|
|
 07-13-2019, 08:21 AM
|
#81
|
|
Senior Member
Join Date: Nov 2012
Location: Brentwood, CA
Posts: 1,051
|
more wiring
Moving the battery over 2-1/4", and adding a boost tube, was not without it's consequences.
After spending two, 2 hour sessions trying to re-situate the main battery cables, where they weren't stained against an pressurized AC hardline, against a sharp body edge and risk cutting through the wire insulation over time, causing a high amperage short in the non-fused cable, maybe burning the thing down, I had to admit defeat.
Like watching 2 movies featuring Pauly Shore, there's 4 hours of my life I'll never get back 
I told myself "do it right or do it twice".
I decided I could splice in 8 more inches of wire, to extend the harness, just above the radiator.
I found some high quality, pre-tinned butt connectors, some big diameter rosin core solder. The saying "Dammit! Use only rosin core solder on electronics gear!" was beat into my head while growing up, by my good friend's dad. I still hear his voice inside my head every time I solder something.

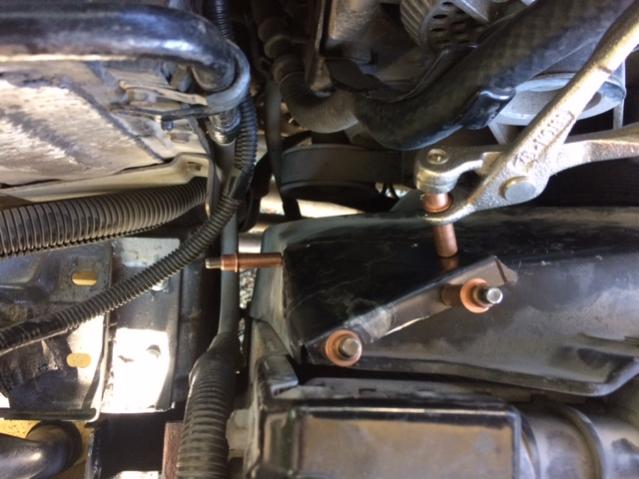
Kind of a neat shot I think.
This is #1 gauge copper battery cable, you need a torch to solder this stuff.

I bought these huge cable ferrel crimpers several years ago, they do a nice job on large electrical lugs as well. This one is #6 gauge.
I found it to be important to either use a continuous run, or solder larger wire/high current connections in autos and boats. SOme might think it a little overkill, but I've repaired too many BS connections that have gone bad from corrosion getting into a crimped connection. This thing has dual batteries and the starter is a high amp draw brute, that needs all the help it can get.

All connections soldered and shrink wrapped, the covered in plastic convoluted wire loom, electrical tape, and it's a wrap!
__________________
1995 E350 7.3 Diesel, 4x4 high roof camper, UJOR 4" lift
|

|

|
|
07-13-2019, 09:20 AM
|
#82
|
|
Senior Member
Join Date: Dec 2014
Location: Riverside Ca.
Posts: 738
|
[QUOTE=TomsBeast;256558]Moving the battery over 2-1/4", and adding a boost tube, was not without it's consequences.
After spending two, 2 hour sessions trying to re-situate the main battery cables, where they weren't stained against an pressurized AC hardline, against a sharp body edge and risk cutting through the wire insulation over time, causing a high amperage short in the non-fused cable, maybe burning the thing down, I had to admit defeat.
Like watching 2 movies featuring Pauly Shore, there's 4 hours of my life I'll never get back!
LOL Pauly Shore, Ain't that the truth!
|
|
|
|
|
07-13-2019, 12:27 PM
|
#83
|
|
Member
Join Date: Jan 2018
Location: Northern California
Posts: 54
|
Quote:
Originally Posted by TomsBeast

Moving the battery over 2-1/4", and adding a boost tube, was not without it's consequences.
After spending two, 2 hour sessions trying to re-situate the main battery cables, where they weren't stained against an pressurized AC hardline, against a sharp body edge and risk cutting through the wire insulation over time, causing a high amperage short in the non-fused cable, maybe burning the thing down, I had to admit defeat.
Like watching 2 movies featuring Pauly Shore, there's 4 hours of my life I'll never get back
I told myself "do it right or do it twice".
I decided I could splice in 8 more inches of wire, to extend the harness, just above the radiator.
I found some high quality, pre-tinned butt connectors, some big diameter rosin core solder. The saying "Dammit! Use only rosin core solder on electronics gear!" was beat into my head while growing up, by my good friend's dad. I still hear his voice inside my head every time I solder something.
Kind of a neat shot I think.
This is #1 gauge copper battery cable, you need a torch to solder this stuff.
I bought these huge cable ferrel crimpers several years ago, they do a nice job on large electrical lugs as well. This one is #6 gauge.
I found it to be important to either use a continuous run, or solder larger wire/high current connections in autos and boats. SOme might think it a little overkill, but I've repaired too many BS connections that have gone bad from corrosion getting into a crimped connection. This thing has dual batteries and the starter is a high amp draw brute, that needs all the help it can get.
All connections soldered and shrink wrapped, the covered in plastic convoluted wire loom, electrical tape, and it's a wrap! |
Amazing project for sure
Thanks for taking all the time to share this information for our education
__________________
2001 Ford E150 HighTop Conversion
Based out of the Sacramento Valley
Northern California
|
|
|
|
|
07-26-2019, 12:58 PM
|
#84
|
|
Senior Member
Join Date: Nov 2012
Location: Brentwood, CA
Posts: 1,051
|
I had to notch the fan shroud, to clear the cold side boost tube. Wanting to retain the efficiency of an in tact shroud, I decided to patch it.

When working with sheet metal, clecos are the 'fabricators best friend'. They act like a temporary pop-rivet, which I will use at final assembly

__________________
1995 E350 7.3 Diesel, 4x4 high roof camper, UJOR 4" lift
|
|
|
|
|
07-26-2019, 01:03 PM
|
#85
|
|
Senior Member
Join Date: Nov 2012
Location: Brentwood, CA
Posts: 1,051
|
Once the patch takes shape, I drilled a couple holes in the patch, and the shroud, and held it temporarily in place with clecos. Remove them, tweak the patch a little more, cut, grind, bend, nip, tuck, until I'm happy with the snug fit

__________________
1995 E350 7.3 Diesel, 4x4 high roof camper, UJOR 4" lift
|
|
|
|
|
07-26-2019, 01:16 PM
|
#86
|
|
Senior Member
Join Date: Nov 2012
Location: Brentwood, CA
Posts: 1,051
|
__________________
1995 E350 7.3 Diesel, 4x4 high roof camper, UJOR 4" lift
|
|
|
|
|
07-28-2019, 10:13 AM
|
#87
|
|
Senior Member
Join Date: Jan 2011
Location: Reynoldsburg, Ohio
Posts: 3,773
|
IIRC Cleco fasteners were and are widely used in the aircraft industry.
Nice work progress! 
|
|
|
|
|
07-28-2019, 11:48 AM
|
#88
|
|
Member
Join Date: Jan 2018
Location: Northern California
Posts: 54
|
Coming together very nicely Tom
Clean job on the shroud, looks factory almost LOL
That thing is gonna be amazing
__________________
2001 Ford E150 HighTop Conversion
Based out of the Sacramento Valley
Northern California
|
|
|
|
|
07-29-2019, 05:36 AM
|
#89
|
|
Senior Member
Join Date: Nov 2012
Location: Brentwood, CA
Posts: 1,051
|
Quote:
Originally Posted by JWA
IIRC Cleco fasteners were and are widely used in the aircraft industry.
Nice work progress! |
Yep, clecos have found their way into racecar fab as well. Best thing since sliced bologna
Thanks, I got sick a couple weeks ago, have a buddy in town this week, so progress has been a little slow 
Quote:
Originally Posted by OutlawImages
Coming together very nicely Tom
Clean job on the shroud, looks factory almost LOL
That thing is gonna be amazing
|
Thanks Brian
__________________
1995 E350 7.3 Diesel, 4x4 high roof camper, UJOR 4" lift
|
|
|
|
|
08-11-2019, 11:19 PM
|
#90
|
|
Senior Member
Join Date: Nov 2012
Location: Brentwood, CA
Posts: 1,051
|
I had a little setback with the fit-up of the boost tubes, which had me cutting and welding my already coated and insulated tubes... 3 steps forward, 1 step back, oh well.
While going through 'final fitup' I discovered the oil dip stick wasn't really workable.
kinda buried

So I start 'doing what I do', come up with a fix


I found that 3/4" electrical conduit has the right inner diameter to slide over the Ford plastic dipstick handle. After trimming the tee handle ears off w/grinder, roughing up with coarse grit sandpaper, I assembled the new extension using a little JB weld to fill the small gap, and a single pop rivet to add some 'belt and suspenders' redundancy. I like my dipstick handles to be easy to locate, I've been known to paint them orange. A little red paint, and it's good to go.


__________________
1995 E350 7.3 Diesel, 4x4 high roof camper, UJOR 4" lift
|
|
|
|
|
|
| Thread Tools |
|
|
| Display Modes |
 Linear Mode Linear Mode
|
 Posting Rules
|
You may not post new threads
You may not post replies
You may not post attachments
You may not edit your posts
HTML code is Off
|
|
|
|
 » Recent Threads
 |
|
|
|
|
|
|
|
|
|
|
|
|
|
|
|
|
|
|
|
|
|
|
|
|
|
|
|
|
|
|
|
|
|