Journey with Confidence RV GPS App RV Trip Planner RV LIFE Campground Reviews RV Maintenance Take a Speed Test Free 7 Day Trial ×


Reply
 
Thread Tools Display Modes
 
Old 12-22-2013, 09:40 PM   #1
Member
 
fancypants's Avatar
 
Join Date: Jul 2010
Posts: 82
Climate control vacuum leak testing?

Hi gang

I've got an '06 5.4L. When the climate control system (A/C or heat) is on and blowing out vents other than the dash defrost vents (e.g. the floor vents), the vents will switch to the defrost vents when moderately hard accelerating or hill climbing. I've read enough other posts on the forum (and elsewhere on the interwebs) to know that this is indicative of a vacuum leak.

I've got the Haynes repair manual but it is pretty much useless for troubleshooting this problem. I don't have the service manuals, so I'll probably have to ask Santa for a post-Christmas gift, but in the mean-time I've gotten enough information to figure out where the (red) vacuum hose attaches to the intake manifold. From there I've traced the vacuum hose back to the oil filler tube area before it plunges into the dark recesses before going through the firewall into the passenger footwell. From the intake manifold to the oil filler tube area I didn't visually find any breaks or loose connections. In the passenger footwell it looks ok too. I popped the access area at the center-top of the dash and that looks fine too. As a bonus, I can see the vacuum actuators operate when the engine is running and changing the vent dial on the dash - very cool!

So, I'm guessing that either the check valve or the vacuum reservoir is leaking (which sounds like a real pain to replace) but I'm going to try and be a good engineer and attempt to troubleshoot it logically. Problem is, I really don't know what I'm doing - I'm just winging this and figuring it out as I go along. Tomorrow, I'm going to give Santa a head start and buy myself a vacuum pump with gauge.

Since I really don't know what I'm doing (but love learning and figuring it out as I go) I've got a few questions about pinpointing where the problem is located:

1) There's a rubber vacuum hose connector in the oil filler tube area. I plan to start here and disconnect it, attach the vacuum pump/gauge and check vacuum. If I connect it facing the intake manifold and create a vacuum, how much vacuum should I create and should I see the vacuum hold? Same question when facing the climate control side. My plan is to keep working my way back into the climate control system to isolate the section where the leak is...

2) The black vacuum hose enters into the passenger footwell through a grommet (through a plastic housing). Where is the check valve and vacuum reservoir? Are they on the firewall side?

3) General operation question: is the purpose of the vacuum reservoir to hold vacuum during periods when the engine can't create enough (like accelerating or hill climbing)? Is this always enough, assuming there are no leaks?

4) General operation question: is the purpose of the check valve to keep the vacuum in the climate control system from filling when the manifold vacuum decreases (i.e pressure increases)? Basically, a one-way valve to keep the vacuum from filling?

5) General operation question: is a vacuum leak like this detrimental, or even noticeable, to engine operation?

Sorry if I've asked too many questions; just trying understand our vehicles better, see if I can fix it myself without blowing it up, and maybe even learn something in the process.

Any suggestions for other approaches are welcome too.

Cheers. And happy holidays.
-Kevin

__________________
KeVan: '06 E350 4x4 V8 "Transformer"
fancypants is offline   Reply With Quote
Old 12-22-2013, 10:42 PM   #2
Senior Member
 
Join Date: May 2012
Location: SoCal
Posts: 598
Re: Climate control vacuum leak testing?

God speed Kevin. My 97 Dodge does the same thing and I just put up with it. I see by the receipts of the last owner that the Dodge dealer could not figure it out.
stanw909 is offline   Reply With Quote
Old 12-23-2013, 09:14 AM   #3
Senior Member
 
Ford_6L_E350's Avatar
 
Join Date: May 2007
Location: Washington - Ridgefield
Posts: 4,728
Re: Climate control vacuum leak testing?

I've always found it more successful to troubleshoot with pressure than with vacuum. Just a couple of psi of pressure and a bottle of soapy water will find a lot of leaks. Probably won't find a leaking check valve however.

If you get it narrowed down to a couple of possibilities (you may already be there), always replace the cheaper or easier one first. You'll really be in a bad mood if you do the pricey one first and it is not the culprit.

Mike
__________________
Alaska to Key West, Labrador and more
Prostate cancer survivor. See Thread Prostate cancer and Sportsmobiles
2015 VW GTI 2020 Fiat 124 Spider
2012 E250 Hitop camper
Ford_6L_E350 is offline   Reply With Quote
Old 12-26-2013, 10:13 PM   #4
Member
 
fancypants's Avatar
 
Join Date: Jul 2010
Posts: 82
Re: Climate control vacuum leak testing?

Short story: fixed it with about $20 worth of parts and an hour or two of work.

Long story: it took many hours/days of research, hypothesizing, testing, going to various auto supply stores, waiting for parts, etc.

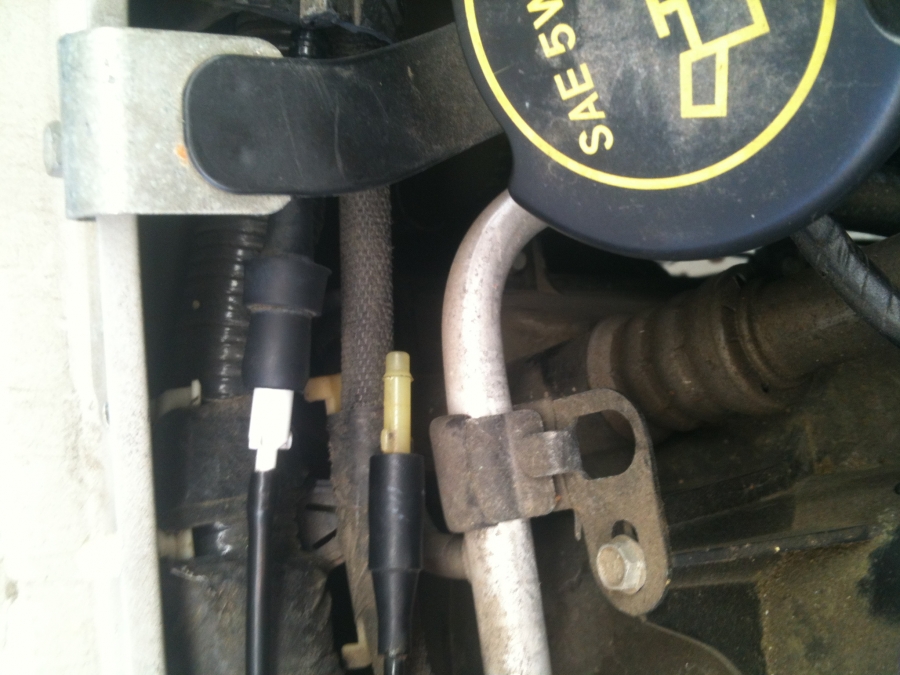
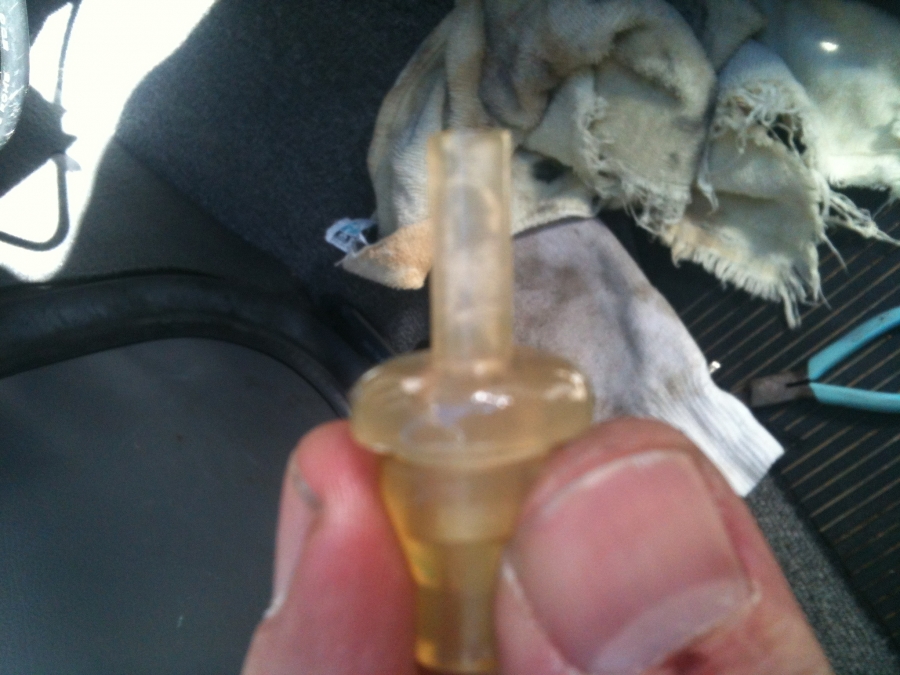
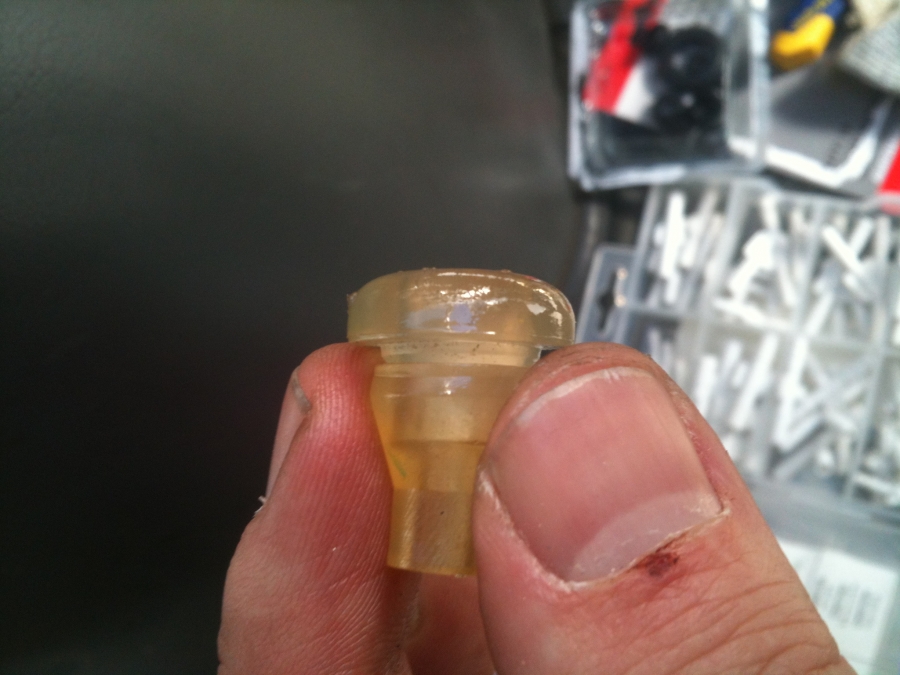
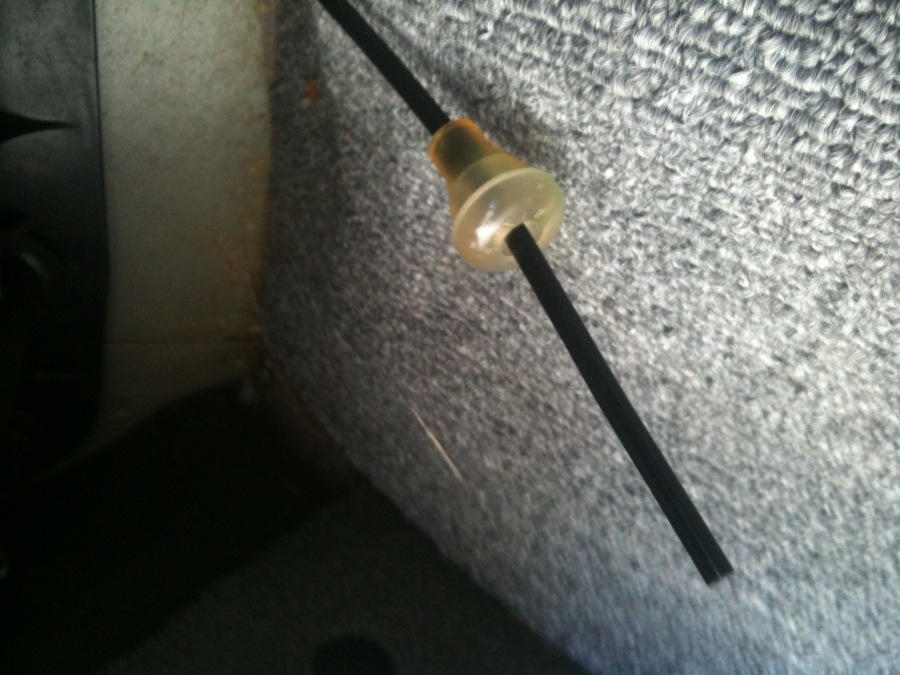
After researching various websites and familiarizing myself with the various parts/connectors in the van (removed doghouse; dash where glove box would be; popped hood; got under van; etc.) I bought a hand vacuum pump/gauge (~$40) at Pep Boys, and started disconnecting the vacuum hose from the intake manifold/throttle body and testing vacuum. Well, actually, I couldn't disconnect it at the intake manifold - it was just too difficult to pull it out of it's rubber boot and I didn't want to break anything, so I disconnected it at the rubber boot connector just behind the oil filler cap (note: the black rubber boot and yellow plastic connector is the original vacuum hose that I disconnected; also note: all the pictures are rotated ccw 90 degrees - not sure why):

I attached the vacuum pump and checked if the climate control system (i.e. check valve, vacuum canister, vacuum tubing, climate controls) could hold a vacuum - it couldn't, at least not more than a second or two.

I then capped that line, popped the climate control actuator access panel in the top center of the dash, disconnected the vacuum harness, and tested the main (black) vacuum line looking back into the check valve and vacuum canister. Again, it couldn't hold vacuum for more than a second or two.

This indicated that the check valve and/or vacuum canister were bad. Even though there's vacuum tubing in between that might have been leaking, there were no signs of bad connections, cracks, rodents, so I made the leap of faith that it was the check valve and/or vacuum canister.

I went to the Ford dealer to see what the parts would cost; it would be ~$70 or $80 for the vacuum canister, check valve, and additional vacuum tubing. I also got the impression from researching, although no really good explanation, that the check valve and vacuum canister replacement was labor intensive. I asked Ford what the cost would be; the service mgr talked to the tech and said $933 labor, plus parts, plus likely AC recharge, so I'm looking in the $1100 plus range out the door. Ouch.

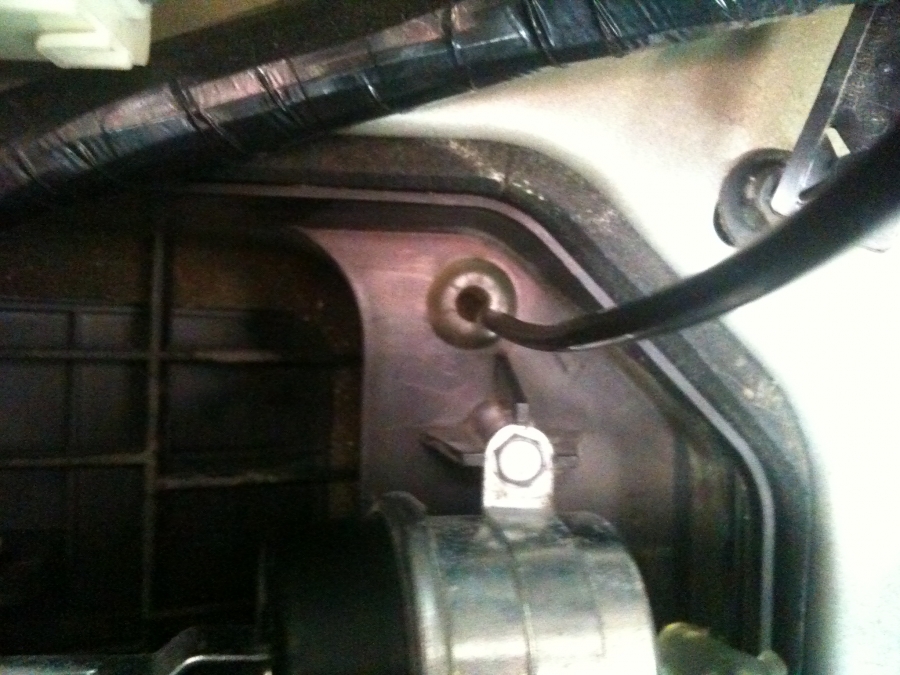
Not wanting to pay that, plus really wanting to understand the system, I did some more research and figured out why it is so much labor (there is so much stuff in the way, plus the AC system needs to be dismantled, etc.), and also found some work-arounds. Some people did work-arounds where they rerouted the manifold vacuum hose to after the vacuum canister and check valve, but this doesn't solve the "when climbing a hill" issue. The right way to solve it is by bypassing the E350's pretty much inaccessible vacuum canister and check valve with a new vacuum canister and check valve, but in a much more accessible place. Some people have done this, but they pretty much all did it by drilling a new hole through the passenger side firewall into the engine compartment. I didn't want to do this, especially since there is already a hole where the existing vacuum tube comes through, but I figured that they must know something I don't. In any case, maybe they just didn't try it, but by gently pulling the vacuum hose/grommet out of the hole in the passenger footwell, and then using a coat hanger to fish string into the engine compartment, I was able (eventually, since I was working solo) to following the same path as the existing vacuum tube all the way around and up to the oil filler cap. No need to drill!

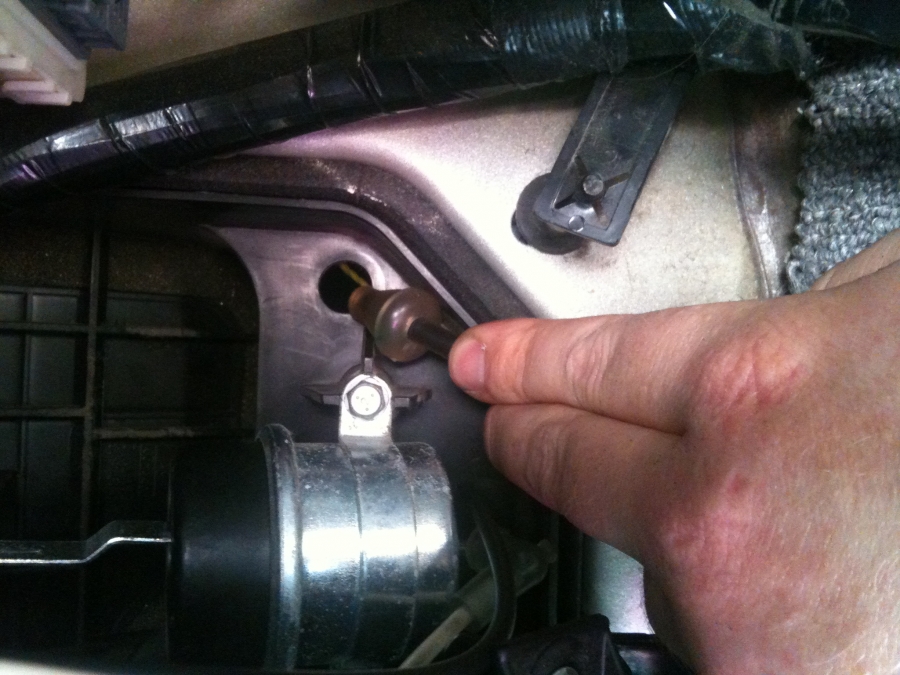
I then used the string to route new 3' x 1/8" vacuum tube (~$5) along side the old one, back through into the passenger footwell. I debated a bit then decided to cut out the vacuum hose/grommet and attempt to reuse it on the new vacuum hose. By cutting of the grommet nipple and pulling the old hose out of the grommet, the new hose fit perfectly through the grommet and right back into the firewall.


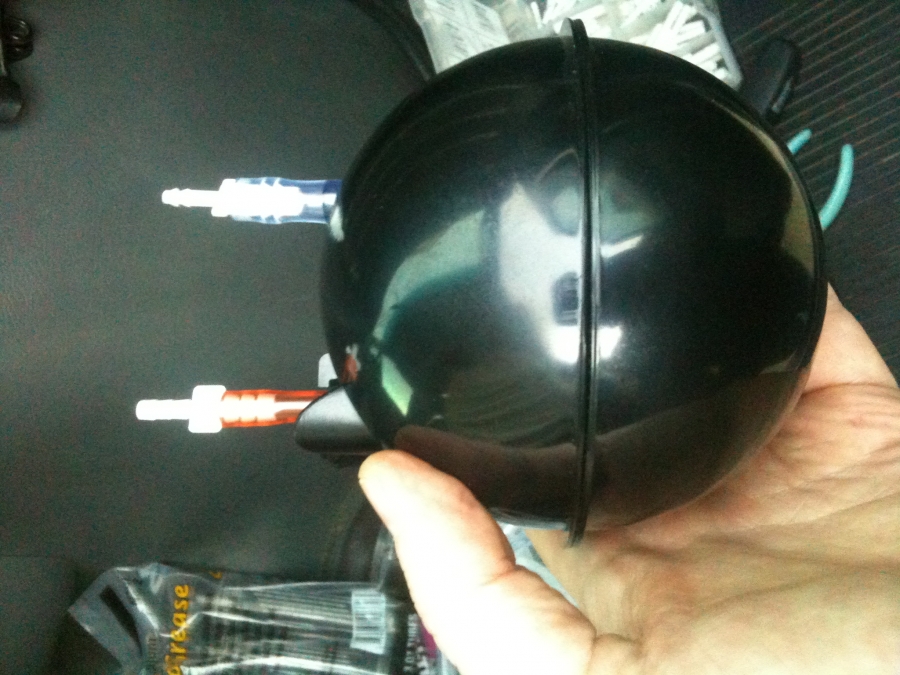
Now, to replace the vacuum canister and check valve, I found a Dorman 47076 (~$13) which has the check valve built in. I plumbed this in the passenger footwell, between the grommet and the vacuum connector just under the dash in the footwell. I then checked the vacuum from the oil filler cap area again and found that it held a vacuum for at least a couple minutes. Took it out for a ride on a couple of moderate hills and everything worked as it should - vents didn't switch to defrost.

So, took a while to figure out, but the actual work was pretty easy and straightforward, especially since there was no firewall drilling like other solutions required. There's plenty of room to mount the vacuum canister up under the passenger dash but maybe in the future I'll move it to the engine somewhere.

I did use a couple of odds-n-ends pieces and sizes of tubing I had laying about for connecting the vacuum hoses to the vacuum canister, and I also used some various sized plastic vacuum hose connectors.

Hope this helps if someone decides to tackle it.

Most relevant web resources I could find:
Troubleshooting steps:http://www.justanswer.com/ford/5axpn...cargo-van.html
System overview:http://www.justanswer.com/ford/55t8z...a-c-vents.html
http://www.ford-trucks.com/forums/11...ch-folder.html
http://www.ford-trucks.com/forums/12...l#post13670732
Inside vacuum tube connector pictures:http://www.ford-trucks.com/forums/12...-problems.html
Highlights video someone did of the proper fix:
In-depth video of a work-around fix (only a partial fix since he didn't use a vacuum canister or check valve):
__________________
KeVan: '06 E350 4x4 V8 "Transformer"
fancypants is offline   Reply With Quote
Old 12-27-2013, 07:45 AM   #5
Senior Member
 
86Scotty's Avatar
 
Join Date: Jul 2011
Location: TN
Posts: 10,220
Re: Climate control vacuum leak testing?

Very nice work, please keep us updated on whether everything keeps working long term. This is a really great reference for those likely me completely unfamiliar with what's under the dashboard. I do most of my own maintenance but tracking down the vacuum lines, etc. under a cramped van dash has always concerned me. Actually the last one I did was a Chevy Astro which was even tighter!
Where did you source the Dorman canister?
I am curious because early on with my van I had some trouble with this too but it fixed itself (meaning it quit screwing up) so I've never had to mess with it. I've been wondering when I would, but I have never found much info online on this.

86Scotty is offline   Reply With Quote
Old 12-27-2013, 08:18 AM   #6
Senior Member
 
Tapatio's Avatar
 
Join Date: Nov 2010
Location: California
Posts: 1,012
Garage
Re: Climate control vacuum leak testing?

Nice job Kevin! My dad owned a repair shop/gas station and we would always tell customers that vacuum related problems were "dealer only repairs". Glad you found a cheaper way to fix it and thanks for posting.
__________________
2006 E350 6.0PSD 5R110, SMB 4X4, RB-50, ARB lockers front/rear, Aluminess galore, AMP steps.
Callsign KK6GIY
Tapatio is offline   Reply With Quote
Old 12-27-2013, 12:29 PM   #7
Member
 
fancypants's Avatar
 
Join Date: Jul 2010
Posts: 82
Re: Climate control vacuum leak testing?

Thanks guys. It always feels good when I can make something work, instead of making it worse.

I got the Dorman 47076 vacuum tank at O'Reilly Auto Parts. Pep Boys and NAPA could get it but would take a few days, and both were more expensive. You don't need to use this vacuum canister but it is pretty compact (maybe 6-7" diameter) and has the check valve built in, so it is very convenient.
__________________
KeVan: '06 E350 4x4 V8 "Transformer"
fancypants is offline   Reply With Quote
Old 12-30-2013, 10:40 AM   #8
Senior Member
 
joey2cool's Avatar
 
Join Date: Nov 2009
Location: Pacific Northwest
Posts: 378
Re: Climate control vacuum leak testing?

Now that's impressive detail work. Very innovative! The simplicity of this solution makes me wonder if I can talk my dealer into doing it for me. Looks like you didn't need to go much further with the research after finding that diagram. Bet I have the same problem, and probably from day one of my purchase. Now that it's out of warranty, I'm waiting for something to get worse than the current account blowing switch to defrost vent mode. For example, a dash indicator light to service the engine.

Wonder where that Ford tech works...
__________________
2010 Ford E250 5.4L V8 Gas 2WD
SMB Mod RB36 w/PH Prop Stove & Furn Frig 10G Wtr Elect
Silver Bullet
joey2cool is offline   Reply With Quote
Old 01-06-2014, 09:14 AM   #9
Senior Member
 
Join Date: Dec 2007
Location: OH.
Posts: 228
Re: Climate control vacuum leak testing?

Can you post a pic of the old vacuum/check valve assembly?
__________________
07 E-350
patrick51 is offline   Reply With Quote
Old 01-12-2014, 10:23 PM   #10
Member
 
fancypants's Avatar
 
Join Date: Jul 2010
Posts: 82
Re: Climate control vacuum leak testing?

patrick51: I didn't remove the old vacuum canister/check valve since that was basically the why the dealer wanted so much to repair it - many hours of labor just to get to it. I don't have any pictures either since it is so buried in the passenger engine compartment I couldn't figure out a way to even get a glimpse of it.

However, I do have the Ford part numbers, so you can search for pictures:
Vacuum canister: 19A566
Check valve: 19A563

The dealer also said they would replace the connecting hose assembly: 19C827A
__________________
KeVan: '06 E350 4x4 V8 "Transformer"
fancypants is offline   Reply With Quote
Reply

Thread Tools
Display Modes

Posting Rules
You may not post new threads
You may not post replies
You may not post attachments
You may not edit your posts

BB code is On
Smilies are On
[IMG] code is On
HTML code is Off
Trackbacks are Off
Pingbacks are Off
Refbacks are Off

» Featured Campgrounds

Reviews provided by

Powered by vBadvanced CMPS v3.2.3
Disclaimer:

This website is not affiliated with or endorsed by Sportsmobile SIP or any of its affiliates. This is an independent, unofficial site.


All times are GMT -6. The time now is 03:19 AM.


Powered by vBulletin® Version 3.8.8 Beta 4
Copyright ©2000 - 2024, vBulletin Solutions, Inc.