Journey with Confidence RV GPS App RV Trip Planner RV LIFE Campground Reviews RV Maintenance Take a Speed Test Free 7 Day Trial ×


Reply
 
Thread Tools Display Modes
 
Old 09-25-2020, 08:05 AM   #21
Senior Member
 
pjpvi's Avatar
 
Join Date: Apr 2007
Location: SF Bay Area, CA
Posts: 1,289
Quote:
Originally Posted by Belize View Post
Sorry Phil, you’re right, that is the shock. Am on assignment thru weekend again, will post photo of bar when I get back.
I just took a quick look at mine and forgot that the track bar attaches to the passenger side plate. It may have some lateral force on it that is binding the bolt from coming out. Need to try to shift the axle to the left or right a little. Can do that by jacking on frame maybe (extending suspension) or have some one try to "wiggle" the van side to side while you try to get the bolt out (not while on jack stands though!). Maybe a little gentle persuasion with a hammer cautious not to damage the threads. If I was nearby I'd be happy to help.

Good luck!

__________________
Phil

- 2005 EB50 6.0PSD - SMB 4x4
pjpvi is offline   Reply With Quote
Old 09-25-2020, 09:10 AM   #22
Senior Member
 
Join Date: Jul 2011
Location: Flagstaff, AZ
Posts: 2,001
Quote:
Originally Posted by arctictraveller View Post
Prefab weld on shock tabs are readily available on line, but be aware that lowering the tabs will most likely require longer shocks if you are to avoid reducing the available droop, and stressing the shock itself. Or, you can install limit straps, but your still limiting droop. In addition, bump travel should be limited by bump stops, not the shock. If travel is limited in either direction by the shocks, hitting just one unexpected pot hole or "sleeping policeman" (I love that term) could result in shock, or mounting tab damage (as you have seen)
Best of luck.........
Indeed. And also I suspect the reason many of us that have gone the Deaver Spring route have had issues with the plate and the remote reservoir that Deaver spec'd with their spring package. On the other hand, lots of folks have had the plate break anyway.

Either way, I tested mine at full droop or extension. Lift went from 3 to maybe 4" with the Deavers. The spec's on the 7100 series Bilsteins are:
Collapsed Length (IN) :14.61"
Extended Length (IN) :24.39"

Now, the shock is actually going through full travel rather than being limited to the collapsed or compressed upper 1/3 of the stroke. But like I said I don't know if the shocks spec'd by Agile have sufficient length for the same solution.
__________________
2005 E350 RB 6.0 PSD for extended fun
1989 Landcruiser FJ62 for local fun
2011 VW TDI Golf for hwy fun
JoeH is offline   Reply With Quote
Old 09-27-2020, 11:00 AM   #23
Junior Member
 
jquevedo's Avatar
 
Join Date: Aug 2012
Posts: 16
Issue is bracket desing not the shocks

I own a 2006 SMB EB50, common occurrence in SMB's, replace buy one from SMB West, repair weld or fabricate a new one.
I broke my driver side one after many miles of off road driving in Baja Sur. At a small Weld shop in Mexico who also builds Off road racing cars, we made a couple of gussets and welded the piece in-situ, it is now even better than new, and we paced the gussets in positions where you can use normal tools to access the nuts to work in the suspension.
jquevedo is offline   Reply With Quote
Old 09-27-2020, 11:42 AM   #24
Senior Member
 
TomsBeast's Avatar
 
Join Date: Nov 2012
Location: Brentwood, CA
Posts: 1,051
The shop who originally converted mine to 4x4 used a mix-n-match of UJOR parts, Ford Truck, and van parts for the front axle conversion. For lower shock mounts, they used the stock cast iron ones.


While completely redoing the front suspension several years ago, I designed my own lower shock mounts from a clean sheet of paper.


It might be more than you'd want, but you could steal some of the design elements and find a local Belize craftsmen, or someone in the states to build you something similar.


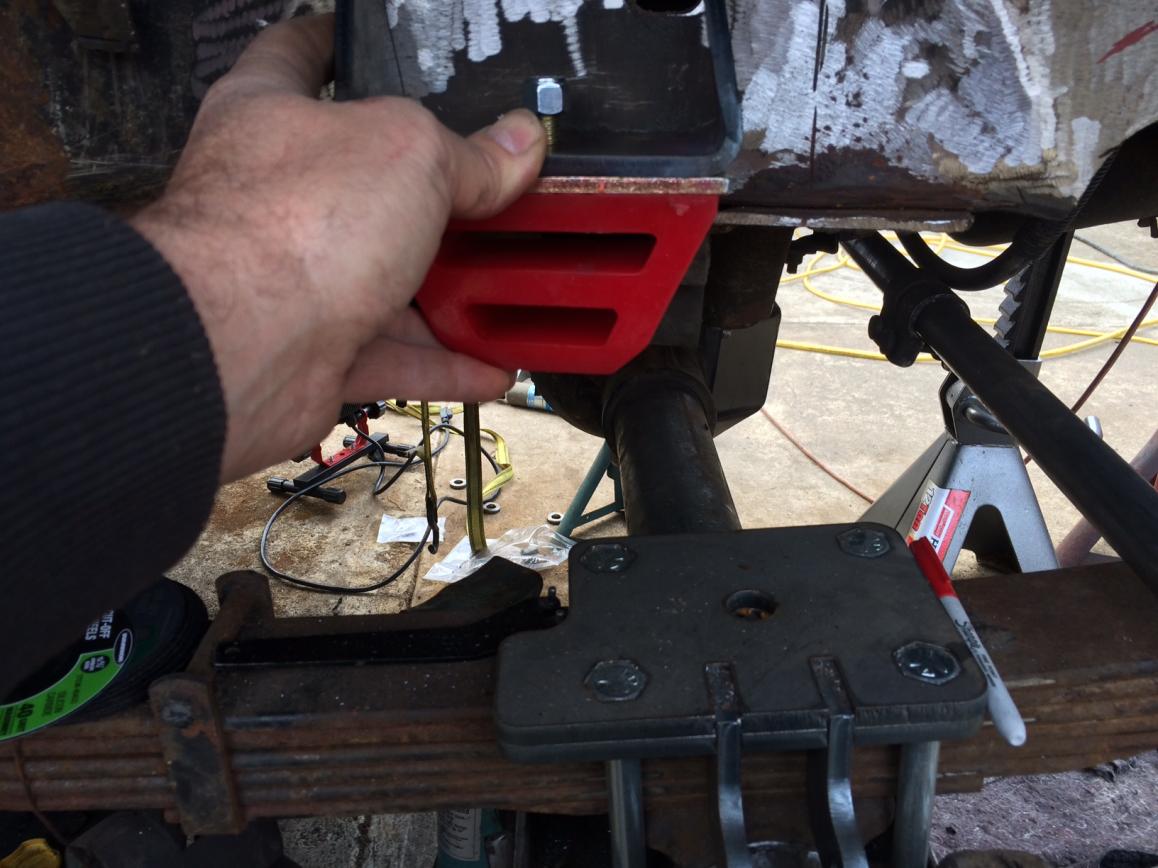
They were cut from 3/8" steel plate. You can't see it from this view very well, but the two plates are stacked for a total of 3/4" thick. The top plate has hex holes, to nest the heads of the 9/16"-UNF grade 5 bolts. The bottom plate has 9/16" thru holes. I keyed the 3/8" thick shock tabs into both plates, not bending moment where the other ones fail, the bending is in the long and strong direction, for a bulletproof part.


This pic shows them mocked up in place, before welding.


There's more pics on this thread:
https://www.sportsmobileforum.com/fo...edo-17676.html


__________________
1995 E350 7.3 Diesel, 4x4 high roof camper, UJOR 4" lift
TomsBeast is offline   Reply With Quote
Old 10-04-2020, 07:29 AM   #25
Senior Member
 
Belize's Avatar
 
Join Date: Sep 2019
Location: Dangriga
Posts: 172
Garage
I managed to re-weld the brackets back together and added 3 gussets to each. Looks rock solid. The tracking bar bracket also cracked, and had to cut the bolt off to remove the bushing so I could weld it. Was a bitch getting the bar back in. Had to jack each wheel independently so get the holes lined up enough to slip in the bolts. I found I had to get the tracking bar completely level to get the holes on both side to line up. Thanks for all the suggestions and Phil, the bracket you sent I guess will be waiting for you (or stay in my parts box as a spare) when you visit for your free night at the resort!
Belize is offline   Reply With Quote
Reply

Tags
shocks, suspension

Thread Tools
Display Modes

Posting Rules
You may not post new threads
You may not post replies
You may not post attachments
You may not edit your posts

BB code is On
Smilies are On
[IMG] code is On
HTML code is Off
Trackbacks are Off
Pingbacks are Off
Refbacks are Off

» Featured Campgrounds

Reviews provided by

Powered by vBadvanced CMPS v3.2.3
Disclaimer:

This website is not affiliated with or endorsed by Sportsmobile SIP or any of its affiliates. This is an independent, unofficial site.


All times are GMT -6. The time now is 07:28 AM.


Powered by vBulletin® Version 3.8.8 Beta 4
Copyright ©2000 - 2024, vBulletin Solutions, Inc.