Journey with Confidence RV GPS App RV Trip Planner RV LIFE Campground Reviews RV Maintenance Take a Speed Test Free 7 Day Trial ×


Reply
 
Thread Tools Display Modes
 
Old 10-06-2016, 06:52 PM   #291
Senior Member
 
larrie's Avatar
 
Join Date: Apr 2011
Location: Oregon Ciry Oregon
Posts: 2,854
That is just nasty looking behind the scenes.

__________________
Larrie
Read detailed trip reports, see photos and videos on my travel blog, luinil.com.
Current van: 2002 Ford E350 extended body camper with Colorado Camper Van pop top and Agile Offroad 4WD conversion.
larrie is offline   Reply With Quote
Old 10-07-2016, 05:33 PM   #292
Senior Member
 
86Scotty's Avatar
 
Join Date: Jul 2011
Location: TN
Posts: 10,242
Continued..........

More pics of the top prep. Marc told me he didn't want to see pics during the upgrades so these are partly for him.


This box is better than Aluminess. I want one


OK, back on track, typical burnt up paint, hairline cracks and various bad spots in the roof. This part looks just about the same as my last Raptor Line on my own van


We put a roof vent in this one and went with a Maxxair this time. I really like their design better than the Fantastic vent and you can run this one in or out in rain due to the top design. Oh, and for the record, the hole right in the center of the top caused no noticeable weakness in the top. These tops are strong and the cross bars support just fore and aft of a center mounted vent. I recommend everyone do this, especially if you ever stealth camp. These vents really move some air and are totally silent on the lower settings


Now for some pretty pics


We got Dupont paint vs. the off brand I used on mine for tint base and I strongly recommend it. It cost about $70 and the RaptorLiner kit is about $125 so you can do this to your top for only about $200 in materials, but the materials part is easy.

Comparison pic of the original SMB hardware and new stainless ready to go. Quite a contrast.


More to come

86Scotty is offline   Reply With Quote
Old 10-07-2016, 05:48 PM   #293
Senior Member
 
86Scotty's Avatar
 
Join Date: Jul 2011
Location: TN
Posts: 10,242
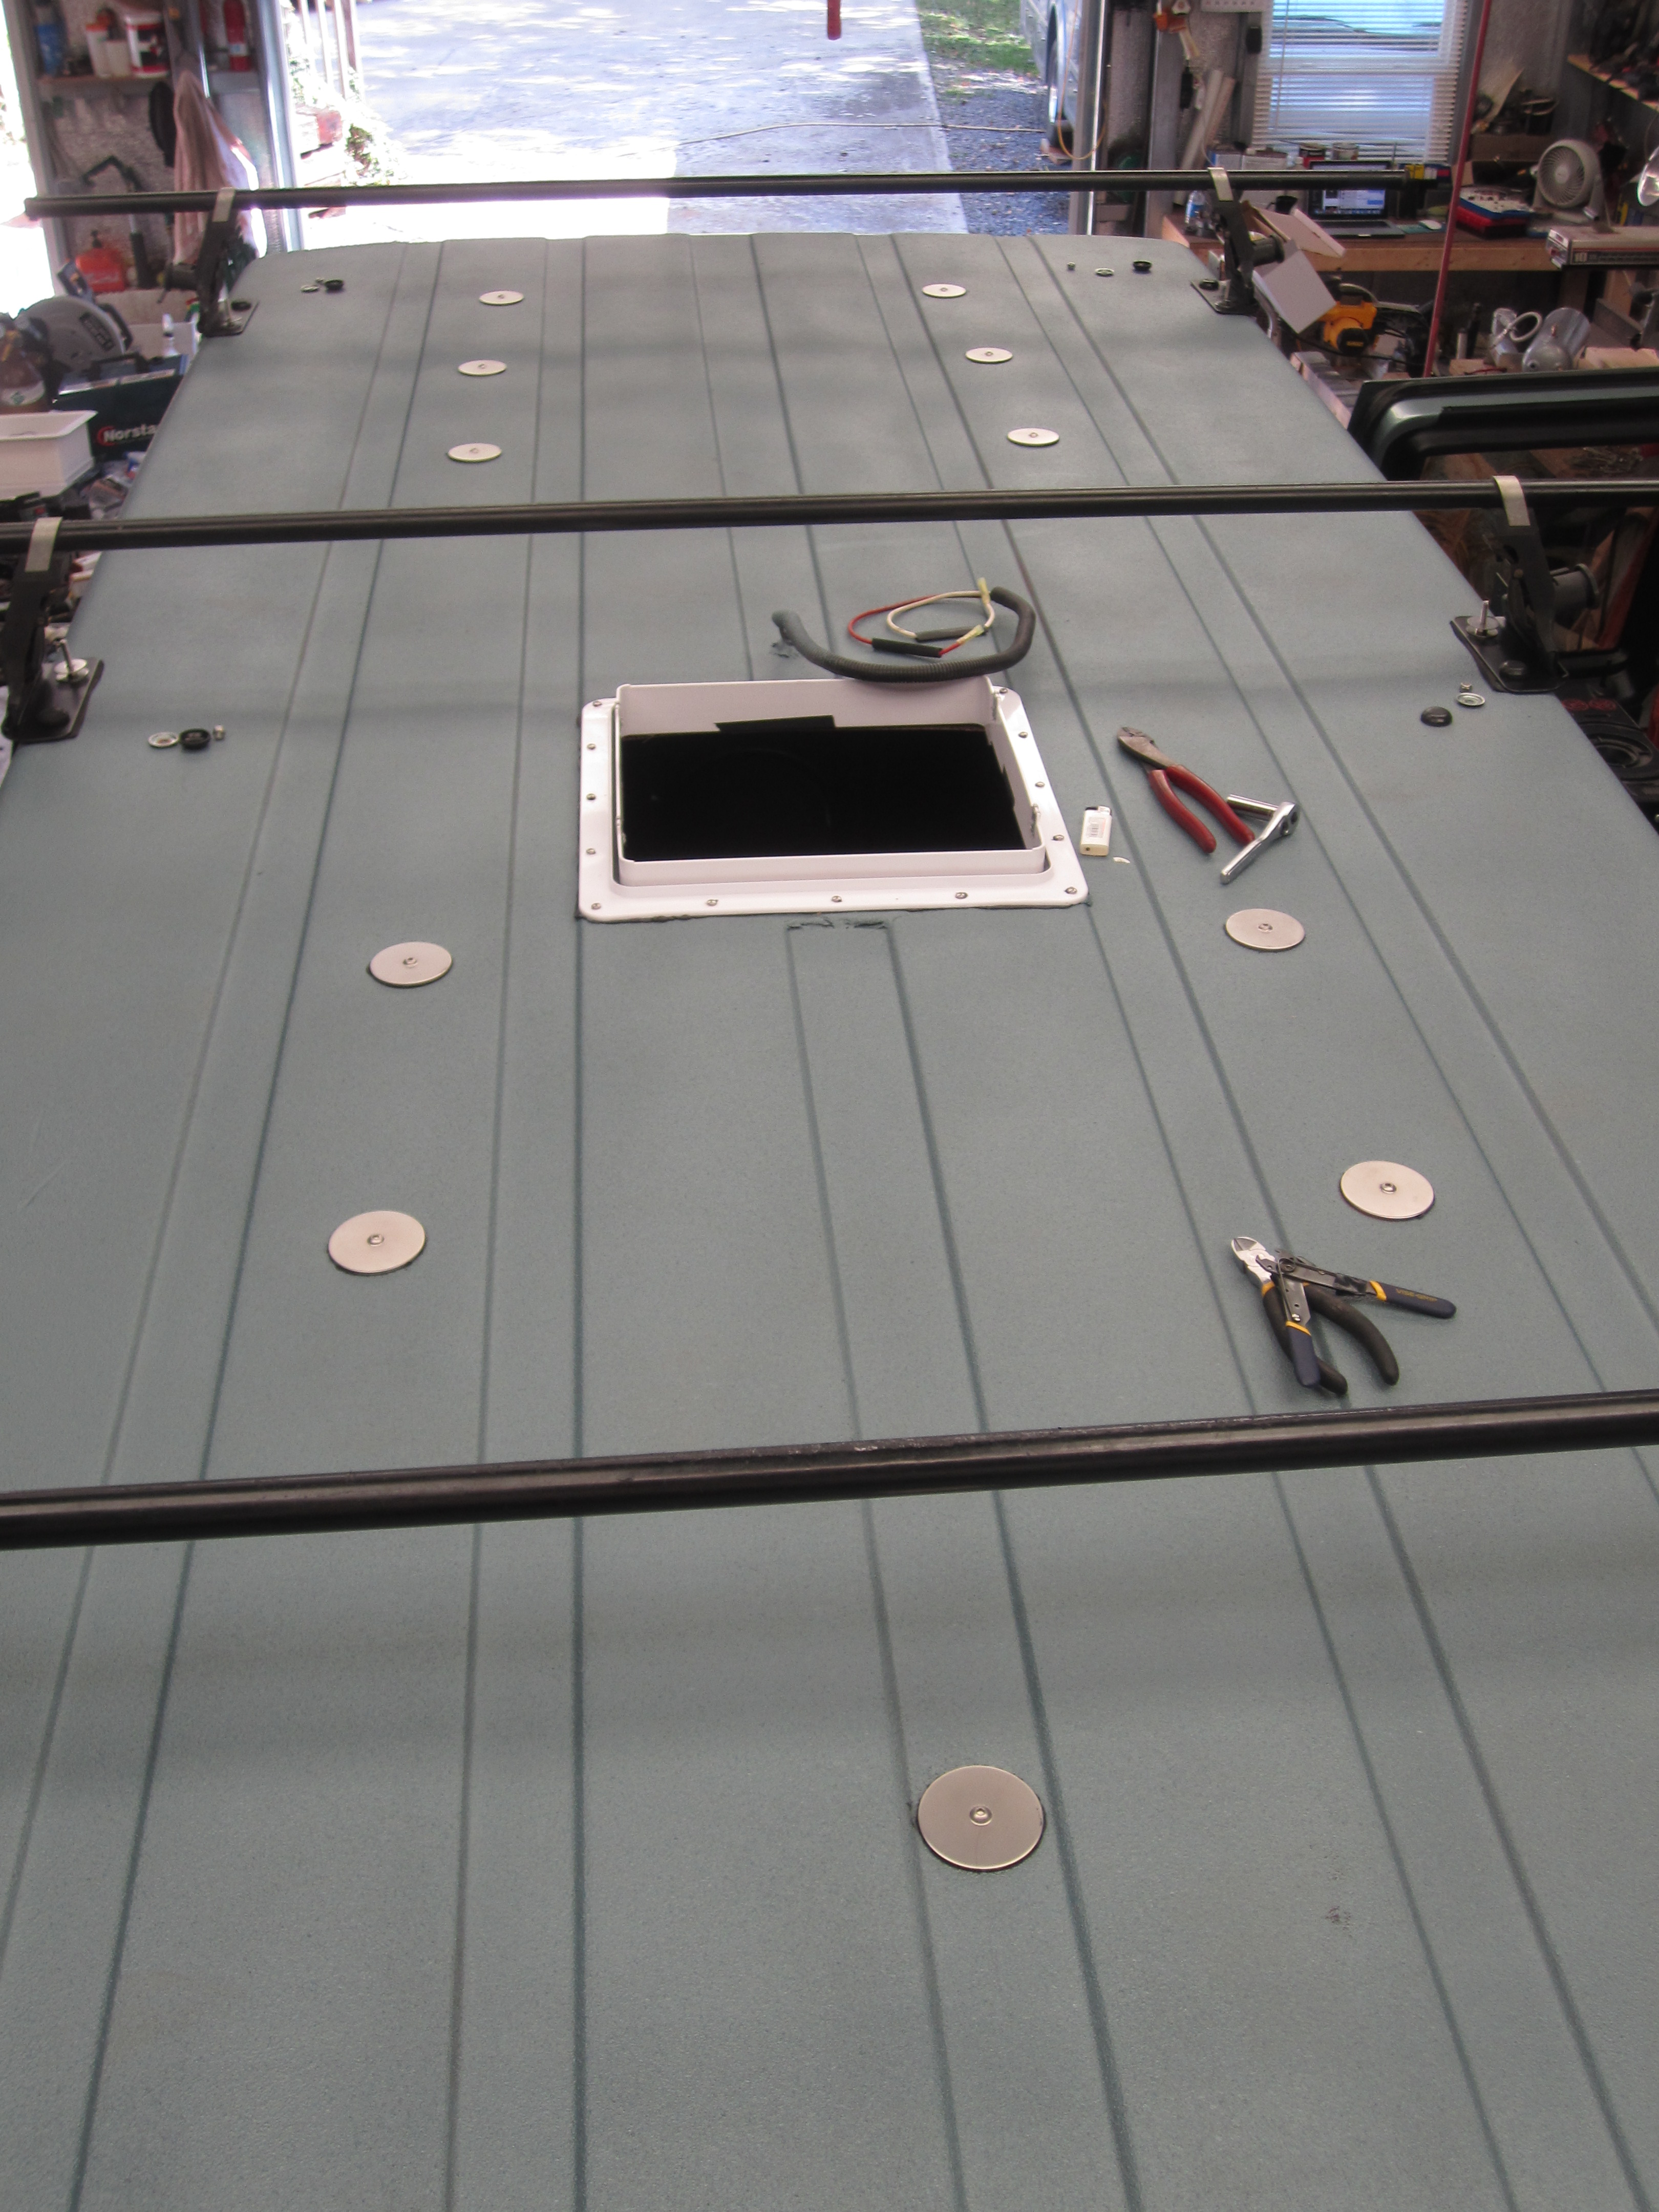
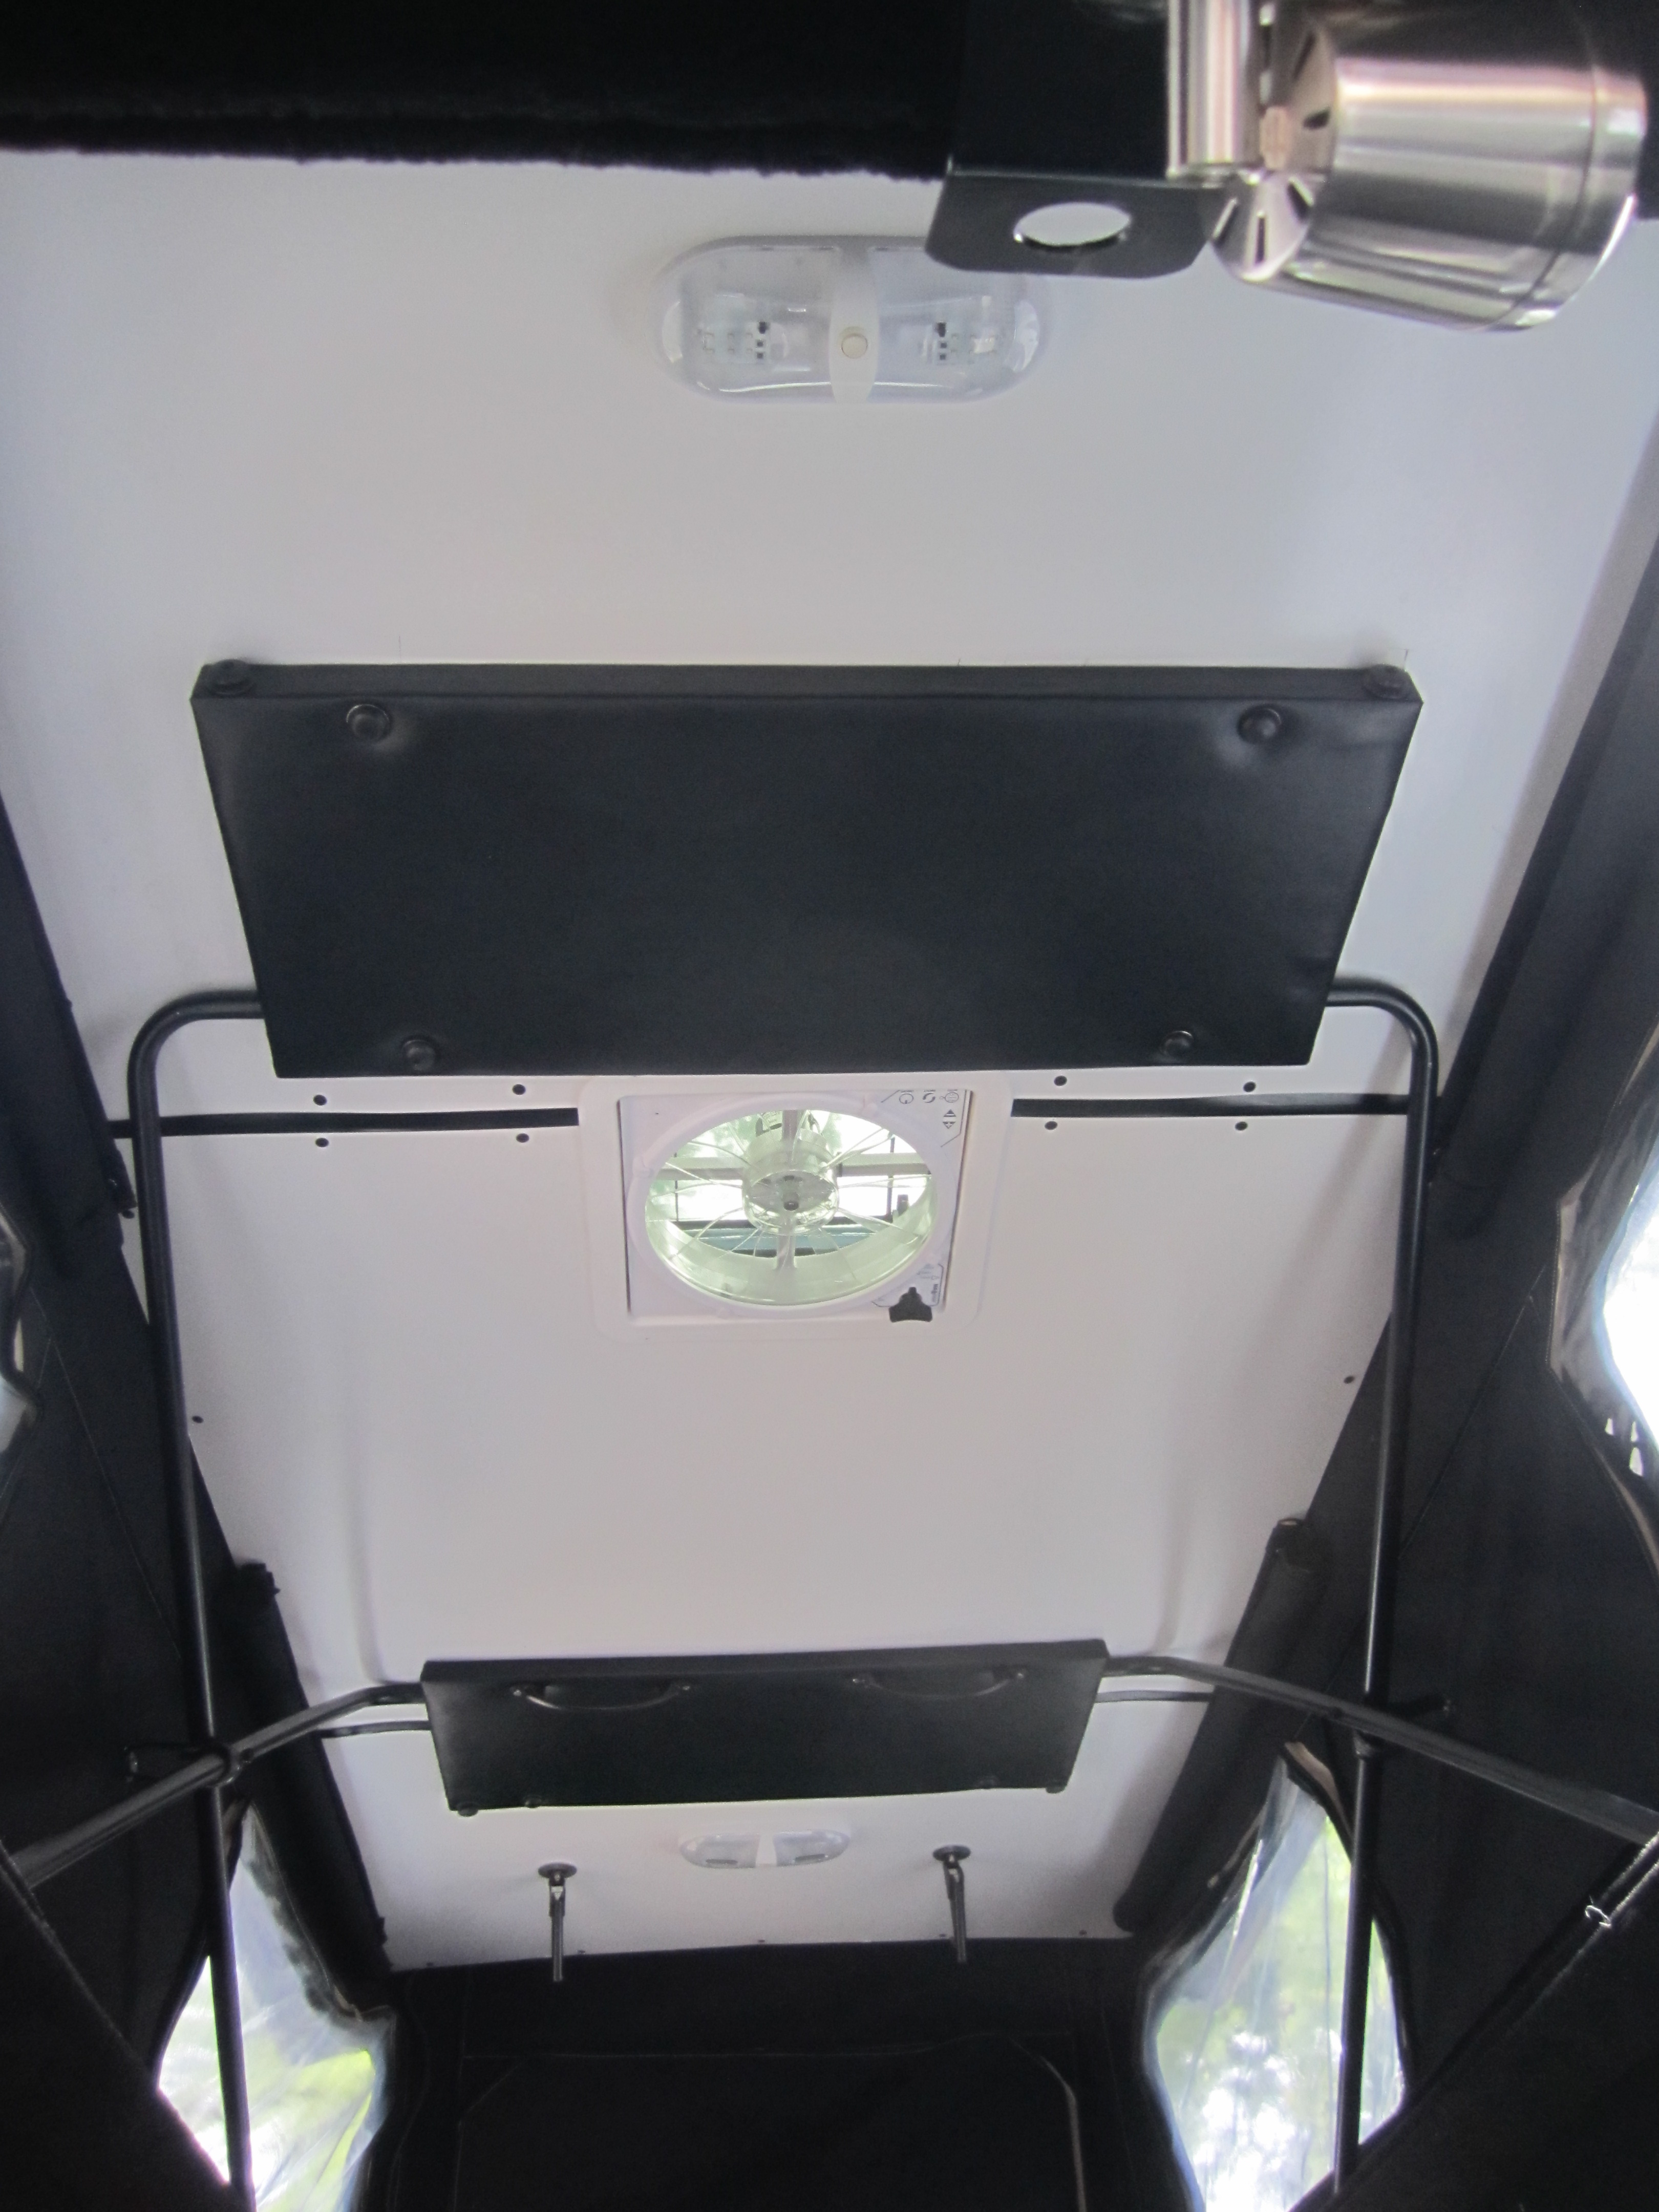
Before I forget, as I did on my last van I got fiberglass filler and built up a little ledge around the roof vent hole, filling in the ribbed channels and making a 1" lip around the hole for a seamless, level vent install. I taped it off so RaptorLiner didn't muck it up and put a thick bead of butyl around it.

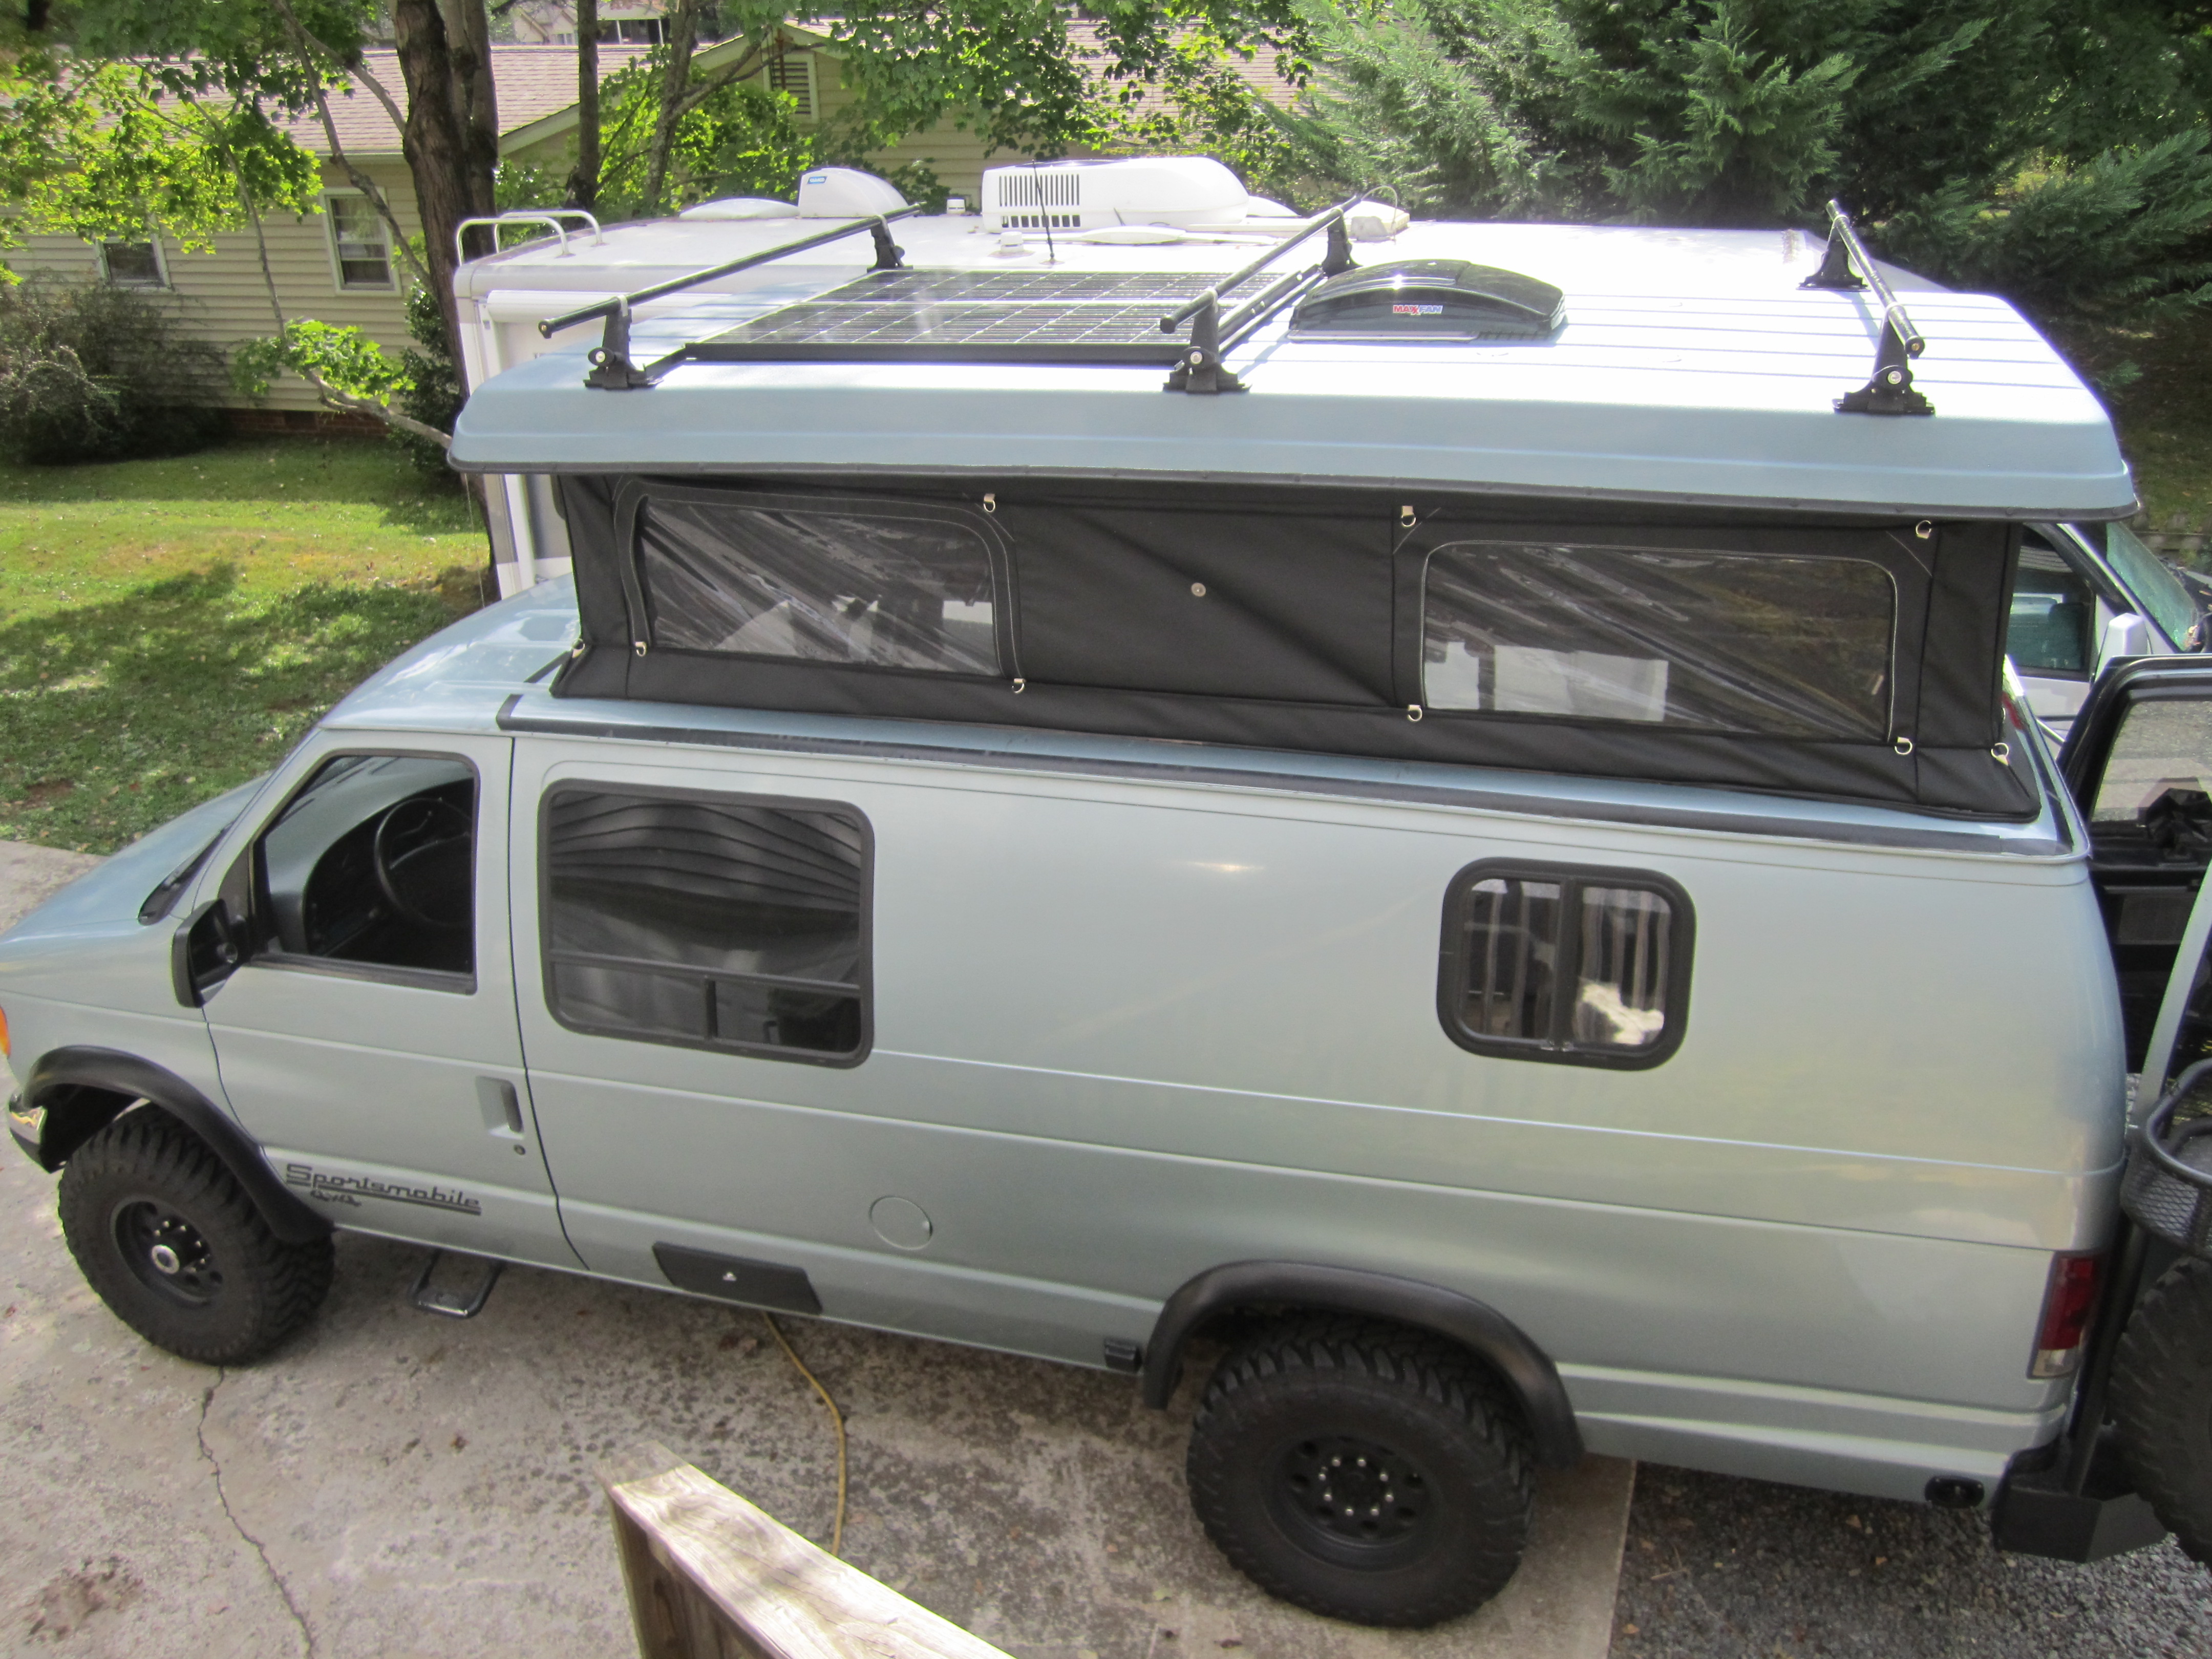
Solar panels mounted to aluminum angle, still covered from being painted. Probably a confusing pic. It'll make sense later.


I love me some pretty black painted solar panels. So clean.


So, time to flip the top and do the canvas the easy way. I have no idea how SMB does it but I can tell you that hanging it from the bottom up like I did in my van was really tough. This was much easier.

Sam cleaning up the dirt dobber nest leftovers. I have no idea if you people from places other than the south have these, but we do!


Lots of aligning and taping to get it all straight, and new panels shown here


No pics of the furring strips holding the canvas down, but 1.5" strips are holding the canvas in place and the roof panels are on top of that, which gives you a lot easier time aligning things and getting under a panel (or above a panel) should you ever need to. this black canvas is a thing of beauty, and Zum really wants me to put the camera down and come throw that ball.


I contracted two helpers to help me flip the top and get it back on the jig. One of them was perhaps not too thrilled but she did help, alot.
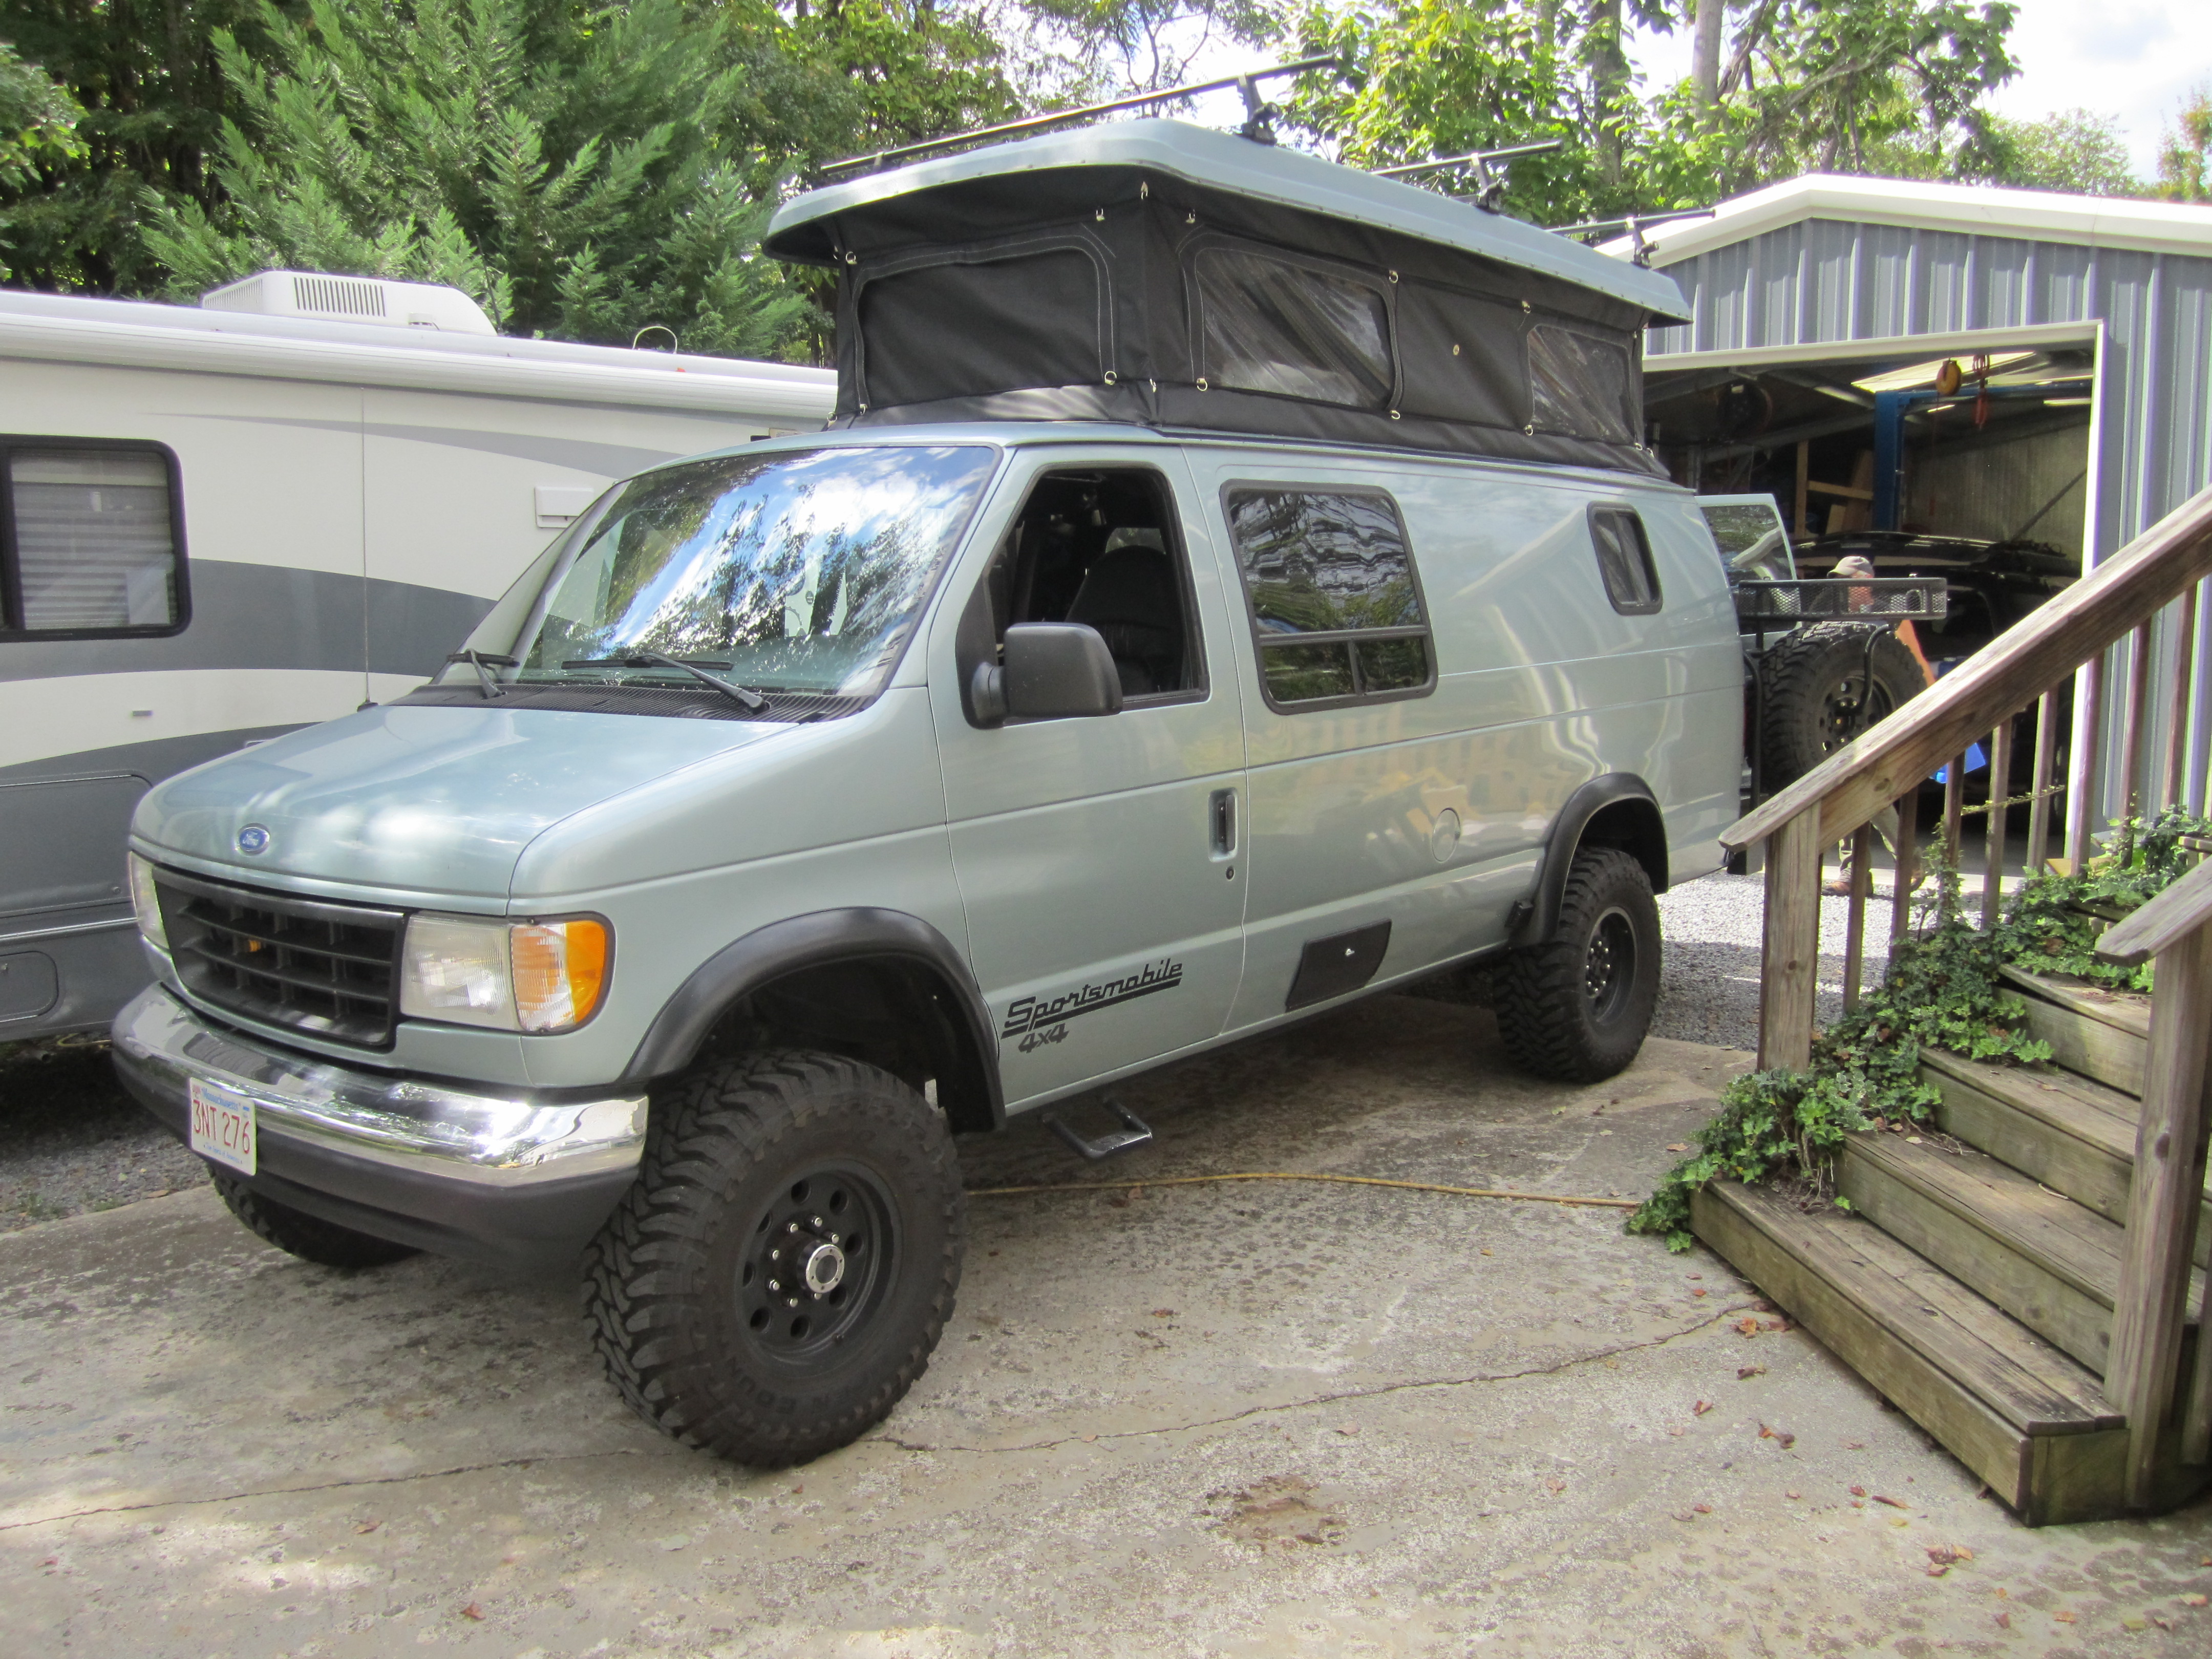


And voila!


Now where is that big convertible van?

Looks like I have no pics of rolling it back under there. Installation reverse of removal, however.

More to come!

86Scotty is offline   Reply With Quote
Old 10-07-2016, 06:19 PM   #294
Site Team
 
BroncoHauler's Avatar
 
Join Date: May 2007
Location: Southern New Mexico
Posts: 10,179
"A Tennessee based van conversion company."

Carnac the Magnificent says: What's in Eric's future.


Herb
__________________
SMB-less as of 02/04/2012. Our savings account is richer, but our adventures are poorer.
BroncoHauler is offline   Reply With Quote
Old 10-08-2016, 06:50 AM   #295
Senior Member
 
86Scotty's Avatar
 
Join Date: Jul 2011
Location: TN
Posts: 10,242
I dunno. I won't be quitting my day job anytime soon. I'm having fun though.


Sent from my iPhone using Tapatalk
86Scotty is offline   Reply With Quote
Old 10-08-2016, 06:52 AM   #296
Senior Member
 
86Scotty's Avatar
 
Join Date: Jul 2011
Location: TN
Posts: 10,242


Sent from my iPhone using Tapatalk
86Scotty is offline   Reply With Quote
Old 10-08-2016, 07:01 AM   #297
Senior Member
 
twogone's Avatar
 
Join Date: Aug 2010
Location: Taylor, Mississippi
Posts: 1,648
Quote:
Originally Posted by BroncoHauler View Post
"A Tennessee based van conversion company."

Carnac the Magnificent says: What's in Eric's future.


Herb
That kid's got the chops
__________________
'95 SMB E350 Quigley 7.3
https://www.taylorarts.com
... If you have to ask, you'll never understand...
"... torpedo'd, because we don't generally cotton to bullshit around here." -jage
"... do they ooch apart in the night?" -Dia
twogone is offline   Reply With Quote
Old 10-08-2016, 07:04 AM   #298
Senior Member
 
Jsweezy's Avatar
 
Join Date: Dec 2015
Location: Hillsboro, OR
Posts: 1,371
Garage
Its looking good and I am glad you put up info about what your using because I now know to go with a maxxair fan instead of the highly sought after competitor.

That van is gonna look amazing.
__________________
2010 E150 5.4, E250 suspension, E350 springs, BFG KO2 265/75/16.

Google Sled Hockey - You won't be disappointed.
Jsweezy is offline   Reply With Quote
Old 10-12-2016, 09:10 AM   #299
Senior Member
 
86Scotty's Avatar
 
Join Date: Jul 2011
Location: TN
Posts: 10,242
So, the reattach went pretty easy using fresh furring strips and thick butyl. I was able to reuse the original SMB bulb weatherstripping and never removed it from the roof. Unless you're dealing with a lot of rust or addressing body cracks I don't really see the need to. It would be a very messy job to remove it. I left the original butyl in place and added more to it. I used this:

Heng's 5050 Black 3 16 " x 1" Butyl Rubber Tape | eBay

2 rolls will do an EB top easily with plenty left over for the roof bolts/washers. One roll would probably do an RB.

Another thing I like about the Maxxair vent vs. the Fantastic Vent is that the flange can be permantently mounted but you can still pull the whole thing off for service, cleaning or whatever with 4 screws from the top side. On the Fantastic Vent you can drop internals from the inside but this is still a superior design IMO.


On the same day I was about to remount Marc's roof he reminded me to sleeve the bars. I had totally forgotten this. I researched chromoly tubing like Boywonder used but the price and lack of availability pointed me in the direction os solid mild steel bar. The weight difference was nil believe it or not. I used 36" sections in the middle of each bar and spaced them in the middle by dropping a short length of wooden dowel in before the rods. Then I drilled them and the pivot bolts keep them there.


Speaking of pivot bolts, here's what the force of our tops will do to a grade 8 bolt over time. On the left is one of the center pivot bolts, new grade 8 beside and the hardened shoulder bolts I went with on the right.


Repainted and cleaned up bars


86Scotty is offline   Reply With Quote
Old 10-12-2016, 09:26 AM   #300
Senior Member
 
86Scotty's Avatar
 
Join Date: Jul 2011
Location: TN
Posts: 10,242
Now things were starting to get pretty. Gooseberry's top hardware is amazing and comes with everything you need but I would have some extra butyl on hand. He probably gives you just enough but I like to use a lot and don't mind trimming what gets squeezed out.
I had already trimmed the 'squeeze' in this pic.


The single most frustrating part of a pop top install IMO is getting the boxes centered and bolted down. It takes two people, no way around it. At least one of them has to be patient, not a common trait in my household. You risk buggering up a fresh ceiling and the alignment is just, quite frankly, a bitch. Anyway, when you get it right it's satisfying.

So, new Sunbrella material black curtains, new white ceiling (Marc is obviously all about black but we both agreed it would've been too much), reupholstered boxes, all new hardware in place, lights and fan wired.


Very few pics of the reinstall but it's pretty straightforward. Line it up and bolt it in. Lay butyl around the bottom perimeter, lay in your fabric and line up and screw down the furring strips. Use about twice as many screws as you think you need to. SMB uses a TON of em.

Here are some pics of Marc and his beautiful van on pick-up day.


Parting shot of Marc explaining to me the saga of his amazing rear box build, because with SMBs there's always a saga. What will the next saga be for Twogone?


86Scotty is offline   Reply With Quote
Reply


Posting Rules
You may not post new threads
You may not post replies
You may not post attachments
You may not edit your posts

BB code is On
Smilies are On
[IMG] code is On
HTML code is Off
Trackbacks are Off
Pingbacks are Off
Refbacks are Off

» Featured Campgrounds

Reviews provided by

Powered by vBadvanced CMPS v3.2.3
Disclaimer:

This website is not affiliated with or endorsed by Sportsmobile SIP or any of its affiliates. This is an independent, unofficial site.


All times are GMT -6. The time now is 04:19 PM.


Powered by vBulletin® Version 3.8.8 Beta 4
Copyright ©2000 - 2024, vBulletin Solutions, Inc.