Journey with Confidence RV GPS App RV Trip Planner RV LIFE Campground Reviews RV Maintenance Take a Speed Test Free 7 Day Trial ×


Reply
 
Thread Tools Display Modes
 
Old 03-19-2017, 07:36 AM   #11
Senior Member
 
rallypanam's Avatar
 
Join Date: Feb 2013
Location: San Francisco/Nevada City
Posts: 3,769
More pictures! What did you rivet? I'm not following.

rallypanam is offline   Reply With Quote
Old 03-19-2017, 08:22 AM   #12
Senior Member
 
Join Date: Feb 2017
Posts: 106
One of the benefits of my job is scrap sheet metal and big zip ties that get too brittle to handle being cinched in a tyton gun but are still really strong. Also, we have a full metal working shop and we can just use it for whatever off hours.

I started with a flat piece of sheet metal and marked out cut and fold lines. My wife was talking to me like the whole time and I was in a rush to go bend it up on the finger at work before she had to leave for work. I misjudged how much wiggle room I would need to fit the stereo in the pocket, should have gone with 7-1/8" instead of 7-1/4". But it allows for greater airflow, something I have also worried about with this unit as it seems to get pretty warm, I mean, they have jammed a lot in there.

I was a little lax on taking pictures and I never fully thought through how to join the flaps on top where the sides meet. I ended up just doing one pop rivet on that front edge as is visible in the pic. I also bent over a lip on the front edge of the box for rigidity which in hindsight was probably unnecessary but it's only 26ga and iwanted it mounted in there good. In one pic you can see the box almost fully bent up with only the top to be folded down.

One thing that I wanted to make sure of was that there wouldn't be any cracks in the pocket for stuff to fall through or get stuck in, I succeeded. The pocket is a little tough to get your hand in so I may make a pull out tray to go in it.
Attached Thumbnails
IMAG0445.jpg   IMAG0447.jpg   IMAG0451.jpg   IMAG0453.jpg   IMAG0457.jpg  

skoronesa is offline   Reply With Quote
Old 03-19-2017, 08:23 AM   #13
Senior Member
 
Join Date: Feb 2017
Posts: 106
And the visor fits two full cd cases!!!
skoronesa is offline   Reply With Quote
Old 03-19-2017, 08:28 AM   #14
Senior Member
 
Join Date: Feb 2017
Posts: 106
I have been trying to do smaller projects on the van because tuesday we got 2' of snow so no crawling under to mount the seats

I think I will make some fender flares next, I am sick of the spray on the side of the van.

Also, I need to get chains. I wanted ratchet strap on emergency chains but I don't see it working with this style rim so I guess I will have to find full sets.
skoronesa is offline   Reply With Quote
Old 03-19-2017, 08:30 AM   #15
Senior Member
 
rallypanam's Avatar
 
Join Date: Feb 2013
Location: San Francisco/Nevada City
Posts: 3,769
Ah, now I get it... utilizing the extra space from the head unit swap. Cool!
rallypanam is offline   Reply With Quote
Old 03-19-2017, 08:33 AM   #16
Senior Member
 
Join Date: Feb 2017
Posts: 106
Yeah, you almost always end up with a pocket when going to a single din from factory but some of the plastic kits don't make use of this.

If someone really wanted I could make a .bmp of the layout.
skoronesa is offline   Reply With Quote
Old 03-31-2017, 07:55 PM   #17
Senior Member
 
Join Date: Feb 2017
Posts: 106
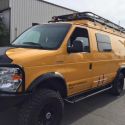
So I finally got the back four seats along the driver wall bolted in. I wanted to upload pics of the unistrut bolted in and the the seats but my phone is giving me issues connecting to my pc and the site isn't working properly on my phones browser.

I wasn't able to do the front two because of the gas tank. I may still mount three more in the back passenger corner and move my one 4' shelving unit to the front driver corner since it doesn't require as much bolting as the seats and can be fastened to the wall as well.

Hopefully the next project will be the front bumper which will be made from a steel I-beam and will have the winch mounted behind it I will make sure to have pics by then.

When I get the cash for some more welding cable I will be installing a second battery.

I also want to do some speakers for the rear, in boxes, mounted up in the corners. If someone knows where the rear speaker plugs should be and their color coding that would be greatly appreciated.
skoronesa is offline   Reply With Quote
Old 03-31-2017, 07:58 PM   #18
Senior Member
 
Join Date: Feb 2017
Posts: 106
Also the van has a new name referencing the fact it looks like a prison bus for children:

The "Potty Wagon"
skoronesa is offline   Reply With Quote
Old 04-08-2017, 09:00 PM   #19
Senior Member
 
Join Date: Feb 2017
Posts: 106
For the avic-n2 bypass, mine was not gold contacts like most but just the underside of the circuit board with two soldered leads exposed. I guess mine is an earlier version. You just take a needle and scrape off the conformal coating, then take a pretinned tip of a soldering iron to drop a ball of solder connecting the contacts.

You can see how the seats are mounted, lengths of shallow unistrut bolted in MANY places to the floor spreading the load making for a rock solid install.

I took the original bumper off to start mocking up what I want to do for the new one. I decided before I go any further I need some really heavy wall ~6"x6" square tube stock to extend the bumper mounts out further. This will make enough room for the winch to be mounted behind the I-beam.
Attached Thumbnails
IMAG0462.jpg   IMAG0465.jpg   IMAG0581.jpg   IMAG0584.jpg   IMAG0618.jpg  

skoronesa is offline   Reply With Quote
Old 04-27-2017, 09:15 PM   #20
Senior Member
 
Join Date: Feb 2017
Posts: 106
Just bought some new tires! 4 Nankang Mudstar Radial MT Mud Tires 265/75R16 265/75-16 2657516 LRE R16

Nankang Mudstar 265/75r16 10ply load E

I read they are a harder than normal rubber for a mud tire so they should last.

Can an admin move this thread to the homemade smb/ground up build section please?
skoronesa is offline   Reply With Quote
Reply


Posting Rules
You may not post new threads
You may not post replies
You may not post attachments
You may not edit your posts

BB code is On
Smilies are On
[IMG] code is On
HTML code is Off
Trackbacks are Off
Pingbacks are Off
Refbacks are Off

» Featured Campgrounds

Reviews provided by

Powered by vBadvanced CMPS v3.2.3
Disclaimer:

This website is not affiliated with or endorsed by Sportsmobile SIP or any of its affiliates. This is an independent, unofficial site.


All times are GMT -6. The time now is 05:20 PM.


Powered by vBulletin® Version 3.8.8 Beta 4
Copyright ©2000 - 2024, vBulletin Solutions, Inc.