|
|
 12-01-2019, 09:32 AM
|
#31
|
|
Junior Member
Join Date: Mar 2019
Posts: 19
|
Looks great man! The shop you have access to looks like it would make things easy.
|

|

|
|
12-01-2019, 08:11 PM
|
#32
|
|
Senior Member
Join Date: Nov 2018
Location: Santa Cruz, CA
Posts: 319
|
Yeah, the shop helps out a lot. If only it were at my house, then I'd really be livin large. If you ever are in need of wood, let me know. We have lots of scraps that are basically free for the taking. Mostly 1/4", 1/2" and 3/4" finished plywood. Random sizes, they're all off cuts from our shop work that we either accumulate too quickly to re-use or are too small/weird shaped to be useful.
|
|
|
|
|
12-02-2019, 05:30 AM
|
#33
|
|
Junior Member
Join Date: Mar 2019
Posts: 19
|
Quote:
Originally Posted by nyyankees588

Yeah, the shop helps out a lot. If only it were at my house, then I'd really be livin large. If you ever are in need of wood, let me know. We have lots of scraps that are basically free for the taking. Mostly 1/4", 1/2" and 3/4" finished plywood. Random sizes, they're all off cuts from our shop work that we either accumulate too quickly to re-use or are too small/weird shaped to be useful.
|
What area is the shop in?
|
|
|
|
|
12-02-2019, 10:57 PM
|
#34
|
|
Senior Member
Join Date: Nov 2018
Location: Santa Cruz, CA
Posts: 319
|
we're over in kirkland, right next to chainline brewery. "Homegrown Trailers"
|
|
|
|
|
12-03-2019, 06:41 PM
|
#35
|
|
Junior Member
Join Date: Mar 2019
Posts: 19
|
Nice, my office is in Bothell and I love in North Seattle
|
|
|
|
|
12-03-2019, 11:14 PM
|
#36
|
|
Senior Member
Join Date: Nov 2018
Location: Santa Cruz, CA
Posts: 319
|
I'm in greenlake... on the southern end, 61st and Latona. You're nearby, right?
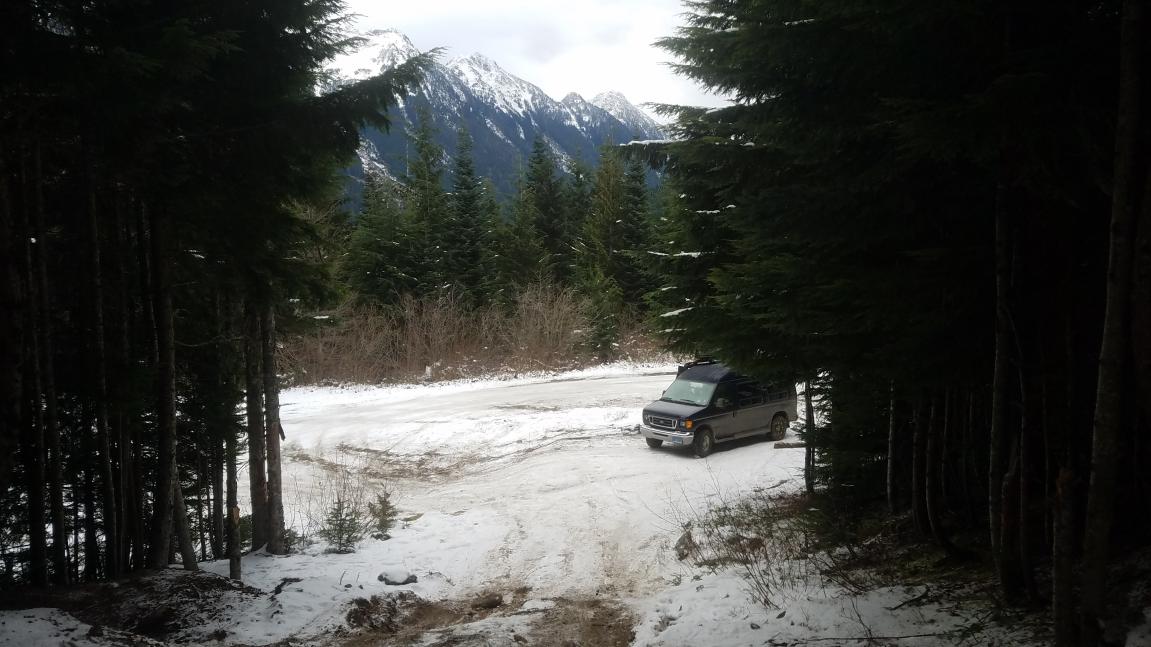
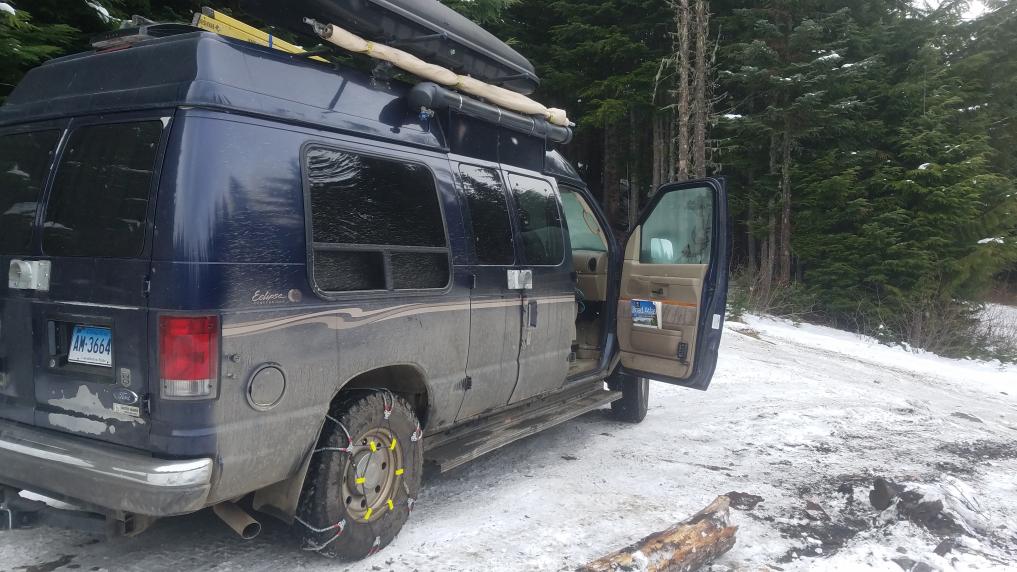
Headed up to the Mt. Baker area this past weekend. The northern cascades are quickly becoming one of my favorite areas in the region. Hiked Heliotrope ridge & up to Artist's Point on Saturday, both were beautiful. The FS road up to the Heliotrope ridge trailhead was one of the sketchiest I've been on in a while - since that area hasn't had prolonged snow yet and temps must have been above freezing during the day and below freezing at night last week, there were long portions that were entirely covered in black ice (the fact that it's paved most of the way doesn't help). We pulled off part way up Friday night and spent the night after getting stuck and having to precariously put on chains part way up an icy hill. Made it all the way up to the trailhead with no issues in the morning, but the icy decent was gnarly. Held it in first gear to keep the wheels turning as slowly as possible but still had a few instances of complete loss of traction. I'm amazed that as many cars were on that road as there were. No 4WD will get you out of a slide in that icy of conditions and with a ditch on one side and decent 5-10ft drop on the other, there wasn't an easy way out if you really lost control.
Outside of that road, all the others were completely passable with either no snow or enough snow to not be icy. Definitely looking forward to getting the knockoff chinese diesel heater installed & running within the next few weeks... it was cold.
The icy road (side note - does anybody know how to change the orientation of photos on this forum...)
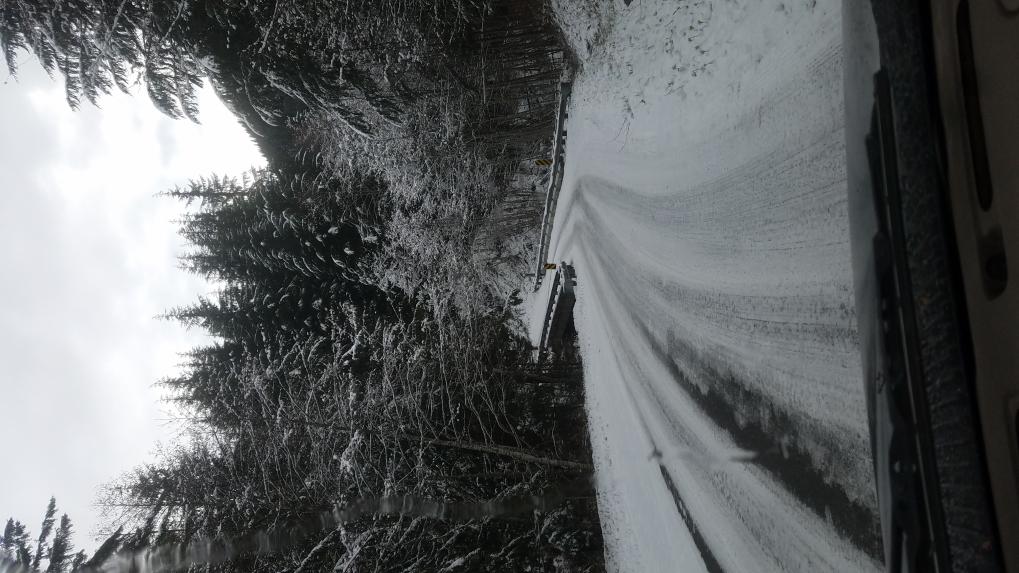
Our campsite for the night outside of Mt. Baker ski area
Why I don't believe in washing the van...
The obligatory christmas card photo with our charlie brown tree fresh cut from the forest (yes we had a permit)

|
|
|
|
|
12-04-2019, 06:47 AM
|
#37
|
|
Junior Member
Join Date: Mar 2019
Posts: 19
|
Yeah, I'm N 138th and Greenwood. The weekend trip looks nice. We haven't taken our van out for a few months. Busy with house stuff and work. I need to change that.
|
|
|
|
|
12-04-2019, 12:24 PM
|
#38
|
|
Senior Member
Join Date: Apr 2016
Location: Oregon
Posts: 1,186
|
Photos
For photos: all the landscape ones will post fine. If you have portrait-style from your iPhone, etc. just take it to Edit on your phone first and change the size even the slightest. Then post, itll come out right side up.
__________________
"PhoTo" - 2014 Ford E350 5.4L RB - Agile 4x4 - CCV Poptop
|
|
|
|
|
12-04-2019, 03:15 PM
|
#39
|
|
Senior Member
Join Date: Nov 2018
Location: Santa Cruz, CA
Posts: 319
|
Quote:
Originally Posted by Seattle350
Yeah, I'm N 138th and Greenwood. The weekend trip looks nice. We haven't taken our van out for a few months. Busy with house stuff and work. I need to change that.
|
Yeahhh I know that feeling. Fortunately it's only the GF and I and we rent, so some of those weekly responsibilities aren't there and we're able to get out pretty regularly.
Thanks otter - seems strange, but I'll have to try that next time.
|
|
|
|
|
12-10-2019, 11:46 PM
|
#40
|
|
Senior Member
Join Date: Nov 2018
Location: Santa Cruz, CA
Posts: 319
|
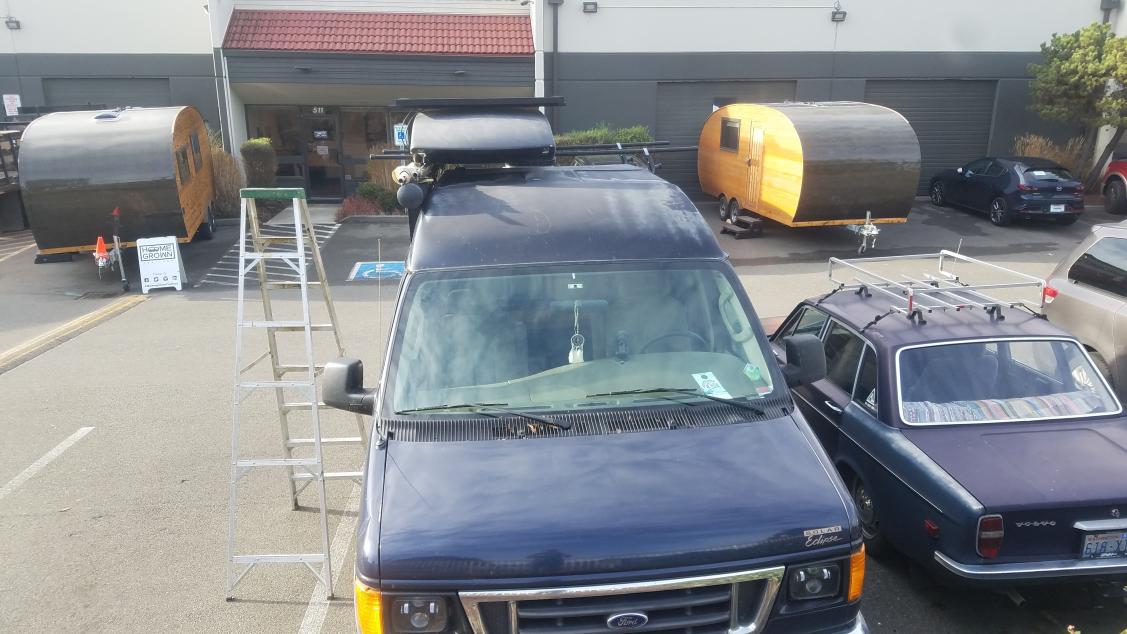
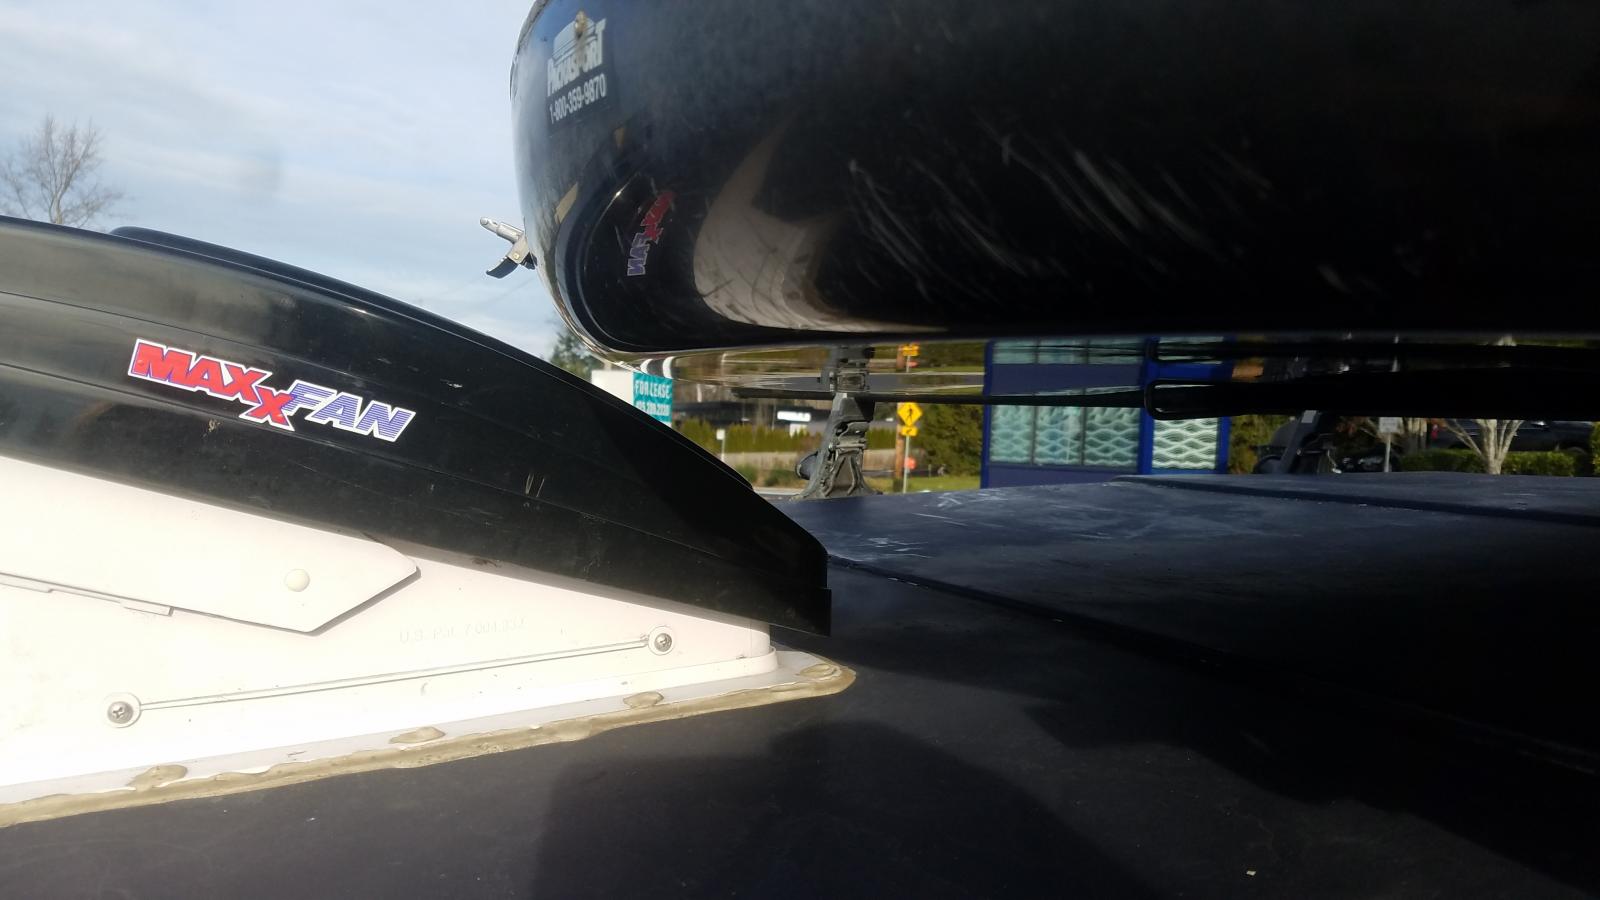
Roof Box Solar Build
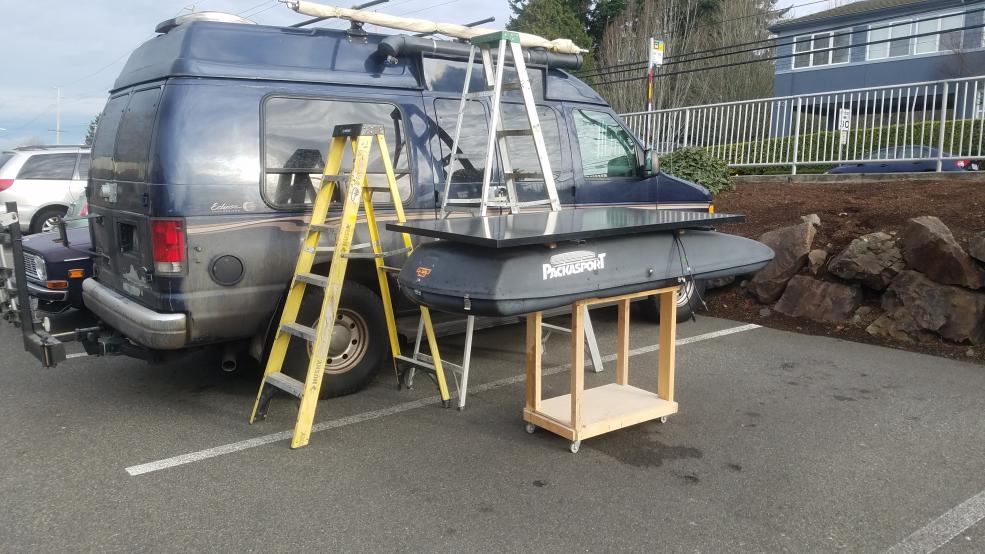
So. The new roof box w/ solar panel on top project is complete and on the van. I’d score it a 2 out of 5 in terms of the success of it.
The good: - It frees up half of the roof area so that we can now more easily carry surfboards/paddleboards/anything else of that nature
- Solar panel will get 100% sun and will never be in the shade of the roof box as it could be when they were positioned next to each other
- The Packasport box is massive
- Overall height is about the same/a few inches lower since the packasport is ~6” shorter
The bad: - The Packasport + residential solar panel setup is heavy as ****. The panel is 40lbs and the box must be close to 60lbs. It was not easy to get on to the roof, even between me and another strong guy from work. In comparison, the plastic Thule roof box was light enough that I could take it off/put it on the roof by myself.
- The Packasport opens from the rear, rather than the side like most thule/Yakima boxes. As it is currently positioned, it’s almost impossible to practically access the Packasport from the rear. I had a great, easy setup for accessing the Thule from the side.
- Although the packasport is massive, its storage space is probably 6” shorter in height than the Thule. I have to readjust what/how I store things in it (box of firewood needs to be shorter & wider/longer, etc).
Final thoughts & future adjustments:
Although I wanted to stick w/ the 260 watt residential solar panel because it’s what I had and it meant that we never had power issues, we have 2, 100 watt flexible panels at work that were damaged but still fully function that I may consider putting on the packasport. This would significantly reduce the weight and make the entire setup lower profile. We also did a couple road trips without the solar panel while I was working on this project and it made me realize that now that we are mainly weekend warriors (aka not living in the van), we don’t really need much solar power because our batteries charge sufficiently from the B2B alternator charger on the drive from Seattle to wherever we are going.
I’ll likely revisit the idea of replacing our roof rack setup with a unistrut-based one. This would #1 lower the overall roof rack height (currently sits ~4” above the roof); #2 give more flexibility for where things are located, ideally enabling me to move the Packasport further towards the rear of the van so that its rear access is more accessible. I’ll also likely move it to the driver-side of the van from the passenger side since most tree branches and other fun things that might try to smash the box/solar panel are on the passenger side of the road.
As always, live and learn. In hindsight, I probably should have prioritized other projects that had better time spent to reward ratios (aka installing the Chinese diesel heater), but it’s one more project knocked off the list.
The old roof setup - narrow thule box next to residential solar panel. No room for anything else (although I could just fit 1 surfboard in a bag under the solar panel)
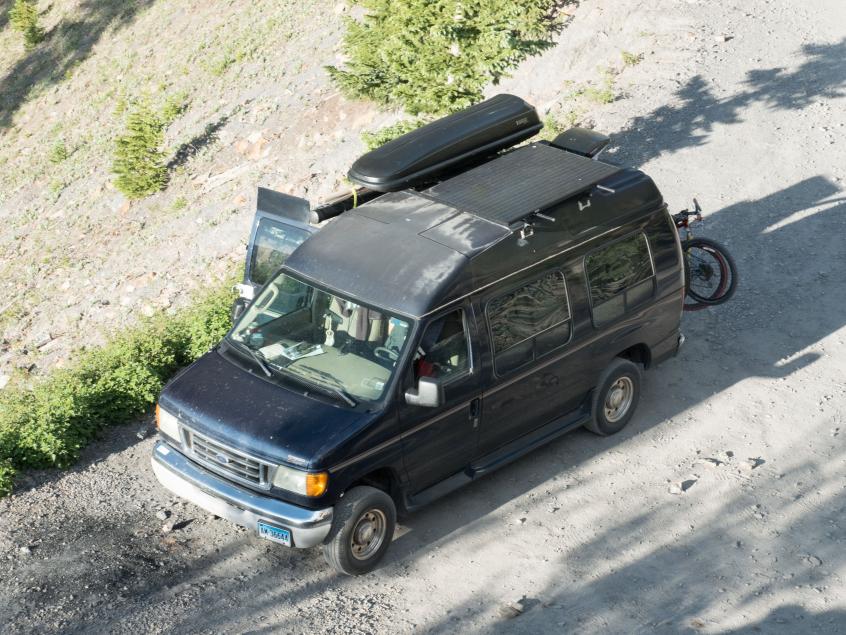 Finished product - packasport w/ solar panel on top of van (note plenty of extra room on driver-side to carry paddleboard/surfboards/etc
 Packasport installed & open on roof
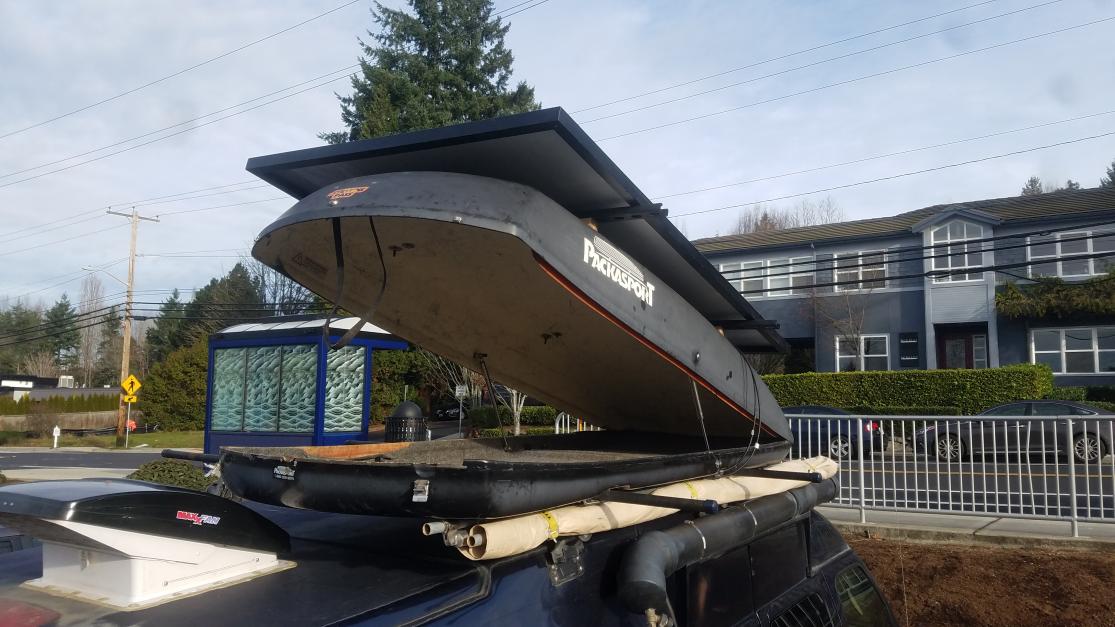 Close clearance between opened roof vent and packasport - measured before-hand but definitely did not think it would be that close.
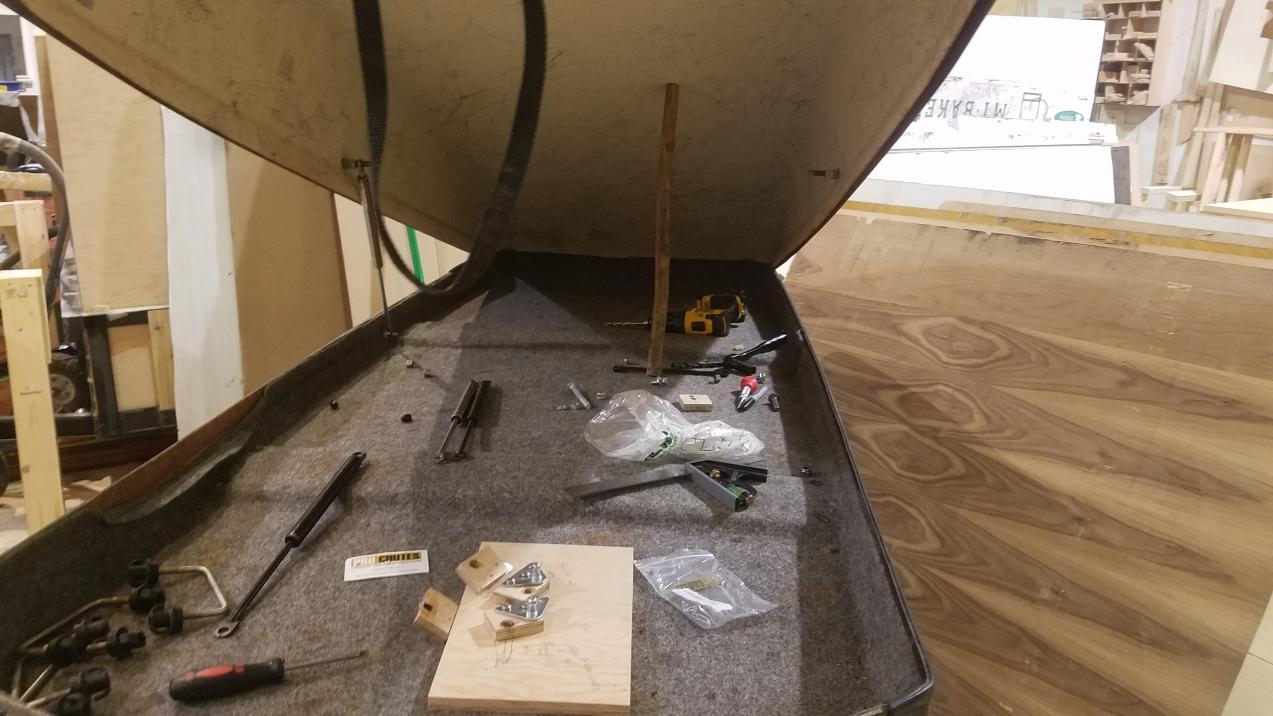
 Install of the new struts
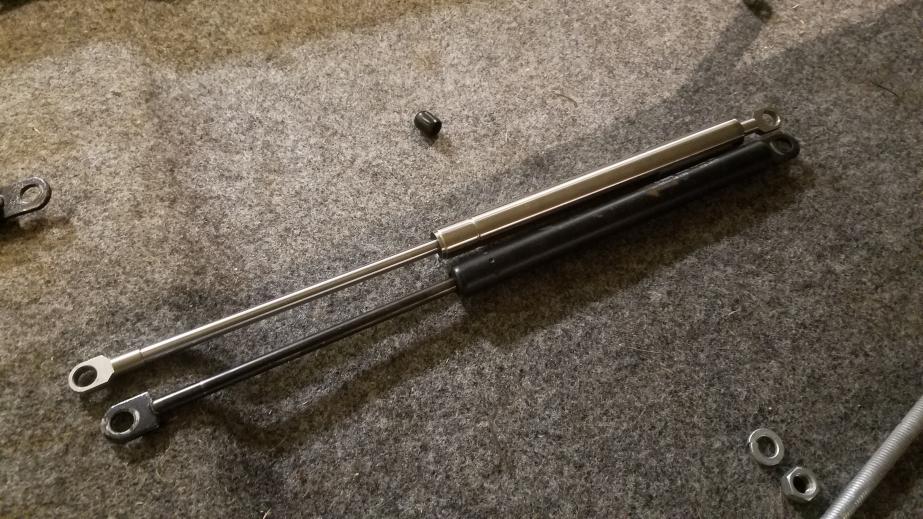
 Old struts = black; new = stainless steel. Ordered two additional sets of struts in an attempt to get the weight rating just right. These are rated at 60lbs each and they don't quite hold the box/solar panel open as solidly as I'd like. Praise the lord for amazon returns.
 1 new mounting hole for the bolts that they gas struts attach to had to be drilled. For some reason the distance between the strut mounting points on is 1/2" shorter on one side. Since the new struts are 1/2" longer than the old ones, they wouldn't let the lid close fully. There's always some funky-proprietary thing that these companies throw in to make a diy project tricky.
 Unistrut support cross-bars for mounting solar panel (w/ epoxied wood spacers to clear the hump in the middle of the roof box)
 The finished product, pre-install
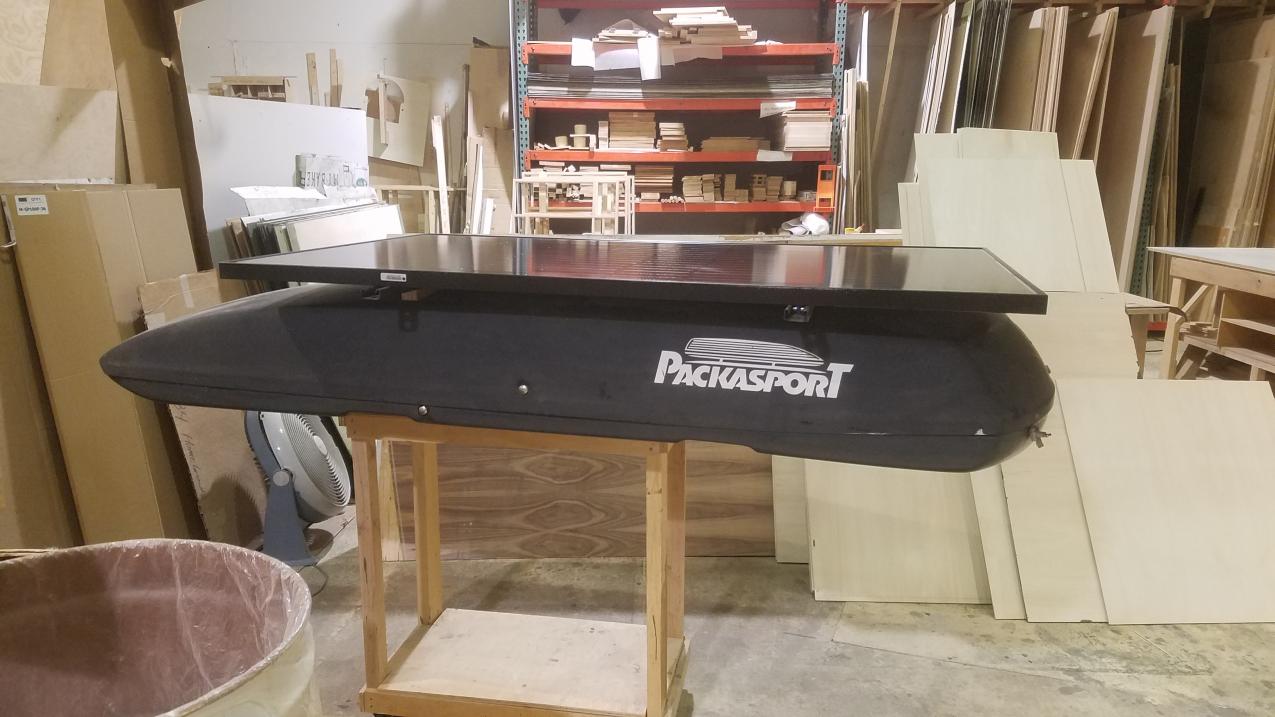 This thing is big... and weighs a lot. Getting it on to the roof wasn't pleasent.
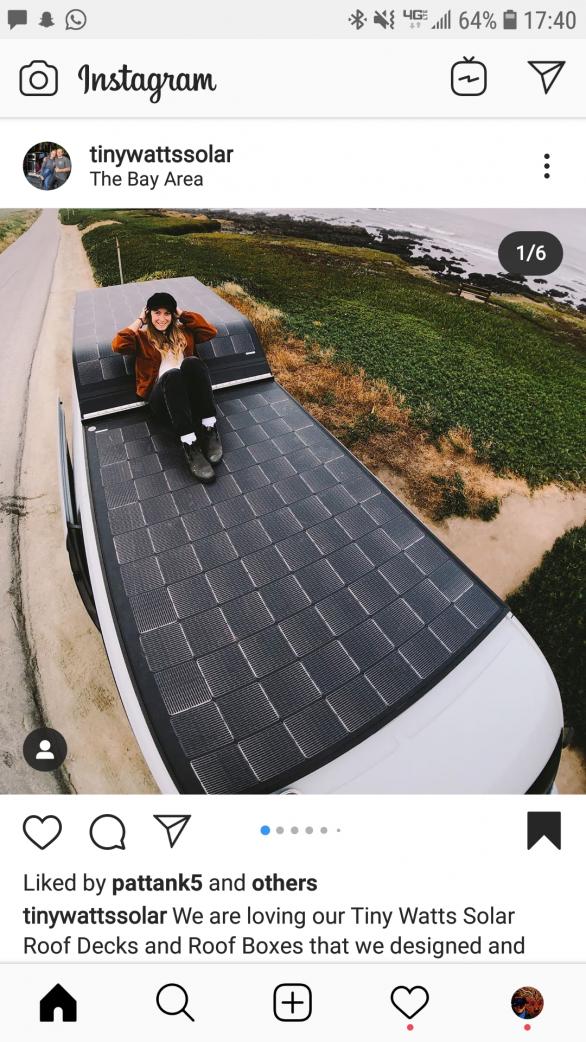
 The dream setup (in my opinion). These guys work with a solar panel manufacturer (that provide panels for the military) that can be walked on and curved. The front portion of panels acts as a fully functional deck (can be walked on) and the rear section is a roof box with a solar panel as the top (notice the aerodynamic bend in it). I take absolutely no credit for this - Tinywattssolar has a really cool small business doing this type of work. I have no idea how much something like this costs and imagine that it's far outside of my price range, but it's something that is really cool.
|
|
|
|
|
|
 Posting Rules
|
You may not post new threads
You may not post replies
You may not post attachments
You may not edit your posts
HTML code is Off
|
|
|
|
 » Recent Threads
 |
|
|
|
|
|
|
|
|
|
|
|
|
|
|
|
|
|
|
|
|
|
|
|
|
|
|
|
|
|
|
|
|
|


 PhoTo
PhoTo Linear Mode