Journey with Confidence RV GPS App RV Trip Planner RV LIFE Campground Reviews RV Maintenance Take a Speed Test Free 7 Day Trial ×


Reply
 
Thread Tools Display Modes
 
Old 11-26-2015, 10:01 AM   #91
Senior Member
 
Join Date: Feb 2015
Posts: 175
Re: 2010 Express AWD build,The Gnarvan

Quote:
Originally Posted by boywonder
Nice! You've been busy.......are you using cherry plywood?

The strain reliefs for floor penetration are a great idea.
Alder plywood, but I used a cherry stain.

TeleSteve is offline   Reply With Quote
Old 11-26-2015, 10:16 AM   #92
Senior Member
 
Join Date: Feb 2015
Posts: 175
2010 Express AWD build,The Gnarvan

A shot of the bed made up, I still need to get the cushions covered, but they have a piece of carpet over them for this first trip.

A few of the shower.


Switch panel

ACR and 150 breaker/disconnect at engine battery.

Connections at house battery w/ 150 amp breaker/disconnect.

House fuse panel w/ 100 amp breaker disconnect.

Inverter remote and webasto smart temp thermostat.
TeleSteve is offline   Reply With Quote
Old 11-27-2015, 09:49 AM   #93
Senior Member
 
RandallDee's Avatar
 
Join Date: May 2013
Location: Cascadia
Posts: 319
Re: 2010 Express AWD build,The Gnarvan

Whoa.

Not sure how I missed this thread. Nice work and very nice van.
__________________
2023 Transit AWD w/ Van Haus build.
73 BMW 2002 O=00=O
RandallDee is offline   Reply With Quote
Old 11-30-2015, 11:30 AM   #94
Senior Member
 
Join Date: Feb 2015
Posts: 175
2010 Express AWD build,The Gnarvan

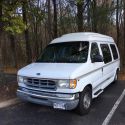
Just got home from the vans first 7 day trip. So far everything that is done is working great. I didn't have enough time to plumb the heater hoses back to the heat exchanger so no hot water, but the rest of the plumbing and electrical worked great. We had to be in Tucson this last Friday- Saturday for a family event so we made a trip out of it. We left last Monday after making the final tweaks to the van including filling and testing the water system for the first time. While driving to the Grand Canyon we spent the first night in the Mojave desert before pushing the next day to GCNP. We spent 3 days and 2 nights in the park exploring and taking in the big ditch.


Even the dog took in the scenery.

The Webasto heater got some use with the below freezing temps, although the Thermostat doesn't seem to be working, it is either on or off, I will have to look into that more now that I home.
We then made a short drive over to check out Arizona Snowbowl. We had just planned to park somewhere on Forest Service land, but ran into and old friend who invited us to Thanksgiving dinner at the Hart Prairie Preserve. So after dinner we just stayed and camped on the preserve. this place was beautiful right on the North slope of The San Francisco Peaks.

This shot was taken at night by moonlight with the ski resort in the back ground.

The next morning after -6 degree F night, but the heater kept us toasty warm.
The old cabin where we shared Thanksgiving with one old and about 20 new friends. We then spent most of the day skiing at Snowbowl before making the drive down to Tucson.

We spent the next two nights with family and friends in Tucson before making the 12 hour drive home yesterday in holiday traffic.
Overall it was a great trip and my wife who has been skeptical of this whole van thing is ready to take another trip. I still have a lot of work to do to get it finished but at least it is usable at this point. My next projects will be to get the hot water working and build and plumb the sink cabinet on the side door. I also need to finish the door panels and the rest of the trim pieces.
TeleSteve is offline   Reply With Quote
Old 12-01-2015, 11:44 AM   #95
Junior Member
 
Join Date: Nov 2015
Posts: 9
Re: 2010 Express AWD build,The Gnarvan

this is amazing. have to ask, what is that bench/bed out of
tj4861 is offline   Reply With Quote
Old 12-05-2015, 07:06 PM   #96
Senior Member
 
accrete's Avatar
 
Join Date: Oct 2010
Location: The Sunny Southwest, USA
Posts: 427
Re: 2010 Express AWD build,The Gnarvan

Very professional job Steve.

Oh, and for any who may come this way....
Quote:
Originally Posted by TeleSteve
A little 3M spray adhesive was used to help hold the denim insulation and reflectix in place...
Take it from one who's been there...make sure your dearly beloved wears a shower cap or similar if she is going to help with the 3M spray application ; )

Thom

PS...and if you don't...be prepared to buy her roses and take her to her fav restaurant for a make-up-dinner date.
__________________
Greetings from the Sunny Southwest, USA
2017 RAM Promaster Conversion. SOLD: 2010 Chevy Express AWD
Van Build Thread @ SMBForums
accrete is offline   Reply With Quote
Old 12-05-2015, 09:03 PM   #97
Senior Member
 
Join Date: Feb 2015
Posts: 175
Re: 2010 Express AWD build,The Gnarvan

Quote:
Originally Posted by tj4861
this is amazing. have to ask, what is that bench/bed out of
Not really sure, I bought it used from someone who works at SMB Fresno. He said it was a take out from one of there current projects. The head rests had "extreme sports vehicle" embroidered in them. The seat is made by Atwood.
I don't have any pics at the moment, but I just deconstructed the whole seat and cut off the mounts for the headrests and armrests. The medal head rest mounts were a huge hard spot in the middle of the bed that had to be avoided while sleeping. They are now cut off and I am shaping new higher density foam for it. I ordered the OEM wicker seat fabric from Detroit. If it comes in time, it goes in to the upholsterer to get recovered to match the factory front seats this coming Thursday. The rear platform cushions will get the same wicker and vinyl covers.
TeleSteve is offline   Reply With Quote
Old 12-11-2015, 11:32 PM   #98
Senior Member
 
Join Date: Feb 2015
Posts: 175
Replacing the foam on the used bench seat/bed to get ready for new upholstery. I went with 70 density 3" foam on the seat and 70 density 4" foam over the back platform boards. I built up the edges wrapping the frame with 1/2" 40 density (green in photos).


While the seats and cushions were at the upholstery shop I worked on the rear door panels and speaker install.
Building the box for the cubby hole and wrapping it with carpet.

The panels are 1/4" Baltic birch wrapped in vinyl. the door curves where I wanted to mount the speakers so I made tapered trim rings wrapped in gray carpet.


The upholstery shop knocked the seat and cushions out in two days and I just picked them up this afternoon. I bought OEM neutral wicker to match the front seats. I googled and printed out some pictures of factory express bench seats so they could make the seat look factory. I wanted them more flat with no bolsters so it would be flatter in bed mode.
I am pretty happy with the outcome.


The rolls you see under the seat are the black out window screens I made by sandwiching Reflectix with black foam lined headliner on one side and automotive carpet on the other. All three layers were glued together with contact cement and then I sewed 1" nylon webbing all around the edges. I will post some more pictures when I can, it's been raining and snowing here lately.
The wood pieces next to them are the start of the rear corner trim pieces.
TeleSteve is offline   Reply With Quote
Old 12-14-2015, 11:17 AM   #99
Senior Member
 
rockbender's Avatar
 
Join Date: Sep 2010
Location: Bend, OR
Posts: 800
Quote:
the door curves where I wanted to mount the speakers so I made tapered trim rings wrapped in gray carpet.
Of course you did!

As always, nice clean work and great use of space. The seat turned out great! Our foam setup is nearly identical and I sleep so well down there. Using the stock fabric was a great idea too!

Any issues or complaints with the Webasto?
__________________
Josh
2009 Express AWD, CCV Top & 50-ish home build. Daily driver/camper/kid hauler
rockbender is offline   Reply With Quote
Old 12-15-2015, 08:53 AM   #100
Senior Member
 
Join Date: Feb 2015
Posts: 175
Quote:
Originally Posted by rockbender View Post
Of course you did!

As always, nice clean work and great use of space. The seat turned out great! Our foam setup is nearly identical and I sleep so well down there. Using the stock fabric was a great idea too!

Any issues or complaints with the Webasto?
The Webasto is working great. I added the Smartemp thermostat which doesn't work as well as I hoped. It takes a ambient temp reading at the t-stat for the display temp, but still uses the temp of the intake air for the set temperature. So the heater can be set at 60 and will keep running until it displays around 75 since the t-stat is up high and the intake is down low. There is an offset adjustment of up to 9 degrees but that will never be the same.
i mostly use the van at high elevations. I was concerned that the heater was running rich so I tried to make the altitude adjustment with the Smartemp unsuccessfully. So I hooked up the original t-stat and made the adjustment successfully. Then reinstalled the Smartemp. So far it seems to be working better, but haven't had a trip with it since the adjustment.
TeleSteve is offline   Reply With Quote
Reply


Posting Rules
You may not post new threads
You may not post replies
You may not post attachments
You may not edit your posts

BB code is On
Smilies are On
[IMG] code is On
HTML code is Off
Trackbacks are Off
Pingbacks are Off
Refbacks are Off

» Featured Campgrounds

Reviews provided by

Powered by vBadvanced CMPS v3.2.3
Disclaimer:

This website is not affiliated with or endorsed by Sportsmobile SIP or any of its affiliates. This is an independent, unofficial site.


All times are GMT -6. The time now is 08:22 PM.


Powered by vBulletin® Version 3.8.8 Beta 4
Copyright ©2000 - 2024, vBulletin Solutions, Inc.