 |
|
 06-15-2023, 01:56 PM
|
#51
|
|
Senior Member
Join Date: Mar 2015
Location: Maryland
Posts: 3,387
|
Wheels look great!
I know you’ve got the square tubing on the box swing arm, but with the weight of the generator in there it still places a lot of stress on the the pivot support - did you also order the nylon support wedges from Aluminess to help take some of that load off?
__________________
TwoXentrix
"AWOL"
|

|

|
|
06-15-2023, 02:26 PM
|
#52
|
|
Senior Member
Join Date: Feb 2013
Location: San Francisco/Nevada City
Posts: 3,769
|
Quote:
Originally Posted by 86Scotty

|
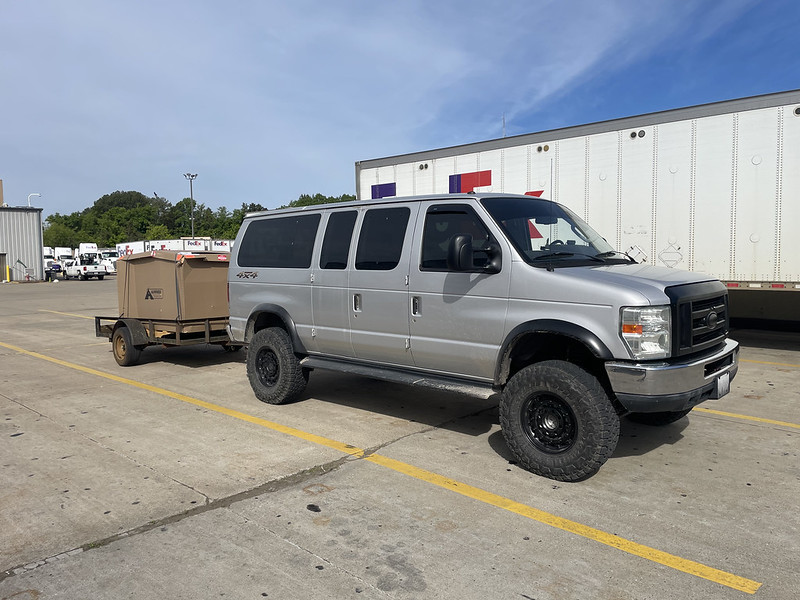
I was looking at this very picture thinking man, he really needs to do seomthing about that ugly chrome bumper... and then I saw the logo on the box in the trailer...
|

|
|
|
06-15-2023, 03:49 PM
|
#53
|
|
Senior Member
Join Date: Jul 2011
Location: TN
Posts: 10,258
|
Quote:
Originally Posted by Twoxentrix
Wheels look great!
I know youve got the square tubing on the box swing arm, but with the weight of the generator in there it still places a lot of stress on the the pivot support - did you also order the nylon support wedges from Aluminess to help take some of that load off?
|
Not yet, the latches on the newer Aluminess stuff are different and very supportive. I'll look in to this though.
I really don't need to carry my generator everywhere, I've just been figuring out storage for things.
|
|
|
|
|
06-15-2023, 03:50 PM
|
#54
|
|
Senior Member
Join Date: Jul 2011
Location: TN
Posts: 10,258
|
Quote:
Originally Posted by rallypanam
I was looking at this very picture thinking man, he really needs to do seomthing about that ugly chrome bumper... and then I saw the logo on the box in the trailer...
|
Gotcha 
.
|
|
|
|
|
06-16-2023, 08:55 AM
|
#55
|
|
Senior Member
Join Date: Feb 2015
Location: Durango, Colduhrado
Posts: 687
|
If there was a LIKE button, I sure would hit it for these new posts. Looking very good! Thinking of going up to 35's as my fender wells have been modified for them if I want to go that route.
__________________
All things being equal - fat people use more soap.
|
|
|
|
|
06-21-2023, 08:57 PM
|
#56
|
|
Senior Member
Join Date: Jul 2011
Location: TN
Posts: 10,258
|
I did not at all like how the Quigley t-case shifter came in this van. It was sticking straight up out of the floor, taller than I remember with previous Q's I've had. Also, the newer console makes it much harder to move to the back of the van from the driver's seat. I pulled it, cut it off and re-welded. It's ideal now.
 EB1A5B3D-155C-4CF1-90D3-A30F543FAFC3 EB1A5B3D-155C-4CF1-90D3-A30F543FAFC3 by somethingnottaken, on Flickr
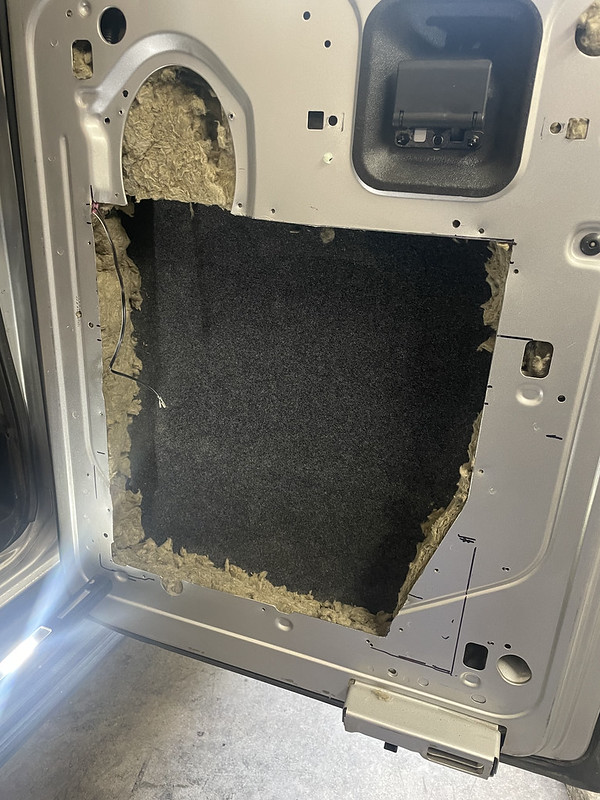
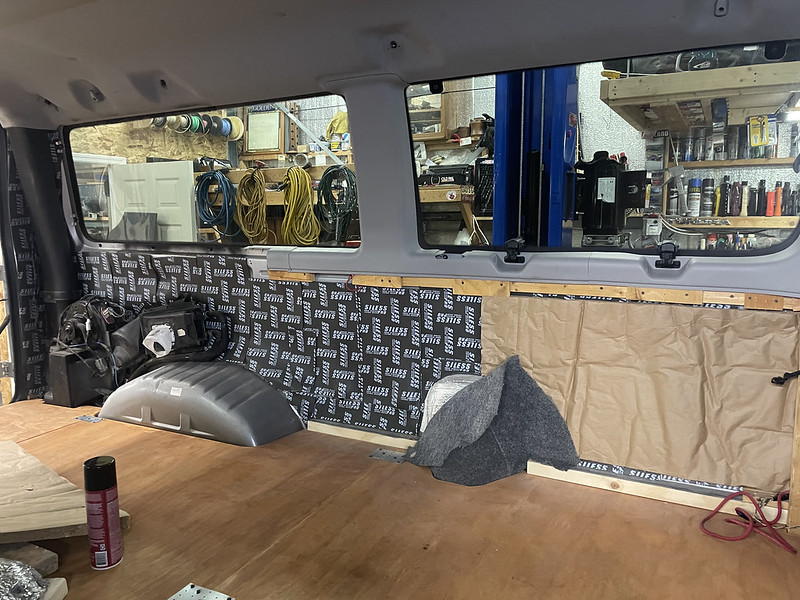
I'll skip over the minutia of insulating everything and just say I did a much more thorough job on this one than I ever have. I insulated everything, every cavity, including above headliner, inside doors, even inside rear taillight housings and similar places where there are lots of body cavities. I used a combination of Siless liner and some foil back foam stuff as well as Rockwool insulation. I probably overdid this. It was winter. I was bored.
IMO it's all a crapshoot anyway on a window van. It's like wearing 3 pairs of wool socks and long underwear with not shirt on.....but I digress.
https://www.amazon.com/gp/product/B0...?ie=UTF8&psc=1
https://www.amazon.com/gp/product/B0...?ie=UTF8&psc=1
For the subfloor I used 1/2" rigid foam and 3/4" plywood. A lot of these pics are just personal reference and do not show the completed job before I covered it up. Also, a lot of it has been rethought out and/or will be useless when the top is cut off. Also, some of these shots show Reflectix insulation that was laid down by in the rear by the previous owner. I removed and re did it with better product and then gray carpet over everything, even what will have cabinets covering it.
 0A800E0D-D3F0-44D8-90F1-52F58B1DE0AA 0A800E0D-D3F0-44D8-90F1-52F58B1DE0AA by somethingnottaken, on Flickr
 AECA2C93-CD2F-42AE-B49E-838071004B51 AECA2C93-CD2F-42AE-B49E-838071004B51 by somethingnottaken, on Flickr
 A453121B-C44B-4B0E-B4F9-857EE6BE3C38 A453121B-C44B-4B0E-B4F9-857EE6BE3C38 by somethingnottaken, on Flickr
 2714684E-0985-4AA0-917A-C7588BAC2129 2714684E-0985-4AA0-917A-C7588BAC2129 by somethingnottaken, on Flickr
 86939FA5-B9D1-4ED5-8081-1F712E646B6D 86939FA5-B9D1-4ED5-8081-1F712E646B6D by somethingnottaken, on Flickr
 416B2C35-FF56-4815-A8B0-134D323598EC 416B2C35-FF56-4815-A8B0-134D323598EC by somethingnottaken, on Flickr
 EFE0C6CA-0B78-42A2-BF71-11067E5D6D64 EFE0C6CA-0B78-42A2-BF71-11067E5D6D64 by somethingnottaken, on Flickr
 D66EA06D-096F-4E71-99C3-34BEE541ADE4 D66EA06D-096F-4E71-99C3-34BEE541ADE4 by somethingnottaken, on Flickr
 A1ADB22B-CEFB-4580-9003-996B59CCC639 A1ADB22B-CEFB-4580-9003-996B59CCC639 by somethingnottaken, on Flickr
 2F92841F-497D-47DE-A62D-AF8C87D3AF4D 2F92841F-497D-47DE-A62D-AF8C87D3AF4D by somethingnottaken, on Flickr
|
|
|
|
|
06-21-2023, 09:27 PM
|
#57
|
|
Senior Member
Join Date: Jul 2011
Location: TN
Posts: 10,258
|
The first part of the interior buildout was settling on a floor plan. I really wanted to build something similar to a SMB RB50 floor plan. She really wanted more of an RB30 SMB floor plan. As you might've guessed we're now building an RB30 floor plan.
 Screen Shot 2023-06-21 at 11.01.12 PM Screen Shot 2023-06-21 at 11.01.12 PM by E A, on Flickr
First was a bed. I wanted to challenge myself and see if I could build a suitable folding bed from scratch using cheap and available parts. I chose to start with some futon brackets I found online. At $20 or so they are disposable but worked out perfectly. I had used these a few years ago to try to modify a van bench seat in to a bed and it went poorly. This worked out better.
First, determine angles, comfortable size and height and sweep of bed from side wall with these brackets. Keep in mind I'm better with a saw and hammer than a calculator.
 1800D42A-D3C3-4A43-997A-01570849F307 1800D42A-D3C3-4A43-997A-01570849F307 by E A, on Flickr
 271F203D-8A6C-420C-A7B0-53EF73097BB1 271F203D-8A6C-420C-A7B0-53EF73097BB1 by E A, on Flickr
 EDA61906-68F7-486B-849E-571EEEBF9012 EDA61906-68F7-486B-849E-571EEEBF9012 by E A, on Flickr
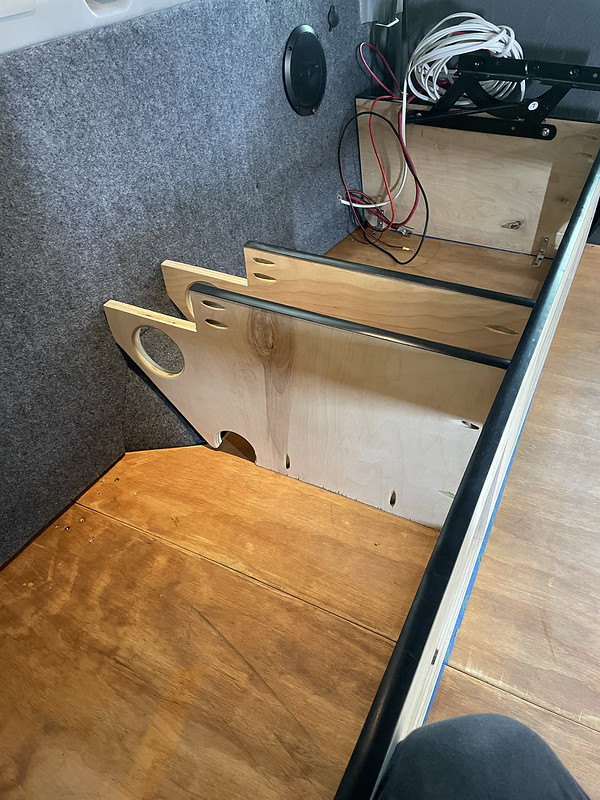
Once I got the basic measurements figured out with scrap I started to form the box and foundation for the entire left side cabinet, essentially one big structure the way I did it as you will soon see.
 C6140680-A361-4D75-9012-6C2403A7587E C6140680-A361-4D75-9012-6C2403A7587E by E A, on Flickr
 B82C5B9C-4DD1-4FE0-83C6-7550B09440C5 B82C5B9C-4DD1-4FE0-83C6-7550B09440C5 by E A, on Flickr
 817BB824-E1C7-4E60-8EC1-7E3E4BBF5AC6 817BB824-E1C7-4E60-8EC1-7E3E4BBF5AC6 by E A, on Flickr
 3932B4A4-E2BF-47B1-9BC4-D7F46D646BF4 3932B4A4-E2BF-47B1-9BC4-D7F46D646BF4 by E A, on Flickr
 E8E9CD94-8C00-4171-B9CA-B0589BA95DF4 E8E9CD94-8C00-4171-B9CA-B0589BA95DF4 by E A, on Flickr
 F6FE10D5-740A-4377-A925-49A75CF0CBC9 F6FE10D5-740A-4377-A925-49A75CF0CBC9 by E A, on Flickr
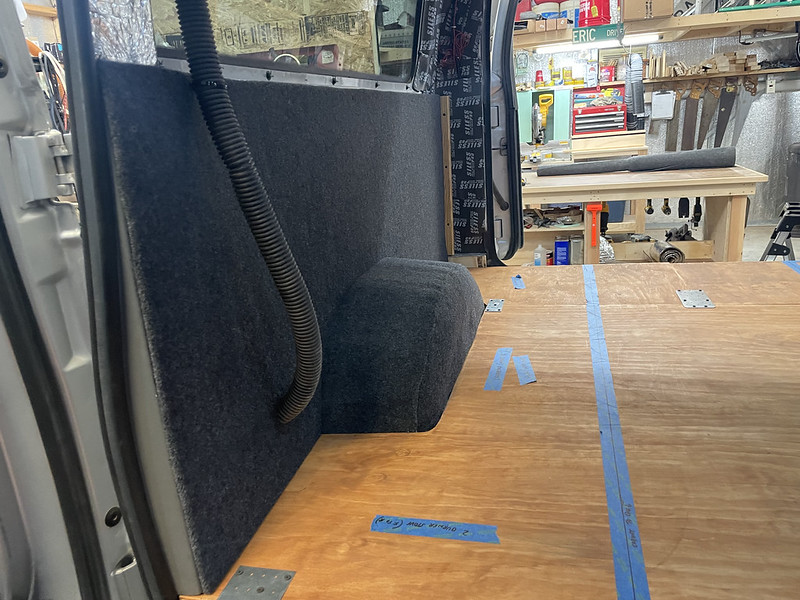
This bed is designed to be a more comfortable couch than bed. It's about 40" wide and 72" long and will only be our bed until we get a pop top. It's the ideal size and 'sit' for a couch. I went with 3" foam on it and have since added a 1.5" memory foam top since I had an old mattress around to cut up. I think 4" foam would've been a better choice. We'll make the final decision on that before upholstery after we sleep on it for a trip or two.
Oh, the angle aluminum supports along the front edge and top of back section as well as the supports you see I added (standing 3/4" ply pieces) firmed it up nicely. I also added some legs to the floor. The back section of the bed nearest the driver's side wall rests on the storage tray I made behind it, pic below. The bed is absolutely rigid. I'm very pleased with the result.
 56BF7EA7-AE20-4FDF-8107-A39339AC297C 56BF7EA7-AE20-4FDF-8107-A39339AC297C by E A, on Flickr
Another feature that this bed build offered is space behind for storage. I built a tray behind the back section that will store an insane amount of things when in couch mode. Easily all of our bedding, pillows and lots of other oblong things.
 F2EA05A1-EC43-4452-A36D-1EDA57BC6E07 F2EA05A1-EC43-4452-A36D-1EDA57BC6E07 by E A, on Flickr
Temporary bedsheet upholstery. It works for now.
 66375E1B-A34C-473E-904E-248A9608B89B 66375E1B-A34C-473E-904E-248A9608B89B by E A, on Flickr
|
|
|
|
|
06-21-2023, 09:48 PM
|
#58
|
|
Senior Member
Join Date: Sep 2013
Location: Eugene, Oregon
Posts: 1,131
|
Thats looking real nice Clark, real nice.
__________________
2015 Chevy Express 3500 Duramax
w/ Quigley 4x4 & Agile Fox shocks
Sold 2005 E350 Chateau
Quigley with Agile RIP, 6.0 PSD
|
|
|
|
|
06-21-2023, 09:54 PM
|
#59
|
|
Senior Member
Join Date: Jul 2011
Location: TN
Posts: 10,258
|
I wanted smarter space and layout than I've had in a homebuild before and it literally took me a couple of months to finalize a plan I liked. Basically it goes like this:
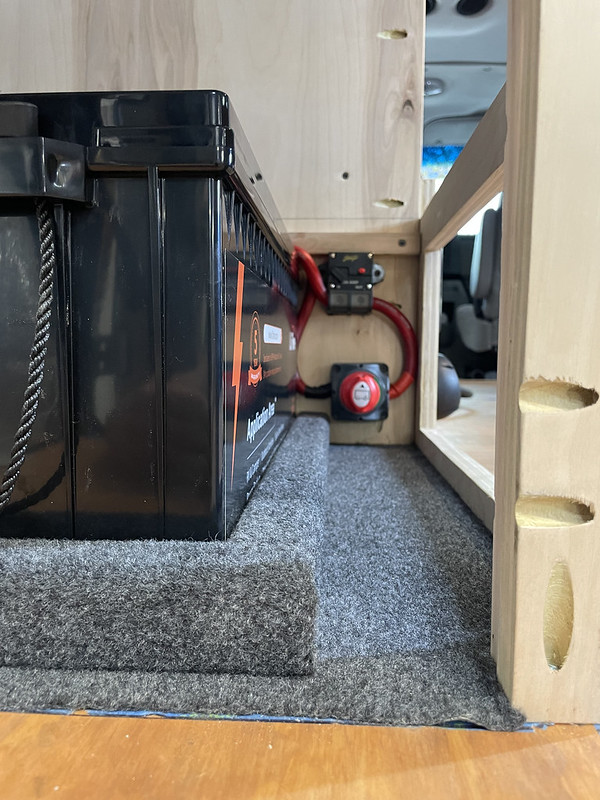
Diesel furnace, 2500w interter, 300ah battery, powered sub, DCtoDC charger, fridge, microwave, pantry, porta potty and closet on driver's side. I managed to do it even adding a couple of large drawers under the bed. it's packed but no more so than many vans. All wiring and electrics under the couch except battery under fridge.
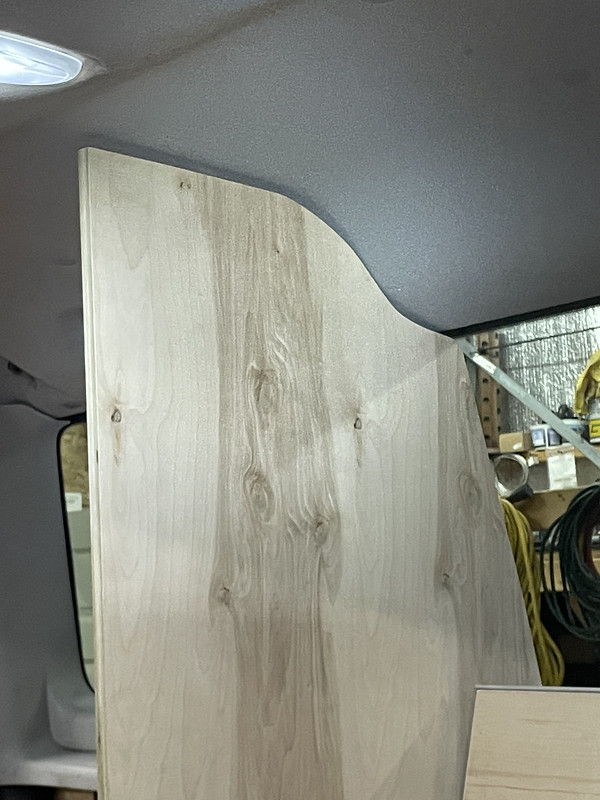
First, build that wall:
 BEF4025D-9819-43EF-9733-19A706FE5496 BEF4025D-9819-43EF-9733-19A706FE5496 by E A, on Flickr
 4490879A-B1C5-4E7E-ACAD-E0F8F6B2B6B0 4490879A-B1C5-4E7E-ACAD-E0F8F6B2B6B0 by E A, on Flickr
Then build a few more:
 ECF40B9F-84E9-464D-96F6-92BAD9C07F0D ECF40B9F-84E9-464D-96F6-92BAD9C07F0D by E A, on Flickr
 47D5105D-4824-40B3-8B40-8F5B9DCAC6C1 47D5105D-4824-40B3-8B40-8F5B9DCAC6C1 by E A, on Flickr
 A8098382-F0D3-4DE5-BDF1-D63DA9768E55 A8098382-F0D3-4DE5-BDF1-D63DA9768E55 by E A, on Flickr
 6EF8A047-AF6B-4F3F-A19A-EF5975CCE18F 6EF8A047-AF6B-4F3F-A19A-EF5975CCE18F by E A, on Flickr
 4F58686B-089F-47CD-8989-13A105503049 4F58686B-089F-47CD-8989-13A105503049 by E A, on Flickr
 E0324D63-8FC6-4ADF-AD88-01AE46AA7E5B E0324D63-8FC6-4ADF-AD88-01AE46AA7E5B by E A, on Flickr
 E502C8D8-8363-448E-828F-991FA4BB112A E502C8D8-8363-448E-828F-991FA4BB112A by E A, on Flickr
 D21D06EC-8909-4C95-9CC1-A7435C9BD5D7 D21D06EC-8909-4C95-9CC1-A7435C9BD5D7 by E A, on Flickr
 F6BDC3FF-E900-48D9-9C37-BA28FB22261B F6BDC3FF-E900-48D9-9C37-BA28FB22261B by E A, on Flickr
 2DE0F72A-374B-42D2-A18C-D8AFCD5F5AE9 2DE0F72A-374B-42D2-A18C-D8AFCD5F5AE9 by E A, on Flickr
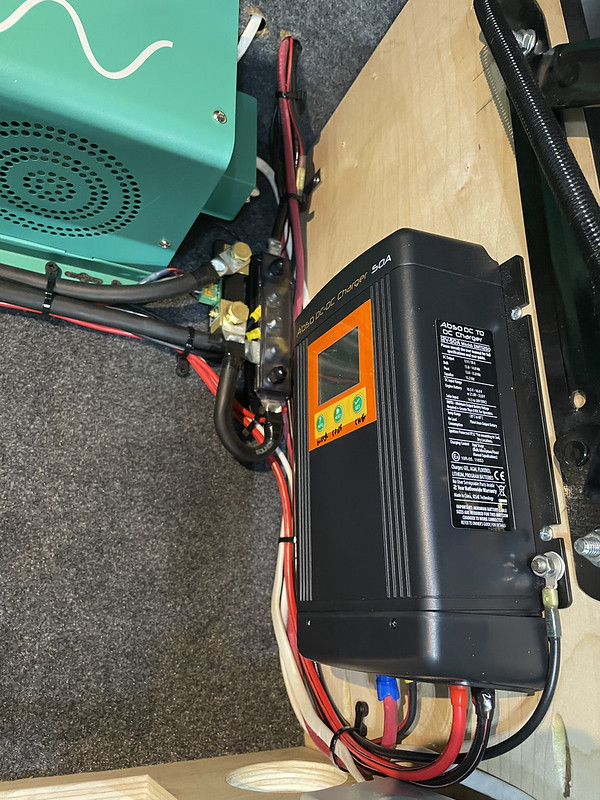
Right about now is when it got really intimidating and really fun. I have never built a lithium powered camper so a lot of these toys were new to me.
What you're seeing: 300ah lithium battery, Kisae 50 DCtoDC charger, Aims 2500 psw inverter with transfer switch, Victron shunt/monitor, bus bars and fuse panels, lots of breakers, lots of wire, lots of AC receptacles, etc.
 7D8876AC-3995-4D9E-9DE5-0EBB2A3DC1FB 7D8876AC-3995-4D9E-9DE5-0EBB2A3DC1FB by E A, on Flickr
 4FC0465C-E45B-4727-B19D-DE743AEA074B 4FC0465C-E45B-4727-B19D-DE743AEA074B by E A, on Flickr
 C6A6DE57-1E59-4251-863B-7780D8111AEF C6A6DE57-1E59-4251-863B-7780D8111AEF by E A, on Flickr
 A662B18E-4FE7-4405-A444-8FE7D54E5799 A662B18E-4FE7-4405-A444-8FE7D54E5799 by E A, on Flickr
 A3577F2F-76F8-40F8-82DD-4864E2CC134E A3577F2F-76F8-40F8-82DD-4864E2CC134E by E A, on Flickr
 01DA5A55-A2AA-435A-9E6E-9C12BACF8092 01DA5A55-A2AA-435A-9E6E-9C12BACF8092 by E A, on Flickr
 D2D033E7-1C44-4428-B6D1-F8F3CB9BC79B D2D033E7-1C44-4428-B6D1-F8F3CB9BC79B by E A, on Flickr
 FF852813-83C2-47DE-8D07-3D78B0549729 FF852813-83C2-47DE-8D07-3D78B0549729 by E A, on Flickr
Furnace goes back there, had not yet arrived at this point:
 B878F023-90EA-41EA-9D3E-949AF25773B2 B878F023-90EA-41EA-9D3E-949AF25773B2 by E A, on Flickr
All tidied up and we now have power!
 542FA598-48E6-4FE8-9AA6-F20C84F35A70 542FA598-48E6-4FE8-9AA6-F20C84F35A70 by E A, on Flickr
 845704B1-3FF1-4BAA-8ED4-388BC8312585 845704B1-3FF1-4BAA-8ED4-388BC8312585 by E A, on Flickr
|
|
|
|
|
06-21-2023, 09:58 PM
|
#60
|
|
Senior Member
Join Date: Oct 2015
Location: Sonoma County
Posts: 792
|
Love how far this has come and love where it’s headed. All that insulation makes me swoon.
Personally I think the walk-through aspect and view out the side doors from your couch makes a 30 the way to go.
Is that a ShopVac tube in the eighth pic of post #56? Is it permanently installed?
Oh, and do you have a link for those futon brackets?
__________________
2003 Astro AWD
2005 Tacoma Access cab 4x4
1999 E350 RB 7.3 "Al B. Tross" aka "Exxon Valdez"
|
|
|
|
|
|
 Posting Rules
|
You may not post new threads
You may not post replies
You may not post attachments
You may not edit your posts
HTML code is Off
|
|
|
|
 » Recent Threads
 |
|
|
|
|
|
|
|
|
|
|
|
|
|
|
|
|
|
|
|
|
|
|
|
|
|
|
|
|
|
|
|
|
|


 AWOL
AWOL


 Linear Mode


