Journey with Confidence RV GPS App RV Trip Planner RV LIFE Campground Reviews RV Maintenance Take a Speed Test Free 7 Day Trial ×


Reply
 
Thread Tools Display Modes
 
Old 09-27-2018, 07:27 PM   #11
Senior Member
 
1der's Avatar
 
Join Date: Apr 2013
Location: San Francisco, CA
Posts: 3,285
A few more tips-
Air intake - try to route so cold cabin air (by a door, or behind driver seat) is being drawn in freely, no obstructions. The unit needs cabin air not “cabinet” air. Air intake should be separated as much as possible from the heated cabin air outlet.

Thermostat/Control location - half way (or lower) up a wall is better than right below the bed platform. The hot air rises and causes the thermostat to shut off the heater But it is still cold down below. Also, the thermostat wire is long so it can be placed away from the heated air outlet. Try to get the thermostat placed at seated chest height.

Install in a place where you have easy access to the heater unit, both above and below the floor. It will need servicing at some point.

Heated cabin air outlet - if you have space to run two outlets, one rear one and one mid on your layout you will be happier. Consider including an adjustable vane to balance air flows between the two.

Combustion Air / Exhaust - if you will be in snow conditions, be mindful of the exhaust pipe location. I ran ours forward so the exhaust can actually exit up to the height of the wheel well arch. It would have to snow three plus feet to cover the wheel wells. An exhaust pipe that exits at 12” above the ground and out to the side can get covered easily. The combustion air intake - ours draws air from the space above the fuel tank away from blowing dust/dirt. We only use the Espar when stopped.

Pick up a spare glow plug, atomizing screen and tool, and a combustion chamber gasket. These units are pretty easy to take apart and clean in an emergency. Carb cleaner, smoking pipe cleaning brush and a small flat brush (preferably copper bristles) are pretty much all that is needed along with your tools, of course.

The rest is following instructions for fuel pump angle, etc.

They work great and make for a very comfortable cabin when installed and used right.

Usage tip - when you start the unit let it run for at least ten minutes before shutting off. These need to get hot to stay clean. Run the unit on high (90 deg) for 5 mins min before shutting down. Open doors and windows if needed. Make sure to change the default program of ten hours to 15 or more hours. I set ours at 18 hrs so it does not shut off in the morning before we wake up.

I learned that leaving the thermostat at 50 while out skiing was not a good thing. Did this to protect water lines/tank inside. Better to set it to 63 or higher otherwise the unit starts and stops before getting hot and this causes “short cycles” and may start to carbon up. You have a D2, which is better at staying clean because it will run on a higher setting longer than our D4 before dropping to low.

Enjoy it!

__________________
Ray
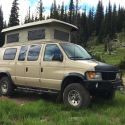
Beastie 3: 2002 7.3 EB Cargo: Agile TTB, CCV High Top, Custom Walk Through, Lots of stuff added. www.BlingMyRig.com
1der is offline   Reply With Quote
Old 09-27-2018, 07:32 PM   #12
Senior Member
 
Join Date: Jul 2018
Location: Colorado Springs
Posts: 174
Great input and advice that I sincerely appreciate. So nice of you to take the time to help and be so thorough. Thanks so much.
Jdkh2001 is offline   Reply With Quote
Old 09-27-2018, 08:47 PM   #13
Senior Member
 
Twoxentrix's Avatar
 
Join Date: Mar 2015
Location: Maryland
Posts: 3,384
Garage
This will come in handy... at some point.

__________________
TwoXentrix
"AWOL"
Twoxentrix is offline   Reply With Quote
Old 09-27-2018, 08:55 PM   #14
Senior Member
 
Join Date: Jul 2018
Location: Colorado Springs
Posts: 174
You’re right that video will come in handy - thanks again.
Jdkh2001 is offline   Reply With Quote
Old 09-27-2018, 09:32 PM   #15
Senior Member
 
Bbasso's Avatar
 
Join Date: Jan 2012
Location: Western North Carolina
Posts: 1,258
Everything Ray said x2.
__________________
Rob.
Current:
2001 E350 PSD w/ a bunch of stuff.
And had three other E350s...
Bbasso is offline   Reply With Quote
Old 09-28-2018, 11:19 AM   #16
Senior Member
 
Join Date: Jul 2018
Location: Colorado Springs
Posts: 174
Hey you all a couple people have said I’m going to be dropping the gas tank to install this unit? In all the videos I’ve seen they simply tap into the auxiliary fuel line to pick up fuel. This may not be the case on my 08 ford 6.0 I don’t know. I am just trying to get advice on what to expect in the install. I so appreciate the tremendous help and advice the forum has given.
Jdkh2001 is offline   Reply With Quote
Old 09-28-2018, 04:15 PM   #17
Junior Member
 
Join Date: Jun 2018
Location: Oregon
Posts: 20
Long time reader/lurker, first time poster here.

I recently picked up the D2 as well and need to get the install done before the rainy (hopefully snowy) season hits here in Oregon.

I have an 02 Ford 7.3 and like JdKh2001 was wondering if I could simply tap into the auxiliary fuel line or If dropping the tank and tapping into that is necessary.

If dropping the tank is the way to do it, where’s the best place to tap in? Through the sending unit or the tank itself? From what I’ve found it seems like a lot of people going through the sending unit.
Thanks in advance and great tips on here!
tmalay is offline   Reply With Quote
Old 09-28-2018, 04:33 PM   #18
Senior Member
 
Bbasso's Avatar
 
Join Date: Jan 2012
Location: Western North Carolina
Posts: 1,258
I followed the instructions exactly and zero problems. Use the supplied fuel kit and you'll be fine.

I too went through the sending unit, easypeasy
__________________
Rob.
Current:
2001 E350 PSD w/ a bunch of stuff.
And had three other E350s...
Bbasso is offline   Reply With Quote
Old 09-28-2018, 05:29 PM   #19
Junior Member
 
Join Date: Jun 2018
Location: Oregon
Posts: 20
Thanks Bbasso, very confidence inspiring. Hoping to get the install done in this weekend!
tmalay is offline   Reply With Quote
Old 09-28-2018, 09:00 PM   #20
Senior Member
 
Bbasso's Avatar
 
Join Date: Jan 2012
Location: Western North Carolina
Posts: 1,258
Within a day if you have everything ready and set.
__________________
Rob.
Current:
2001 E350 PSD w/ a bunch of stuff.
And had three other E350s...
Bbasso is offline   Reply With Quote
Reply

Tags
espar d2, heater furnace


Posting Rules
You may not post new threads
You may not post replies
You may not post attachments
You may not edit your posts

BB code is On
Smilies are On
[IMG] code is On
HTML code is Off
Trackbacks are Off
Pingbacks are Off
Refbacks are Off

» Sportsmobile Registry

PhoTo

Otter

Ford Zilla

Steve C
Add your Sportsmobile
» Featured Campgrounds

Reviews provided by

Powered by vBadvanced CMPS v3.2.3
Disclaimer:

This website is not affiliated with or endorsed by Sportsmobile SIP or any of its affiliates. This is an independent, unofficial site.


All times are GMT -6. The time now is 06:33 PM.


Powered by vBulletin® Version 3.8.8 Beta 4
Copyright ©2000 - 2024, vBulletin Solutions, Inc.