Journey with Confidence RV GPS App RV Trip Planner RV LIFE Campground Reviews RV Maintenance Take a Speed Test Free 7 Day Trial ×


Reply
 
Thread Tools Display Modes
 
Old 03-21-2018, 06:16 AM   #31
Senior Member
 
marret's Avatar
 
Join Date: Nov 2016
Location: FL and VA
Posts: 1,953
Garage
Great photos, work and read. Hats off to you for getting it done. Van looks super.

__________________
Chris
2008 GMC 3500 Quigley Weldtec 4x4 Savana SMB
marret is offline   Reply With Quote
Old 03-22-2018, 05:59 AM   #32
JWA
Senior Member
 
Join Date: Jan 2011
Location: Reynoldsburg, Ohio
Posts: 3,774
Send a message via Yahoo to JWA
Nice build---a few things caught my attention........

Your daughter's desire to be a mechanic--very very cool. The current girlfriend loves doing "guy things" and can now also change her own oil, in a pinch could change a flat on her Toyota 4Runner. (I bought her a AAA road hazard policy so she doesn't have to do this on an open road, she's happy knowing she could if no other option.) Most women and a lot of men too could benefit from simply being more aware of how their vehicles work, won't be a susceptible to less-than-honest "mechanics".

Your ViAir acquisition will serve you well---they're high quality compressors better suited to your needs, a huge improvement over the cheaper varieties on the market.

Have you yet or have planned any sort of body stiffening structure above the original roof assembly? From experience removing the factory roof without adding something to replace it isn't advised.
JWA is offline   Reply With Quote
Old 03-22-2018, 08:23 AM   #33
Member
 
Join Date: Sep 2014
Posts: 55
Quote:
Originally Posted by JWA View Post
Nice build---a few things caught my attention........

Your daughter's desire to be a mechanic--very very cool. The current girlfriend loves doing "guy things" and can now also change her own oil, in a pinch could change a flat on her Toyota 4Runner. (I bought her a AAA road hazard policy so she doesn't have to do this on an open road, she's happy knowing she could if no other option.) Most women and a lot of men too could benefit from simply being more aware of how their vehicles work, won't be a susceptible to less-than-honest "mechanics".

Your ViAir acquisition will serve you well---they're high quality compressors better suited to your needs, a huge improvement over the cheaper varieties on the market.

Have you yet or have planned any sort of body stiffening structure above the original roof assembly? From experience removing the factory roof without adding something to replace it isn't advised.
Thanks JWA,

My kiddos both have been super helpful during my build process. Great times spent together and they take a lot of pride as we use the shiz out of all the things we build.

Living in the mountains like we do, comes with an obligation to learn things like the ability to change tires, build fires, use a chainsaw, a rifle, and many other such skills. We don't live too far from civilization but its common to get into a canyon in deep snow and have no cell signal so its imperative to have some skills to help yourself. I feel like people tend to rely on their phone to be able to save them too often. I don't trust very many mechanics either. Not that they are even doing something shady, I just know they are doing the same jobs over and over and using often cheaper parts to maximize their profits. I just like knowing that things are done with decent parts. I also love knowing how my rig goes together. When you build something that goes way out into the boonies intentionally to find places with no cell signal its nice to be able to do some field repair or even just simple diagnostics. When you build it, you know a hell of a lot more about it.

As far as body stiffening, I have built, and I will be posting more detail shortly, a little bit of a frame around the interior of where the top and the van body meet. This is going to provide some support for the bed that is coming up there for the kids. That is about the stage I am at currently with my build. I still have some catching up to do on my build thread. I used some uni-strut to frame out around the opening. It is bolted using some brackets I made to fit into the seat belt mounting bolts all the way through the van. This gives me infinite mounting points around the opening and provides a bit of structure. Trick will be finding a nice way to finish it out so it looks nice. I have some good ideas so stay tuned. I will eventually be building a roof rack with supports that come down to the existing gutters. Still working out details on that but if it turns out like it is in my head it will be awesome. I want my solar up top and the ability to strap down some chairs or bigger light weight items. Ideally I want a decent spot I can lay on the roof and sleep up there when the stars are out. My last van had a rack I could sleep in and I loved it. With all that said I don't notice a lot of flex. The top itself does seem to provide a decent amount of structure. I drive some pretty rough dirt roads just getting up to my house and I don't notice any flex really. I haven't taken it on any serious offroad yet. I just did the top last January. Time will tell. The frame under the van seems to take most of the flex. I don't even really hear a lot of creaking from the back. My van is pretty quiet riding down the road except for my tools jingling softly in the back against each other. I have a decent stereo in the van but I make it a point in all my vehicles to turn it off on a regular basis to just listen to whatever might be rattling in the vehicle. My hearing sucks most of the time but I can hear a bolt that loosened itself a half turn when it comes to my rides and I am obsessed with having no squeaks. Additionally I just really like hearing the motor running and the exhaust flowing. I really appreciate all things mechanical.
DaYeti is offline   Reply With Quote
Old 03-22-2018, 08:30 AM   #34
Member
 
Join Date: Sep 2014
Posts: 55
Quote:
Originally Posted by marret View Post
Great photos, work and read. Hats off to you for getting it done. Van looks super.
Thank you Marret,

I appreciate the kind words.
DaYeti is offline   Reply With Quote
Old 03-24-2018, 03:15 PM   #35
JWA
Senior Member
 
Join Date: Jan 2011
Location: Reynoldsburg, Ohio
Posts: 3,774
Send a message via Yahoo to JWA
I have a few photos of my stripped out raised rood 2005 E350 extended body if they'd be helpful with your above the gutter rail supports.

As I found out a raised roof where the original roof structure is removed, where only the fiberglass shell is in placed the body will rack just enough to make opening the rear doors very difficult.

I won't bother you to death on this but its worth looking into for safety reasons in the area behind the B Pillars.

Nice work---really enjoy your process so far!
JWA is offline   Reply With Quote
Old 03-24-2018, 05:38 PM   #36
Member
 
Join Date: Sep 2014
Posts: 55
Quote:
Originally Posted by JWA View Post
I have a few photos of my stripped out raised rood 2005 E350 extended body if they'd be helpful with your above the gutter rail supports.

As I found out a raised roof where the original roof structure is removed, where only the fiberglass shell is in placed the body will rack just enough to make opening the rear doors very difficult.

I won't bother you to death on this but its worth looking into for safety reasons in the area behind the B Pillars.

Nice work---really enjoy your process so far!
Thanks JWA. I have a few pictures myself but would love to have access to yours as well if it isn't too much trouble. So far I haven't noticed a ton of flex back there. Never really parked on anything however that isn't fairly level so far. Hopefully with the way my top is installed and the current unistrut frame I built in there I will be good.

My plan on the roof rack will be to go all the way down on the outside of the top to the gutters with supports. I have a plan to follow the roof line as well in the front as a sort of Limb riser style protection for the fiberglass. My idea which may change but currently I would like the aluminum brace for the rack in the front to be about an inch forward of the roof line in the front but contour to the curve of the roof. I will also use the bottom of that support, right above the windshield, to attach a curved LED light bar. I don't really need the light but I do feel like it will add to the look of the van and come in handy on occasion. It is just going to be an Amazon cheapie version.
DaYeti is offline   Reply With Quote
Old 03-26-2018, 08:47 AM   #37
JWA
Senior Member
 
Join Date: Jan 2011
Location: Reynoldsburg, Ohio
Posts: 3,774
Send a message via Yahoo to JWA
Quote:
Originally Posted by DaYeti View Post
Thanks JWA. I have a few pictures myself but would love to have access to yours as well if it isn't too much trouble. So far I haven't noticed a ton of flex back there. Never really parked on anything however that isn't fairly level so far. Hopefully with the way my top is installed and the current unistrut frame I built in there I will be good.
Have a look at these, hopefully the link to Imgu works here: https://imgur.com/a/kbyVF

HTH

The biggest concerns maintaining original structural rigidity is keeping the B- & C- Pillars intact, as delivered from the factory. I don't think removing the intermediate roof ribs is a huge issue but those do lend a bit of reinforcement should the van ever roll over.


I'll be interested how much fun you'll have when encountering the first stiff side wind blast after installing your top---that's quite "exhilarating".
JWA is offline   Reply With Quote
Old 03-26-2018, 09:08 AM   #38
Member
 
Join Date: Sep 2014
Posts: 55
Quote:
Originally Posted by JWA View Post
Have a look at these, hopefully the link to Imgu works here: https://imgur.com/a/kbyVF

HTH

The biggest concerns maintaining original structural rigidity is keeping the B- & C- Pillars intact, as delivered from the factory. I don't think removing the intermediate roof ribs is a huge issue but those do lend a bit of reinforcement should the van ever roll over.


I'll be interested how much fun you'll have when encountering the first stiff side wind blast after installing your top---that's quite "exhilarating".

That is a serious structure you have in there. Mine is just the fiberglass with some wood glued up in there. I will be posting on that soon. Did that add a lot of weight for you up high?

As far as wind goes, I live in a fairly windy area. We regularly get 50+ mph winds in the winter time. I have had a couple rides out toward the airport where the wind was really blowing. Definitely something I can feel. Wind resistance in a vehicle I think is more related to having a stiff suspension than anything else. My old Syncro was not fun in the wind. Something about how they are weight balanced makes them all but change lanes when a crosswind hits. So far in this van I haven't had the white knuckle feelings I had in the syncro. Sometimes it is just better to get off the highway and hit the side roads. Slower seems to help.

Thanks again for the pics of your top.
DaYeti is offline   Reply With Quote
Old 04-03-2018, 08:48 AM   #39
Member
 
Join Date: Sep 2014
Posts: 55
Inside the top and top insulation

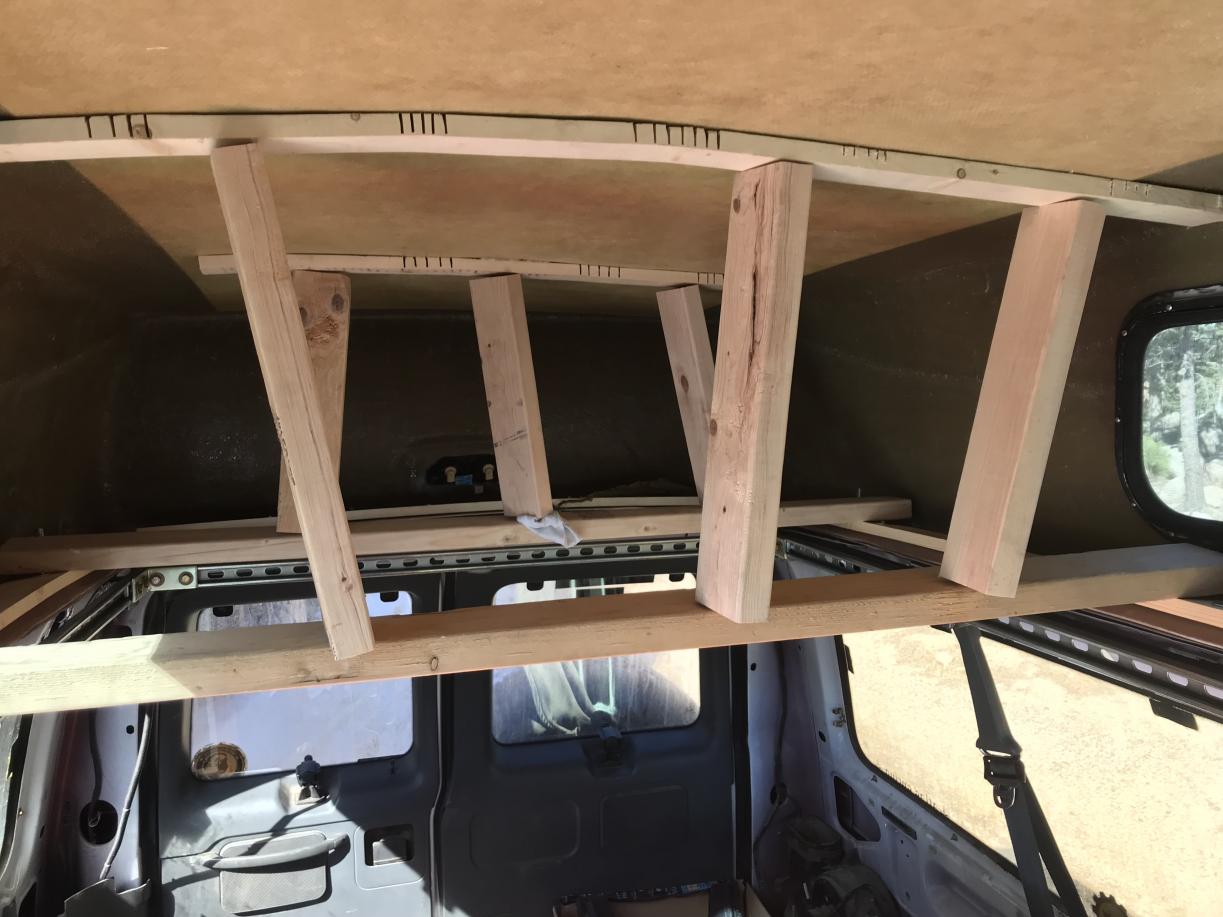
Finally got around to finishing out the interior of the new fiberglass top. This was a long process for me. I started by glueing up a couple of furring strips. My top didn't have wood installed at Fibrene and I got it sort of second hand so couldn't be too picky. I saved literally a couple thousand bucks off the cost and had local pickup. The top had never been installed but was purchased in a group of three for a local van outfitter who suddenly needed to move their shop and wanted the least amount of crap to transfer over. Moving is hard so I understand for sure. I picked this top up for close to 75% discount over what I was quoted for the same top from Fiberene with shipping so you see I didn't care that it didn't have the wood.

I made relief cuts so it would contour to the curved surface of the top.


My make shift clamps to hold everything up tight while the glue set. I did this in February in the mountains of CO so dry time was extra long. I put a small space heater in the van overnight. Kept the van in the 60ish degree area for a couple days. Long enough for the glue to initially dry.


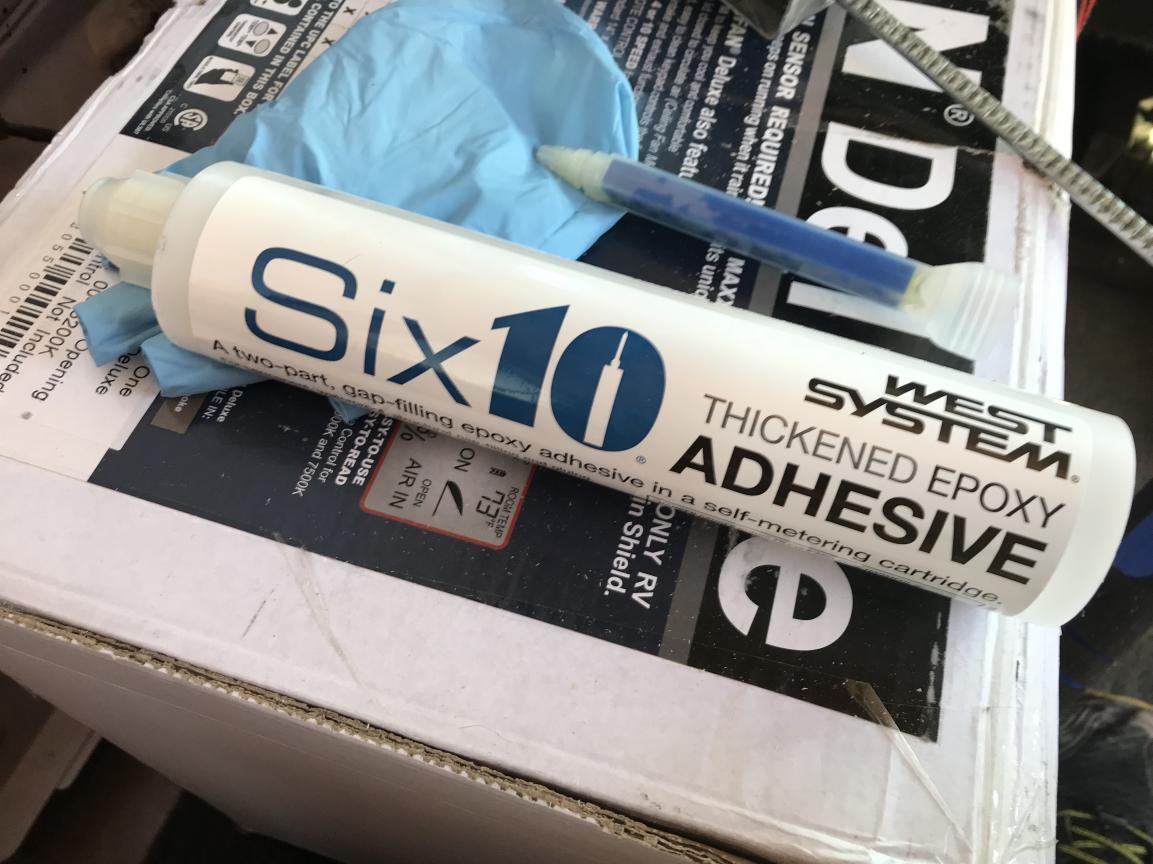
This is the glue I used. It is thickened resin that doesn't drip. Expensive at $20 bucks a tube but worked really, really well. They are solid. I glued three cross pieces the full width of the top and the two smaller fan braces and it took 1 tube. By the way the tube isn't totally full from the factory. It is a two part that mixes as it dispenses in a one part tube. The mechanism that separates the two takes up some space I guess. I did have enough. Wish they had just done it as a two part tube as I have the gun for that as well.


I paid special attention to where my fan would go. This pic shows the fan installed but I glued the pieces up before cutting the hole for the fan. I wanted it to be mounted nice and solid. Sorry the pic is sideways. Sometimes they rotate when I upload and I am too lazy to fix it. You get the idea.


I let those cure fully for almost two full months. Got busy plus felt like that was a good plan. Two weeks of that was the van in the shop getting the transmission re-worked. I felt a huge loss of power in 3rd gear heading over I-70 and took it in to have it checked out. I was still under warranty from the initial rebuild I had done during the 4x4 conversion process. I was under warranty by 4 days actually. Turns out I had a lot wrong and the transmission had to be completely rebuilt again. Frustrating for sure since it had only been about 10k miles. I don't really trust mechanics. I thought we had seriously beefed it up during the build process but now I am not as confident. They did some additional beefing but under warranty work at this point so not sure they spent any more time or money than they had to. I will be trying another shop like John Wood in the future. He does a 5 year unlimited warranty and really does a lot to beef up the A40D. I also had my fan clutch stick in the on position for the second time in less than a year so I decided to convert to an electric fan. That will be another post in a bit.

Hardest part for me was measuring the curve in the front. I used cardboard as a template. All I had were Girl Scout cookie case boxes left over from my kiddos but it worked.


I used cheap underlayment which I thought we bend pretty easily. It is also thin and pretty lightweight. That curve is pretty steep. The sides are required to keep it flexed up in the right position but it really keeps everything nice and solid. I really feel good about how it all fits together to hold itself in the correct spot. You can see that I put half inch pick foam insulation under everything. I obviously laid the foam around the wood strips I installed which are also a half inch. A Home Depot half inch that is. You know what I mean if you have ever actually measured their lumber. I also used just flat aluminum to join the two pieces together. When I trimmed out the window pieces I cut the foam without the window and just pressed hard where the window is and it made a perfect outline of the shape I needed. Then I used the foam to make the window cut in the wood. Worked enough to make it work for me.


The carpeted sidewalls account for my no so great cutting skills. And I feel like it adds a nice soft touch to the top.


I added in some LED can lights as well.


Carpet was super cheap. underlayment was super cheap, foam super cheap. I spent about $125 total for everything and I feel really good about the look as well as how solid it all came out. I actually surprised myself. Once everything was done the real test happened. My only requirement was to finish it out while taking up the least amount of headroom. I am 5'11 and I didn't want to bonk my head. At the back of the top is where it is the lowest. Technically this area will have a permanent part of the bed platform so I won't be standing here but I had success. I can stand fully with shoes on and everything and not touch. In the middle of the top I have several inches of headroom. It's not perfect but I am happy. Sorry about the ugly mug and the messy beard but I had been working.

DaYeti is offline   Reply With Quote
Old 04-03-2018, 10:33 AM   #40
Senior Member
 
arctictraveller's Avatar
 
Join Date: Mar 2013
Posts: 4,244
Great work, lots of work putting the thread together too. Keep the updates coming.
__________________
Arctic Traveller
KC6TNI
2001 GTRV
Advanced 4wd
Agile Ride improvement package
arctictraveller is offline   Reply With Quote
Reply

Tags
4x4 van, campervan, get out explore, high top van, ujoint off road


Posting Rules
You may not post new threads
You may not post replies
You may not post attachments
You may not edit your posts

BB code is On
Smilies are On
[IMG] code is On
HTML code is Off
Trackbacks are Off
Pingbacks are Off
Refbacks are Off

» Featured Campgrounds

Reviews provided by

Powered by vBadvanced CMPS v3.2.3
Disclaimer:

This website is not affiliated with or endorsed by Sportsmobile SIP or any of its affiliates. This is an independent, unofficial site.


All times are GMT -6. The time now is 05:03 AM.


Powered by vBulletin® Version 3.8.8 Beta 4
Copyright ©2000 - 2024, vBulletin Solutions, Inc.