Journey with Confidence RV GPS App RV Trip Planner RV LIFE Campground Reviews RV Maintenance Take a Speed Test Free 7 Day Trial ×


Reply
 
Thread Tools Display Modes
 
Old 01-22-2024, 05:58 PM   #1
Junior Member
 
Join Date: Jul 2023
Posts: 4
2005 E350 Quigley Conversion - Dead Batteries

Hey All,

Sorry im back again with a stupid question. Went out to my van this weekend and the battery was DEAD. Stuck jumper cables on the positive and negative terminals under the frame where the two batteries were moved and I'm not getting any power at all through the batteries.

Obviously, they are toast.

However, i really need to drive the van this weekend and i can seem to figure out how to get the batteries out of the boxes on the frame? I don't really have any kinda of lift but i figure i can crawl under and get the battery out if needed

https://photos.smugmug.com/Econoline...IMG_4349-L.jpg

<a href="https://bentonlancaster.smugmug.com/Econoline-/i-WrHFwkR/A"><img src="https://photos.smugmug.com/Econoline-/i-WrHFwkR/0/c4f63746/L/IMG_4349-L.jpg" alt=""></a>

Im assuming hit the mounting bolts to the frame/But didn't know if there was maybe a trick to just opening the boxes?

Does anyone know the trick and could walk me through it?

Also, Do i need to replace both batteries?

Thanks
Benton
8019462110

beenriding is offline   Reply With Quote
Old 01-22-2024, 07:17 PM   #2
Senior Member
 
dhally's Avatar
 
Join Date: Sep 2009
Location: SE Washington
Posts: 1,031
Garage
Those look like Ford aux bat boxes. The mounting brackets stay on the frame. The battery boxes can be individually dropped down by removing bolts on each end. There are stays to prevent dropping the battery. But a floor jack of some kind is almost required to lower them safely.

You can test the batteries separately, but highly recommended to replace both.
__________________
---------------------
2009 E250 RB 5.4L "SilVan"
dhally is offline   Reply With Quote
Old 01-22-2024, 07:19 PM   #3
Senior Member
 
Join Date: Sep 2013
Location: Georgia
Posts: 746
Man what a bummer ! Maybe buy a Harbor Freight jack - keep it clean and box carefully opened - and return it when done ? Kinda like "Walmarters" do ! In any event - take it slow - those damn things are HEAVY !
doublevan2 is offline   Reply With Quote
Old 01-22-2024, 10:25 PM   #4
Senior Member
 
1der's Avatar
 
Join Date: Apr 2013
Location: San Francisco, CA
Posts: 3,285
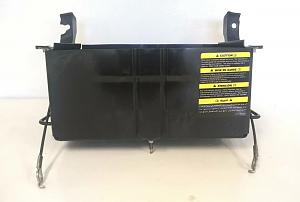
Those are the two group 65 starter batteries. They weigh about 45 pounds each. No lift required, these are not the 4D house batteries at 130lbs!

Each battery box has four bolts that screw into a retained bracket with nuts that is held onto the backside of the frame with tabs that go into slots on the frame.

Only ONE bolt, the upper right, of the four needs to be removed completely, the other three need to be loosened enough to allow the box to be raised up slightly and shifted sideways to clear the shafts of the three bolts that stay threaded into the retained nuts. At this point lower the battery box to the point it will be supported by the strap cables on the outside of each end of the box. Tilt the battery box over so you can see the top of the battery box. There will likely be a plastic cover over the top of the battery, it is attached by two small bolts. Once those are removed and the battery cover is lifted off, there will be a long bolt that screws through the threaded retainer in the bottom of the battery box. This long screw passes through a wedge that is used to secure the battery in the box.

Install the new batteries, wedges, plastic cover. Lift the battery box up bench press style and guide back onto the three bolts. Install the fourth bolt that was removed and tighten everything up.

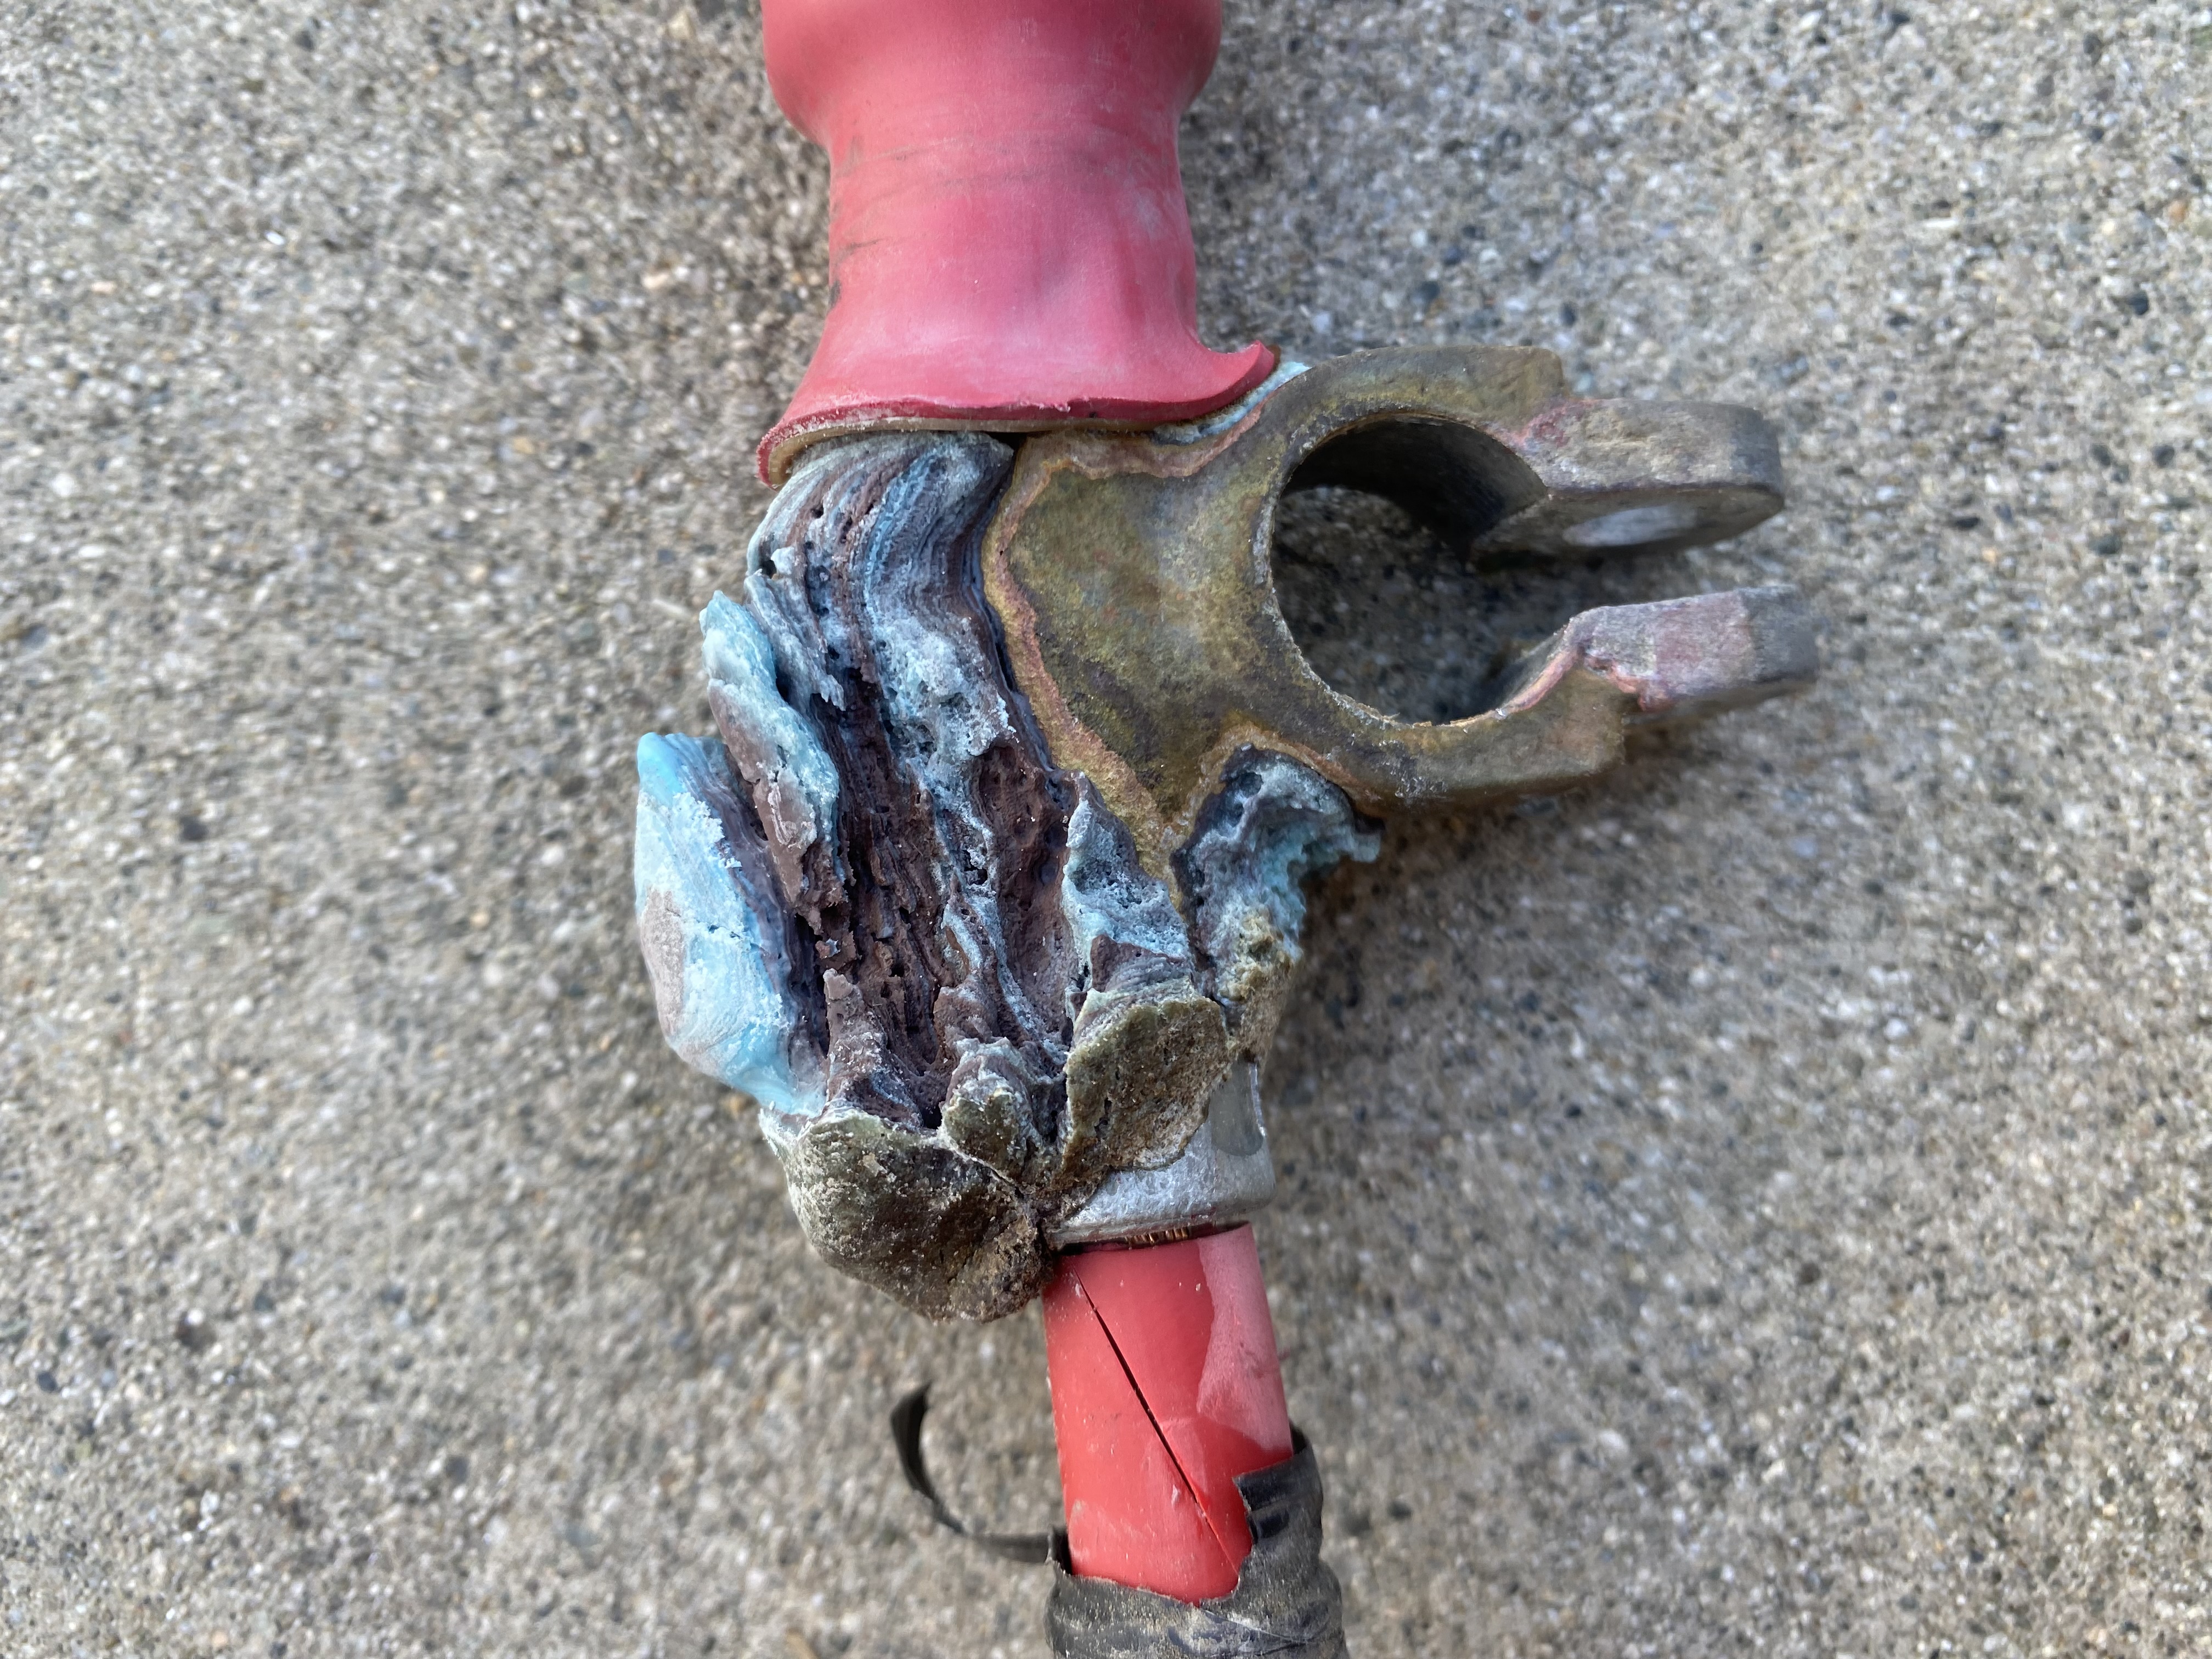
You may need to apply penetrating oil to the backside of the bolts if they are encrusted or rusty.

Name:  IMG_8987.jpeg
Views: 57
Size:  22.4 KBName:  IMG_8988.jpeg
Views: 56
Size:  21.7 KB
Click image for larger version

Name:	IMG_8989.jpeg
Views:	1
Size:	130.2 KB
ID:	49585
__________________
Ray
Beastie 3: 2002 7.3 EB Cargo: Agile TTB, CCV High Top, Custom Walk Through, Lots of stuff added. www.BlingMyRig.com
1der is offline   Reply With Quote
Old 01-28-2024, 01:56 PM   #5
Member
 
Glenn P.'s Avatar
 
Join Date: Apr 2020
Location: CA
Posts: 78
Garage
Done this a few times on my 2005 Quigley with the 6.0 diesel. I use a floor jack with a 2x8 on top, about 2-3 ft long. I lower both batteries in their boxes and then install using the same method.

As mentioned already, always change batteries in pairs, this is not a place to go cheap and just do one. Also, clean the contacts SUPER well as it is obviously extremely time consuming to check this later.
Glenn P. is offline   Reply With Quote
Old 01-29-2024, 02:03 PM   #6
Senior Member
 
Tapatio's Avatar
 
Join Date: Nov 2010
Location: California
Posts: 1,012
Garage
Check the battery lugs while the batteries are down. They can corrode and cause resistance that can potentially overheat your alternator. The resistance will also cause the batteries to not charge equally.

This was the second positive battery terminal (towards the back) on my 2006.

Tapatio is offline   Reply With Quote
Reply


Posting Rules
You may not post new threads
You may not post replies
You may not post attachments
You may not edit your posts

BB code is On
Smilies are On
[IMG] code is On
HTML code is Off
Trackbacks are Off
Pingbacks are Off
Refbacks are Off

» Featured Campgrounds

Reviews provided by

Powered by vBadvanced CMPS v3.2.3
Disclaimer:

This website is not affiliated with or endorsed by Sportsmobile SIP or any of its affiliates. This is an independent, unofficial site.


All times are GMT -6. The time now is 02:35 PM.


Powered by vBulletin® Version 3.8.8 Beta 4
Copyright ©2000 - 2024, vBulletin Solutions, Inc.