|
|
 06-28-2017, 02:27 PM
|
#191
|
|
Senior Member
Join Date: Jul 2011
Location: TN
Posts: 10,251
|
Quote:
Originally Posted by bemerritt

The top is coming down surprisingly well, crazy how much slop is allowed within the design.
|
Precisely, but that's the way it is and the design has been the same for about 50 years now.
I recently did the canvas on Twogone's van and I had mine apart on my old Sporty before that. I don't envy you the job but you'll be stoked once it's done and you have a big drivable tent with a kitchen and tunes. I would go through Boywonder's post on canvas about 5 times before you start. I documented it too on Twogone's build (TGTBT) and my build and re-build of Rusty (Look what just drove up in my driveway.....).
Basically, remove the top and flip it. attach canvas with firring strips, then flip it back over and put it on the van with the canvas hanging free at the bottom. Line it up right and it's not too difficult to get the bottom attached, also with firring strips and lots of butyl. I would LOVE to know how SMB does this job and how many hands they use. My son and I did Twogone's in a day or so. The hardest part was lining up interior panels inside the top. We had to move the canvas around a good big to get everything square and flush.

|

|

|
|
06-28-2017, 02:42 PM
|
#192
|
|
Senior Member
Join Date: May 2015
Location: San Clemente, CA
Posts: 552
|
Yeah, boywonder's thread has had many more views since Istarted down this path. Even got the chance to see it in person, super helpful and Scott has been awesome. Even stopped by on Monday to see the progress.
|
|
|
|
|
06-28-2017, 06:47 PM
|
#193
|
|
Senior Member
Join Date: Feb 2013
Location: San Francisco/Nevada City
Posts: 3,769
|
Quote:
Originally Posted by rallypanam
I actually might have some old ones lying around. I'll try and remember to look tonight.
|
No dice, sorry!
|
|
|
|
|
06-29-2017, 12:37 PM
|
#194
|
|
Senior Member
Join Date: Mar 2013
Posts: 4,244
|
__________________
Arctic Traveller
KC6TNI
2001 GTRV
Advanced 4wd
Agile Ride improvement package
|
|
|
|
|
06-29-2017, 01:03 PM
|
#195
|
|
Senior Member
Join Date: Feb 2013
Location: San Francisco/Nevada City
Posts: 3,769
|
Those would probably work, but I'm pretty sure the hooks were reasonably cheap from SMB...
|
|
|
|
|
07-02-2017, 11:21 PM
|
#196
|
|
Member
Join Date: Apr 2014
Location: los angeles
Posts: 91
|
Read through and Sub'd. Great to find you on Instagram earlier!
|
|
|
|
|
07-04-2017, 10:14 PM
|
#197
|
|
Senior Member
Join Date: May 2015
Location: San Clemente, CA
Posts: 552
|
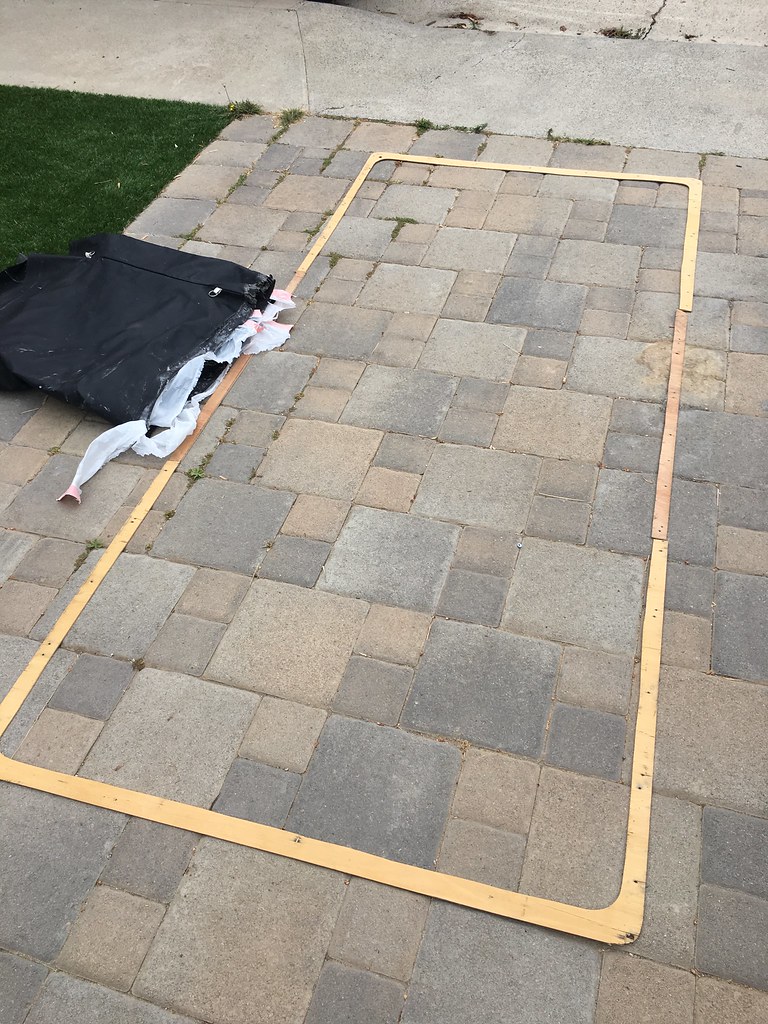
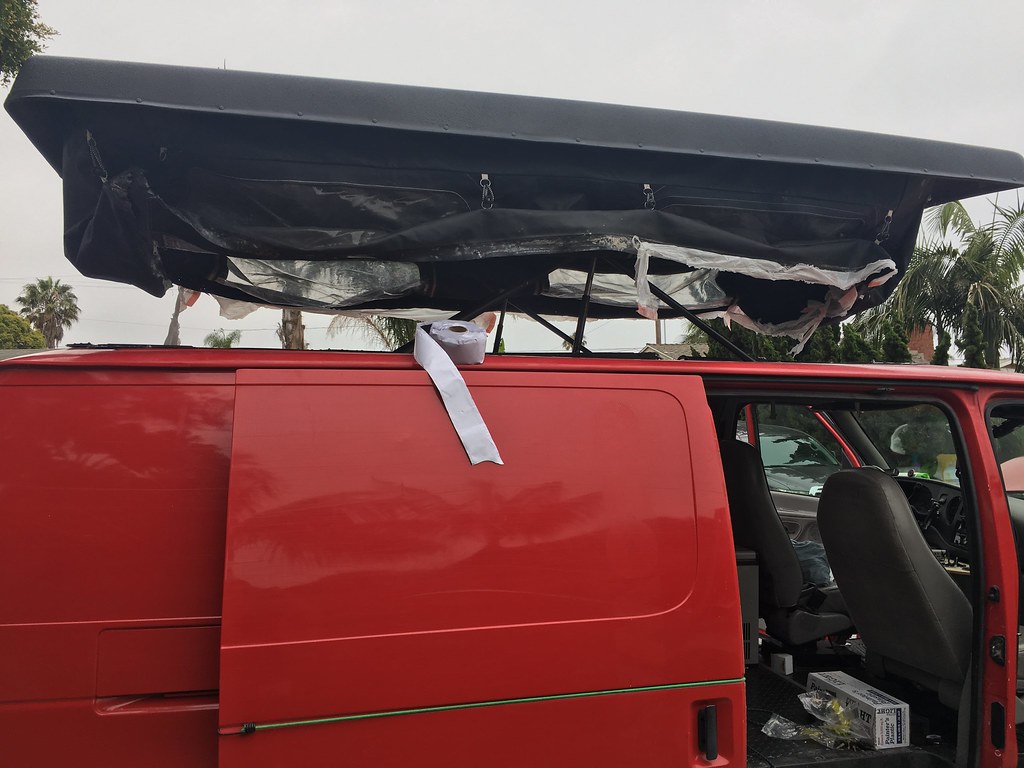
Got the canvas up a couple days ago and could not be more pleased with how it turned out. I suppose I did it somewhat backwards and placed the butyl/gasket/butyl combo down on the van and then secured the canvas to that. The risk was not getting the size right, but it seemed rather intuitive where to put it, so I went for it.
Started by cutting the smb headboard into a ring. This let me ensure the right size, use materials I already had on hand and give me the leeway to insulate and install a proper headliner at a later date.
Then I screwed it into the fiberglass top
First later of butyl on the van
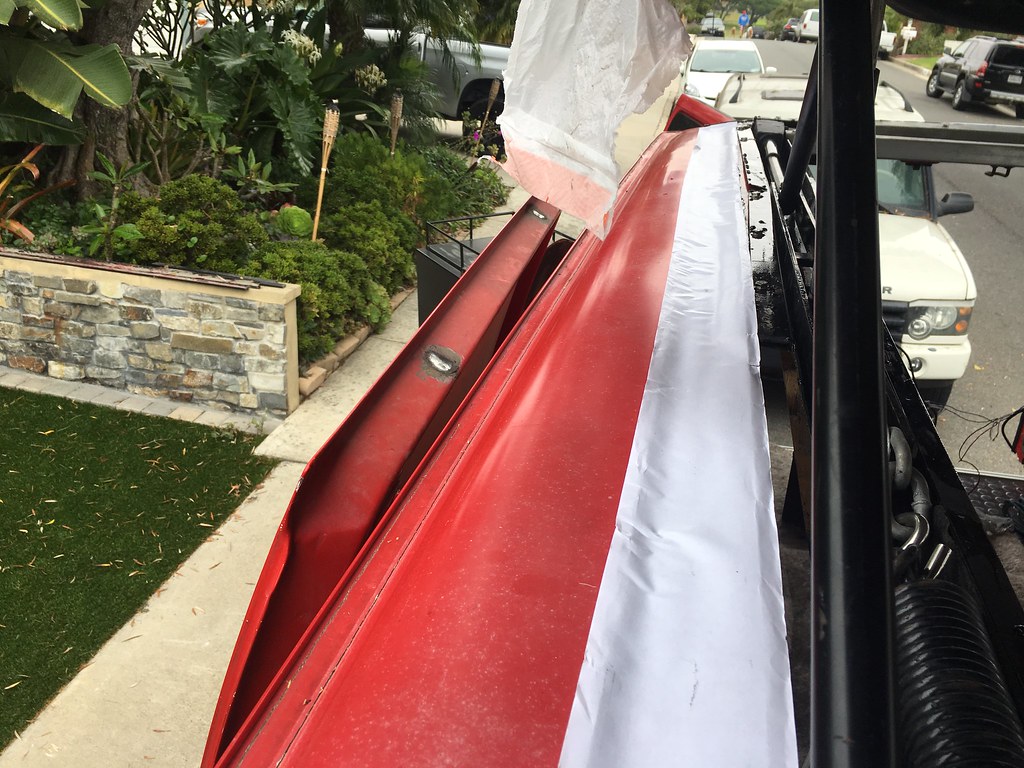
Filling in the "ribs"

Gasket next. As you can see, the butyl is wider than the gasket. I had 2.5" butyl, 2" would be better, but the next size is 1.5". Boywonder and i both agree that if we were to do it again, we would use 1.5".
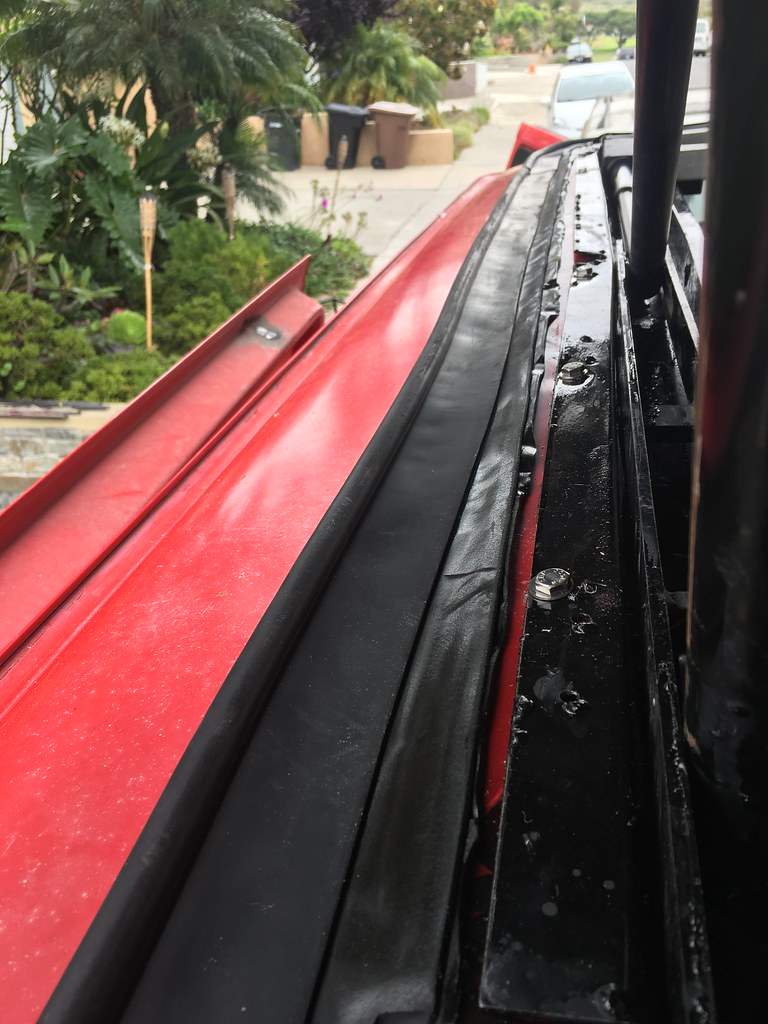
THe next part was hard, so no pics. Basically cut scrap wood and screw down through the canvas with self tapping screws to complete the seal. i went back and re did some of the corners once I saw it from the outside. My tip for this is to not worry about wood in the corners. Attack it with a large washer setup (similar to those from the top) which lets you get right up against the gasket. This is where my reverse order probably makes it harder.
Also, had some black bungee on hand, so i swapped that in for the white. Really happy with the look of the black canvas/top with the rest of the van.

|
|
|
|
|
07-04-2017, 10:19 PM
|
#198
|
|
Senior Member
Join Date: May 2015
Location: San Clemente, CA
Posts: 552
|
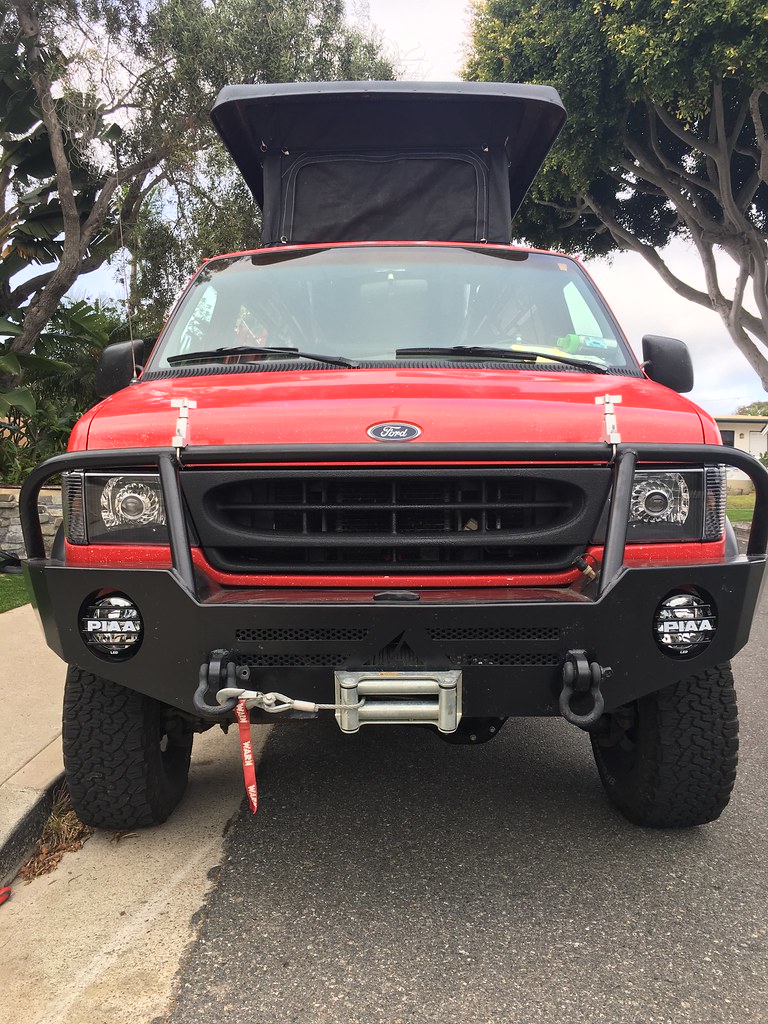
Up next i installed some new lights from vantage. really happy with the look, and overall the install was relatively straight forward. The hardest part was finding room under the hood to mount everything and route the new cables.
Also, due to being alerted by boywonder, picked up some led PIAA fog lights on clearance to replace the hellas in my aluminess bumper. Was never pleased with the hellas and they filled with water as I crossed the mohave river, so it was an easy decision.
Also, took the time to raptor line the grill. Again, very happy with how it turned out.
|
|
|
|
|
07-04-2017, 10:29 PM
|
#199
|
|
Senior Member
Join Date: May 2015
Location: San Clemente, CA
Posts: 552
|
So now the not fun part, the van wont start...
I believe I probably shorted something out, but I'll try and outline what I have done/experienced in hope someone has some good ideas. Here is hte order i remember doing things.
1. installed one new headlight, tested it by turning the key to the on position and flashing the brights/blinkers
2. Next day went to move car, car started, but lost power while moving.
3. Got out of the van, looked around, started it back up and proceeded to park it.
4. Installed the other headlight, removed the grill.
5. I tgried removing the outlet(?) that is attached to the grill that I presume is for jumping and/or pre heating the 7.34 in a service fleet scenario.
6. Realized this wasnt going to work after trying to rtemove the wrong cable and reinstalled it all, with juist pushing the "plug to the side
7. Put the key in the ignition and had no power at all
over the next two days I tried everything. sometimes when i put the key in, I get nothing at all, but one time I did get power after disconnecting the battery and then connecting it. The van started up and was idling. My father wiggled the positive terminal of the starter battery and the engine shutoff. Since then we have not been able to get teh van to turn over.
THe van still sparingly has power when I put the key in. If it does not get power, usually disconnecting the battery and reconnecting it will give it power. THe problem is now the engine will not turn over. Seems to be getting plenty of power, but is not igniting.
I tried disconnecting the new headlights, that didnt seem to have any effect.
I reconnected the lights and the van is getting power, but not turning over. Tomorrow the plan is to try and tow it a mile down the road to a shop to take a look at it.
I checked all fuses that seemed important. Anything obvious I seem to be missing? Hard not to point the finger at myself, and hopefully there is something elementary that can be learned from all of this.
All i want to do is go camp this weekend, please help!
|
|
|
|
|
07-05-2017, 07:28 AM
|
#200
|
|
Senior Member
Join Date: Jul 2011
Location: TN
Posts: 10,251
|
Awesome job on the penthouse. Big washers in the corners are a great idea. I wish I had thought of that.
Sorry to hear about your troubles with power, but if the right people are listening you'll be on your way in no time. Obviously you've checked both ends of your battery ground, right?
|
|
|
|
|
|
 Posting Rules
|
You may not post new threads
You may not post replies
You may not post attachments
You may not edit your posts
HTML code is Off
|
|
|
|
 » Recent Threads
 |
|
|
|
|
|
|
|
|
|
|
|
|
|
|
|
|
|
|
|
|
|
|
|
|
|
|
|
|
|
|
|
|
|


 Linear Mode