Some small bits of progress over the last couple weeks:
Insulation
As I mentioned previously, there's not a whole lot of large easy panels in the rear of the passenger van. Adding Thinsulate was easier than the butyl sound deadening, but still had to use many small pieces that were roughly fit together. Lots of stuffing small bits into nooks and crannies - who knows how effective that will be, but I had the extra Thinsulate so might as well.
Plywood flooring
Roughed in some 3/4" CDX plywood by scribing the edges and cutting with a jigsaw. It's not perfect, but one edge will be covered by the storage bench/bed. Next is to apply some rubber diamond plate flooring and get it bolted up using the OEM seat mounting points. I purchased two 4x8' sheets and oriented them "east/west" in the van, so each sheet corresponds to one row of bench seat mounting holes. The cargo area is actually 7' long, so each sheet is actually 3.5' in the N/S direction. I am also going to use a 2'x3' piece bolted to the passenger side captain's seat location (directly behind the front passenger seat) which I will use for tying down our cooler. This way I can easily remove the cooler and associated flooring, and bolt in the 4th captain's seat.
 Stereo, speakers, dashcam
Got the new setup installed and ran the wiring to the back for the backup cam and rear dash cam. Backup video quality is OK... nothing special but it is certainly better than not having one! The cheap Boss stereo works fine and the new speakers are an improvement over stock. I wish I had stuck with the same model speaker for all 6 locations, but instead I bought two slightly more expensive ones for the front two and cheaped out on the rear 4. They sound surprisingly different and I will need to fiddle with the EQ to find a setting that is a good compromise all around.
Running the wire for the backup cam was not too bad - UJOR already cut through one of the rubber plugs in the floor to run the backup light wiring to the rear bumper, so I just ran the video cable through the same plug. For the dash cam I ran the wire down the rear driver pillar, through the rubber "tube" that runs from the pillar to the door, and then up the inside of the rear door.
Running the wire for the front camera was a little trickier, but not too bad. Couldn't find a good way through the firewall, but found a rubber plug in the driver side footwell that I cut a small slot in. The front camera wire runs down through the footwell, along the frame, and then onto the front bumper where the camera is mounted on the license plate. It's pretty exposed and I might try to tuck it up in the grill somewhere, but this will do for now.

 Ceiling Plusnuts
I originally wanted to install L-track on the ceiling running fore/aft in the van, but didn't want to deal with figuring all that out before our trip. So for now I installed some plusnuts in the existing hex-shaped holes in the ceiling ribs. I will cut some holes in the headliner and install some bolts for now, and then I can use these mounting points later for L-track or other mounting system.
The hex-shaped holes in the ceiling ribs are 12.6mm flat-to-flat, and I had trouble finding a hex rivnut that would fit. I ended up going with
M6 plus nuts that are intended to be installed in a 12mm round hole. I tested a couple and they seemed to install OK by themselves, but I used some 3M DP125 epoxy on the rest of the plusnuts just to ensure they don't spin out. Not sure what the pull out strength will be, but I'm sure it will be enough for hanging a bungee net and keeping light/bulky items out of the way.
 Water leakage in rear windows
Hopefully this doesn't get lost in the noise, but I found some water seeping out of the two holes at the bottom of the rear window. I know that generally water can get inside the body panels of vehicles, but I would have figured this particular cavity should be sealed due to how the window is mounted to the door. Anybody know if this is normal/common, or if this is something I need to fix?


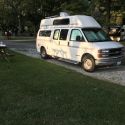
 2008 GMC 3500 SMB


 Linear Mode