Journey with Confidence RV GPS App RV Trip Planner RV LIFE Campground Reviews RV Maintenance Take a Speed Test Free 7 Day Trial ×


Reply
 
Thread Tools Display Modes
 
Old 12-04-2022, 10:57 AM   #1
Senior Member
 
SheepShagger's Avatar
 
Join Date: Apr 2009
Posts: 453
Overhead console build

I've been wanting to do this for years, but knew how I wanted to do it would be a real pain so kept putting it off. Since my headliner needed replacing, I finally bit the bullet a few months ago and started this project.
I wanted overhead console to hold my switches / gauges and provide a little storage. I also wanted it to be as high as possible and keep the sun visors fully functional (ie work on both front and side).

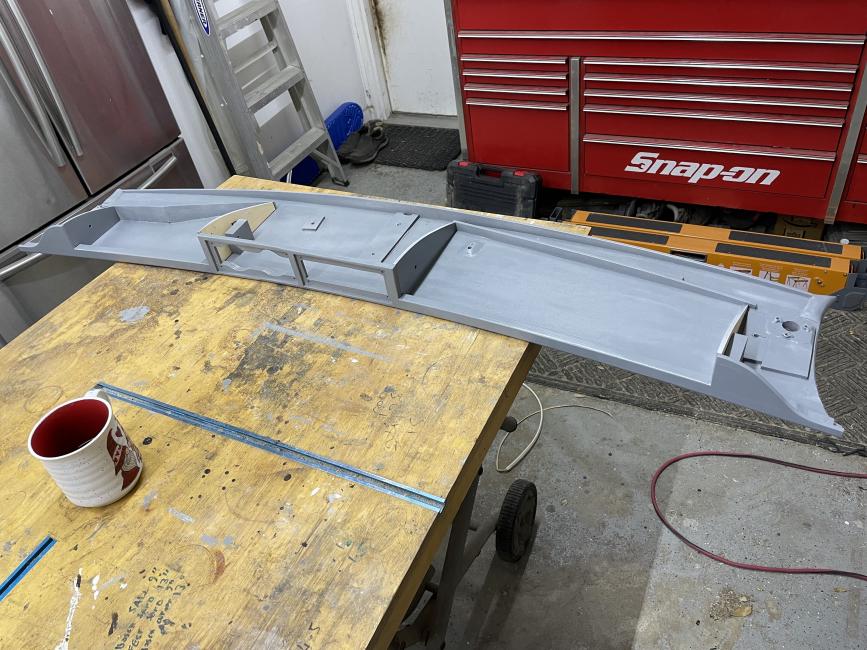
Build it from 1/4 baltic birch ply. Around the mountings I laminated 2 layers together for extra strength, and 3 layers on the front side lip. Again to keep the rigidity their but keep the overall thickness down. I matched the curve of the windscreen on the face of the console for aesthetics. To get all the curves correct around the A pillars, windscreen & roof it took many templates and countless times fitting and removing.


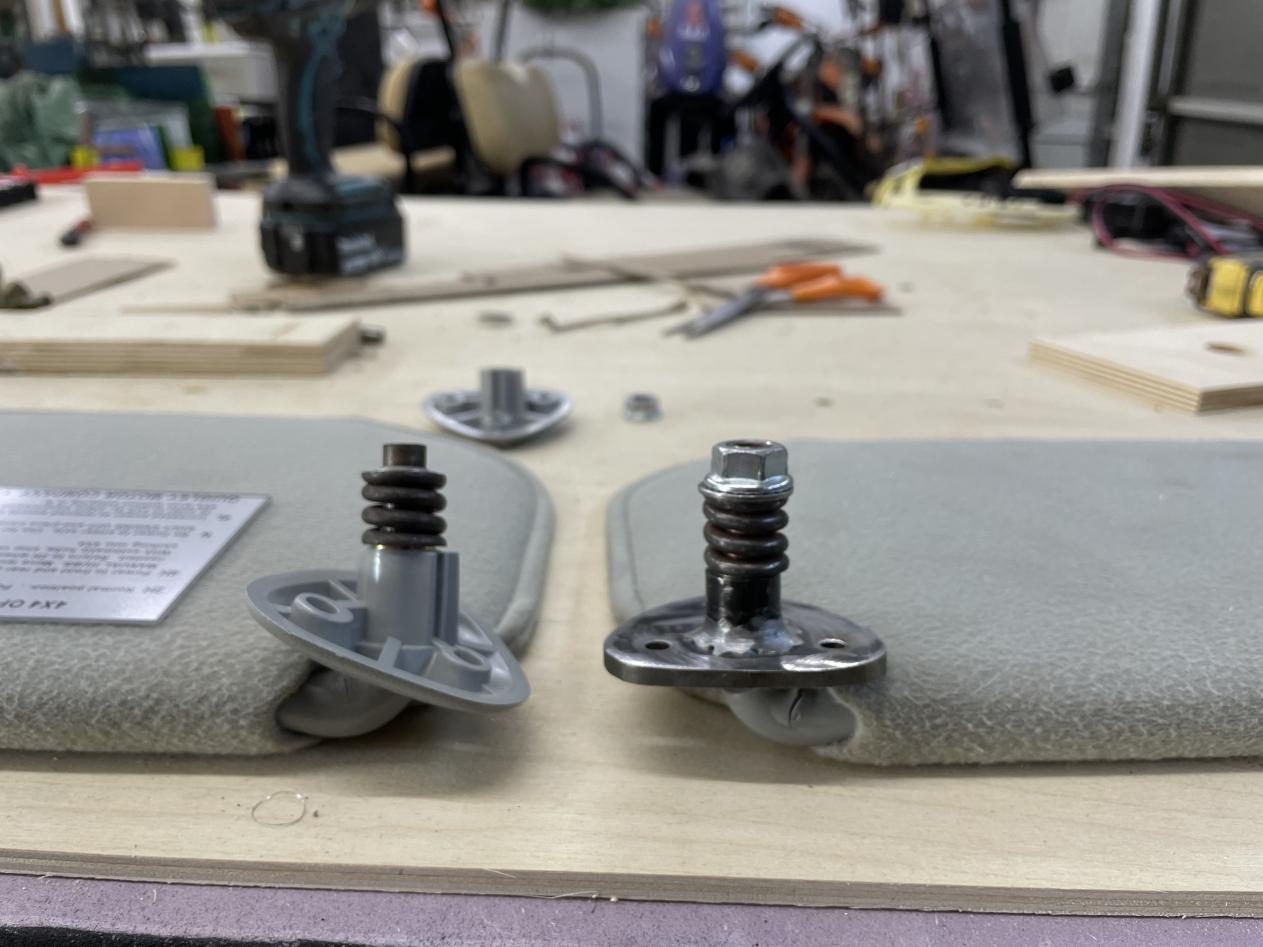
Next was the sun visors. Since the factory mount is angled their is no way to use the factory visor bolted to the overhead console, if you want to use it for the side window as well as windscreen. Although you can play with it enough so that it would works for the windscreen only. I played with making the part of the console the visor mounts to angled, but decided that would look like crap. Also cutting a massive hold in the console so I could use the OEM mounting location with a spacer, but again didn't like the looks of that. So I ended up making my own mounting brackets for the visors. In pic below you can see I removed the circlip that holds the spring, then threaded the visor bar so I can set my own tension on the spring. This now allowed me to make my own mount, that was simply some tube welded to a plate. Their is also a brass bushing I machined for the inside of the tube that way when you rotate the visor it's nice and smooth and it won't ruin the sun visor tube. This was first test fit.


Once I chamfered the edges and painted, looks just like stock.


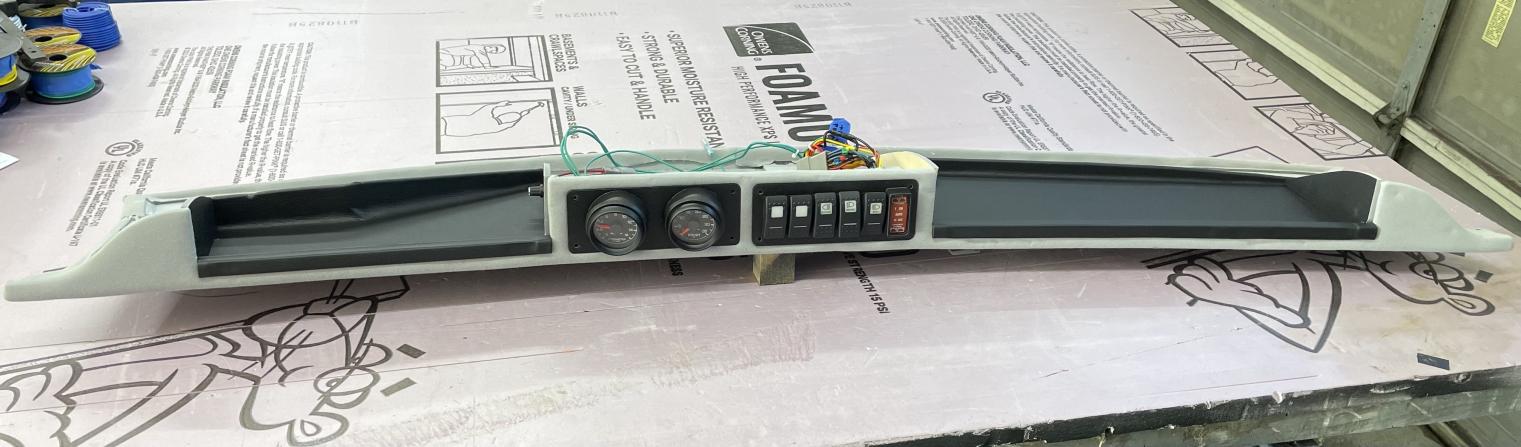
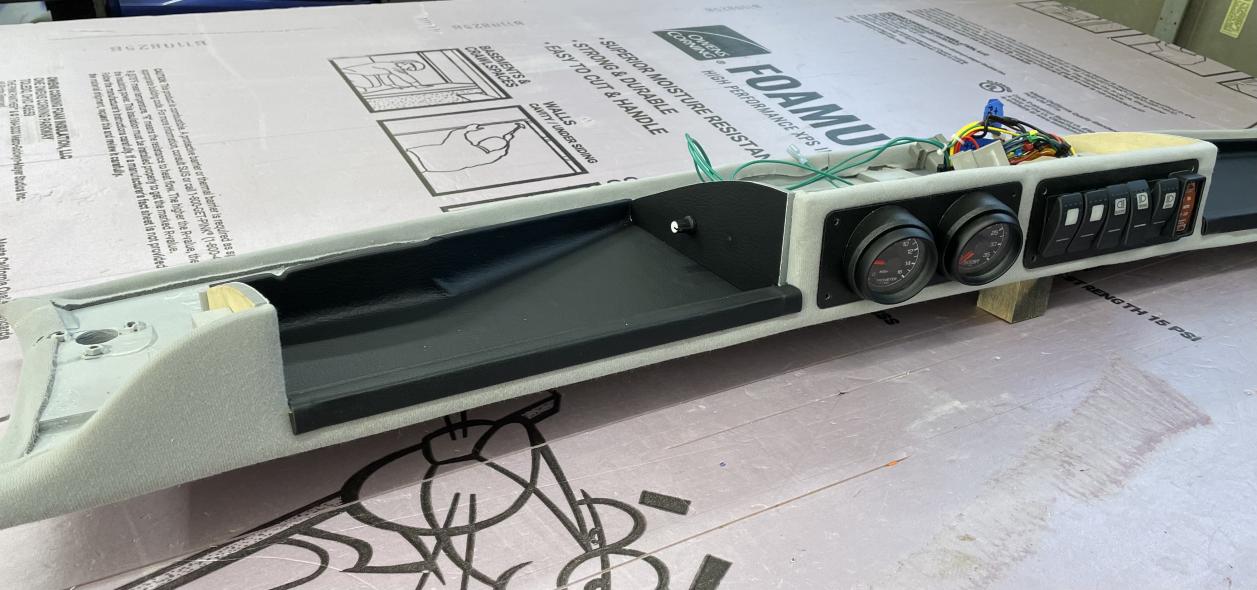
Next was switches and gauges. The switch panel is simply sheet ally with holes cutout for the Carling switches. The gauge panel is perspex with some gauge rings stuck to it. This allowed me to angle the gauges down and to the left. Then both painted with stone guard paint to get a similar texture to other plastic parts in the van.


Then onto covering. I used leftover headliner material for most of the console, then some black marine vinyl for the high wear areas.


For mounting, I made 3 brackets. (one by each sun visor mount, and one in the center). Used rivnuts into the roof cross braces. Again, lots of weird angles to get a perfectly flat mounting area.


Then all finished and installed.

SheepShagger is offline   Reply With Quote
Old 12-04-2022, 11:27 AM   #2
Senior Member
 
Join Date: Feb 2014
Location: Santa Maria, CA
Posts: 586
Very nice!... you made extras, right?
TheLetterJ is offline   Reply With Quote
Old 12-04-2022, 12:38 PM   #3
Senior Member
 
Join Date: Sep 2013
Posts: 703
Awesome build ! Can I put my order in now !?
doublevan2 is offline   Reply With Quote
Old 12-04-2022, 12:47 PM   #4
Senior Member
 
boywonder's Avatar
 
Join Date: Jul 2013
Location: So Cal
Posts: 4,036
Very nice work! especially on the visor mounts.....

1der and I fabricated one for his van and I remember the issues with the angled mounts; not sure how he solved that issue on his console, but yours looks excellent. Nice stainless flat head screws and rounded grey plate are great details.
__________________
2008 E350 RB passenger 4WD SMB penthouse
2013 KTM 350 EXC
2008 KTM 250 XCF-W
2003 Honda Element
boywonder is offline   Reply With Quote
Old 12-04-2022, 01:12 PM   #5
Senior Member
 
Twoxentrix's Avatar
 
Join Date: Mar 2015
Location: Maryland
Posts: 3,338
Garage
Well executed, You've got skills!
May just be me, but I'm getting annoyed with all the interior peripheral lights above & below the windshield - more & more I find them distracting... one day I'll have someone put in dimmers.
__________________
TwoXentrix
"AWOL"
Twoxentrix is offline   Reply With Quote
Old 12-04-2022, 01:22 PM   #6
Senior Member
 
BrianW's Avatar
 
Join Date: Apr 2012
Location: Philadelphia, PA
Posts: 4,198
Overhead console build

Click image for larger version

Name:	IMG_6391.jpg
Views:	5
Size:	180.3 KB
ID:	45934
Click image for larger version

Name:	IMG_6390.jpg
Views:	5
Size:	140.2 KB
ID:	45935
Click image for larger version

Name:	IMG_6387.jpg
Views:	6
Size:	139.8 KB
ID:	45936
Click image for larger version

Name:	IMG_6385.jpg
Views:	4
Size:	124.7 KB
ID:	45937
In case it helps anyone here’s an OEM SMB-built cab shelf from my 1998 van. You can see how they handled the visor brackets: basically a hole in the shelf and extra fabric, allowing the brackets to mount to their original place. I was going to build one for my 2011, which is why I took all the pics, but haven’t gotten around to it.
BrianW is offline   Reply With Quote
Old 12-04-2022, 01:24 PM   #7
Senior Member
 
BrianW's Avatar
 
Join Date: Apr 2012
Location: Philadelphia, PA
Posts: 4,198
Click image for larger version

Name:	IMG_6384.jpg
Views:	4
Size:	122.2 KB
ID:	45938
Click image for larger version

Name:	IMG_6383.jpg
Views:	4
Size:	128.8 KB
ID:	45939
Click image for larger version

Name:	IMG_6382.jpg
Views:	4
Size:	112.5 KB
ID:	45940
BrianW is offline   Reply With Quote
Old 12-04-2022, 01:29 PM   #8
Senior Member
 
BrianW's Avatar
 
Join Date: Apr 2012
Location: Philadelphia, PA
Posts: 4,198
Click image for larger version

Name:	IMG_6393.jpg
Views:	6
Size:	186.0 KB
ID:	45941
Click image for larger version

Name:	IMG_6388.jpg
Views:	6
Size:	212.2 KB
ID:	45942
BrianW is offline   Reply With Quote
Old 12-04-2022, 01:45 PM   #9
Senior Member
 
SheepShagger's Avatar
 
Join Date: Apr 2009
Posts: 453
Quote:
Originally Posted by Twoxentrix View Post
Well executed, You've got skills!
May just be me, but I'm getting annoyed with all the interior peripheral lights above & below the windshield - more & more I find them distracting... one day I'll have someone put in dimmers.
These are wired to the OEM dimmer, but even so are too bright. So they have their own dimmer. I use this dimmer to set them to the same brightness as the OEM cluster then I don’t find them annoying at night, and they still can be dimmed with the OEM dimmer, so I only have 1 dimmer to adjust at night if I desire.
SheepShagger is offline   Reply With Quote
Old 12-04-2022, 01:52 PM   #10
Senior Member
 
Twoxentrix's Avatar
 
Join Date: Mar 2015
Location: Maryland
Posts: 3,338
Garage
Quote:
Originally Posted by SheepShagger View Post
These are wired to the OEM dimmer, but even so are too bright. So they have their own dimmer. I use this dimmer to set them to the same brightness as the OEM cluster then I don’t find them annoying at night, and they still can be dimmed with the OEM dimmer, so I only have 1 dimmer to adjust at night if I desire.
Now that's something I can appreciate...Obviously you planned ahead.
__________________
TwoXentrix
"AWOL"
Twoxentrix is offline   Reply With Quote
Reply

Thread Tools
Display Modes

Posting Rules
You may not post new threads
You may not post replies
You may not post attachments
You may not edit your posts

BB code is On
Smilies are On
[IMG] code is On
HTML code is Off
Trackbacks are Off
Pingbacks are Off
Refbacks are Off

» Featured Campgrounds

Reviews provided by

Powered by vBadvanced CMPS v3.2.3
Disclaimer:

This website is not affiliated with or endorsed by Sportsmobile SIP or any of its affiliates. This is an independent, unofficial site.


All times are GMT -6. The time now is 01:10 AM.


Powered by vBulletin® Version 3.8.8 Beta 4
Copyright ©2000 - 2024, vBulletin Solutions, Inc.