Thanks guys! I am making a bunch of mistakes along the way but at least I am learning and its getting better all of the time.
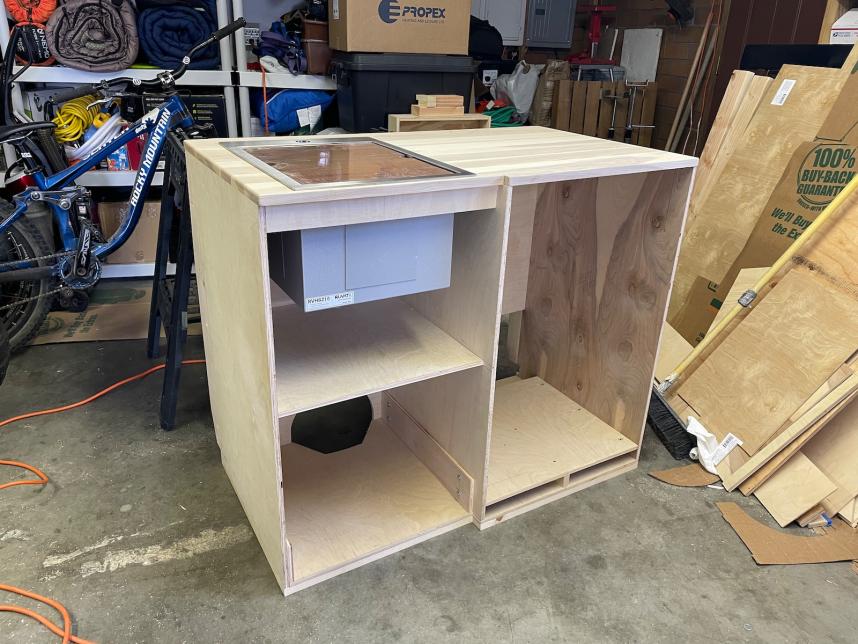
Getting close to having the kitchen cabinet done!
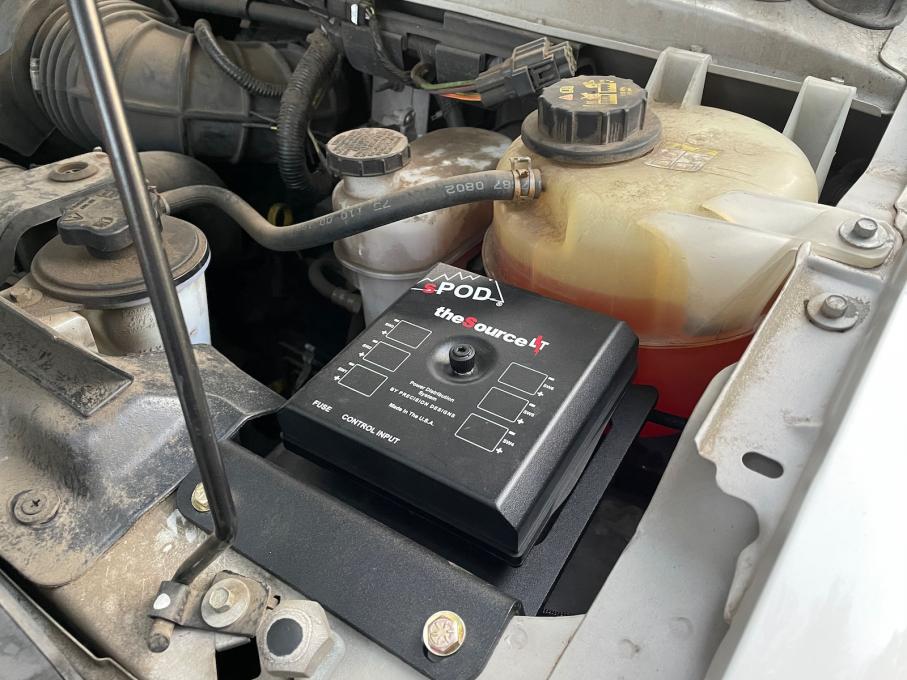
I broke down and bought the SPod kit from UJOR. It took me like 2 hours to get the wiring harness into the engine compartment so I'm glad that I wont have to do that everytime I put a new accessory on the van!
BFG K02 spare on a method 701 installed finally
ARB dual air compressor mounted to the frame. I will wire it up later and do the air lines after I finish the interior. I need to camp!
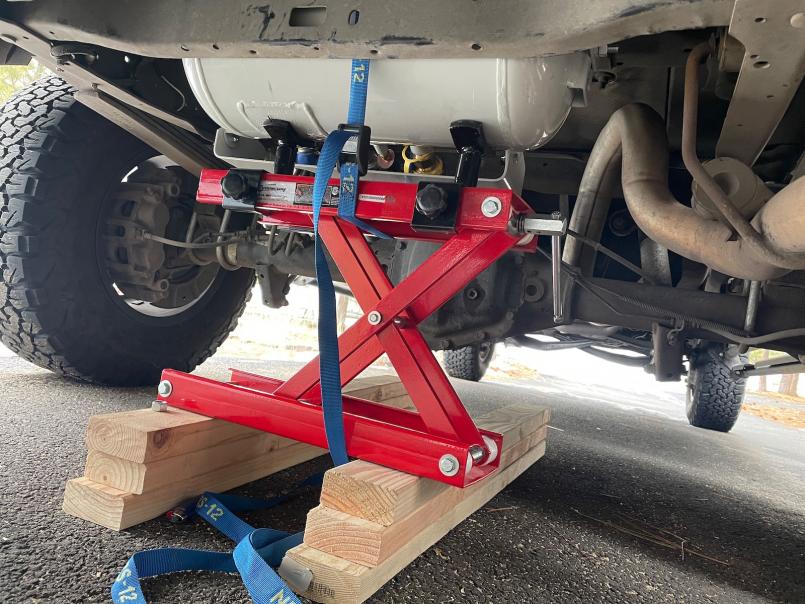
And the big project under the van almost done. Mounting the propane tank and the Propex HS2211 was a huge deal. You can see that my measurements were off : ) Oh well, just add a new self-tapping bolt haha The tank is mounted to the cross member with grade 8 bolts and washers then I put two cam buckle straps on it just in case one of the bolts goes, I should not lose the tank. Probably overkill but as a moto rider I don't want anything coming off of the van!
I have an appointment scheduled in a few weeks for an upholstery shop to recover the bench seat and make the two additional cushions for the bed. I am trying to have all of the lower interior done and the floor installed by then.
It feels like I am finally turning the corner to the final stretch!
Time for an update! I'm making slow, steady progress but if I had to do this over again I would start with a cargo van and add the windows. Because my TufPort top was raw and the windows, I have a ton of interior framing and upholstery work to do. Also I got this bench seat/queen bed because it makes the van really versatile (5 seat belted passengers) but damn, again I have just made way more work for myself!
Anyway, things are almost there. I had the 4:10 gears installed and I m getting 16mpg highway and about 12 in town. Pretty damn good for a 7000lb beast! I also had an ARB dif locker put in but the air lines aren't connected yet.
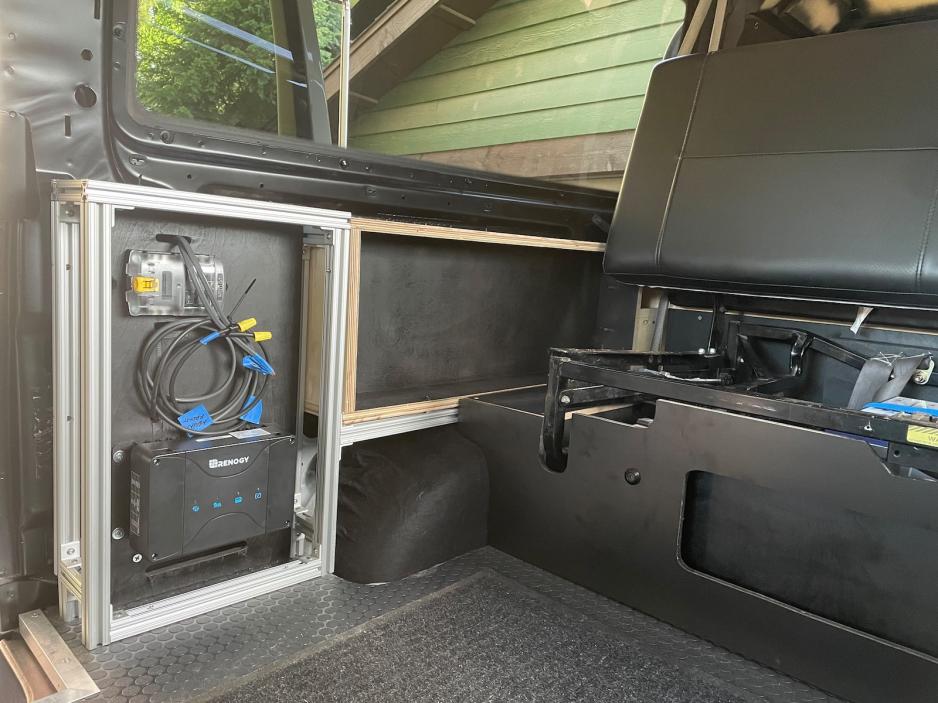
Installed some cheap-ish coin floor and started framing out the area around the bench seat. We wanted it centered so that we can use the factory seat belt mounts but it doesn't leave much room for anything else. and its a ton of odd shapes to fabricate. I made a small electrical compartment under the bench. Yes the seat frame is a ground so I will need to be careful wrench on batteries in there
I built a front panel and tried to put coin floor on it but it just melted off in the heat. So this is V2.0 using flat black Formica laminate. Its a better look so I'm happy with the results. All of the electrical stuff is recessed with wires coming in from behind and will have a lucite panel in front. I am kind of doing more of a car audio style install for all of the components. I just didn't really have anywhere that I could hide everything.
The final look is pretty cool I think. Still a lot of detail work but that will happen over time, I need to hit the road! I designed the bench/bed to have a "fixed" cargo area so that we can just dump the bedding and pillows behind the seat in go mode. A local auto upholstery guy did the cushions and recovered the seat. They should match the cover king seat covers that I bought for the front seats.
Here is the bed platform in back. Another job that just took forever to do. I need a CNC machine in my life! Stained and varnished to match the counter top.
And now the saga of the galley. I knew all along that I should rebuild this thing. I tried to use 1/2" birch plywood to save weight but there is no hardware that I could find for cabinets that isn't 3/4" but I was already almost done. I continued painting and sanding and mounting slides, etc. only to have 2 of the 3 plusnuts spin in the wall when I tried to mount it. I broke part of it trying to get the bolts back out and then finished breaking it because f&*# this cabinet. I am starting V2.0 of the cabinet using 80/20 and I will keep the slides and countertop. It will be 100 percent better and longer lasting but again, I just keep screwing myself over!
On a positive note, I put an Aluminess cargo panel on the back door and relocated the license plate. I plan to put a shovel/axe on there and some extra gas in a rotopax. I figure that with the panel I won't have to make a ton of holes in the van if I change my mind. Also the door still can open fully from the inside if we need a fire escape.
This week I am doing final upholstery on the TufPort top and all of the wood framing that I made around the cutout. I have all of the LED lights to do on the ceiling and I have a box of electrical cables to install the main power system! 13 gallon water tank is one its way so we should be done in a few weeks!!
Amazing progress! I really like that you pointed out the egress issue with having the rear door blocked, and I am rethinking my future plans as a result.
Since we live in the same area, can you share who did the re-gear? I am VERY interested in 16mpg .any other things to consider with that ratio since you have been driving it?
Thanks man! yeah I think a lot of people block the back because it makes a great cargo area but I want to be able to get out from inside if someone is lurking around the van! Sneak attack haha
I just had my regular mechanic do the regear and dif locker. They are called Elite Fleet Automotive. Ask for Nate.
I think my mpg is has do to with the ultra light build. We have almost no cabinets or storage and framing is either 80/20 or baltic birch plywood. But I did see a 2 mpg increase going from 3:73 to 4:10 with the bigger tires. It also corrected the speedo to close enough.


 Vandit


 I designed the bench/bed to have a "fixed" cargo area so that we can just dump the bedding and pillows behind the seat in go mode. A local auto upholstery guy did the cushions and recovered the seat. They should match the cover king seat covers that I bought for the front seats.
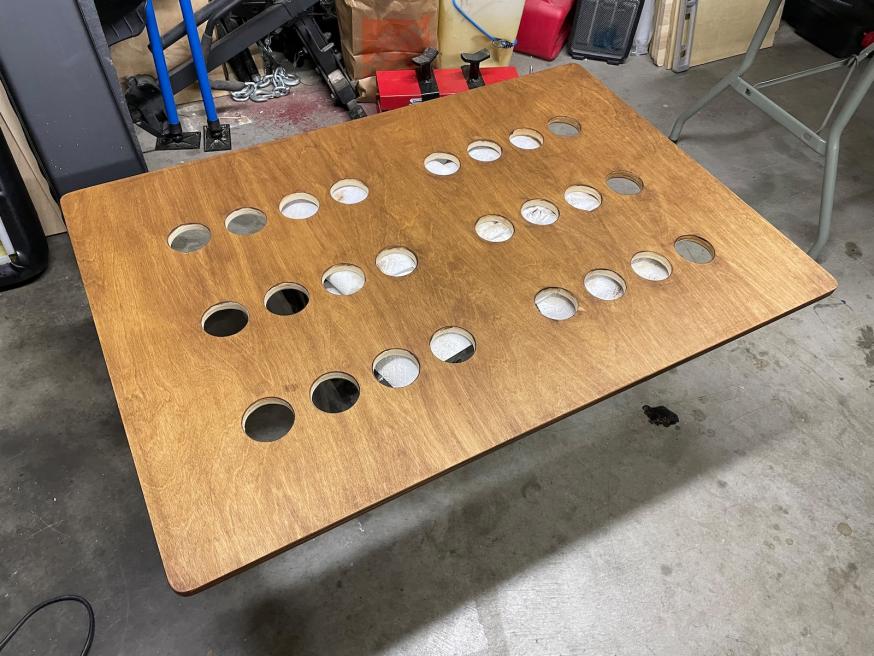


 Linear Mode