|
|
 08-12-2023, 03:11 PM
|
#261
|
|
Member
Join Date: Dec 2019
Location: Pismo Beach, CA
Posts: 92
|
Quote:
Originally Posted by aarcaris

I would highly recommend it! I haven't got to use it out on a trip or anything yet, but I am already very happy with it.
|
How are you feeling about the carpet now? How does it do with dog fur?
We take our dog with us all over the place, and I am constantly fighting the shedding problem, unfortunately his fur gets pretty embedded in the stock carpet in-between driver and passenger seats, how does the carpet do with dog fur? Same issue? Or?
|

|

|
|
08-12-2023, 04:50 PM
|
#262
|
|
Senior Member
Join Date: May 2021
Posts: 400
|
Quote:
Originally Posted by CGgonzo12
How are you feeling about the carpet now? How does it do with dog fur?
We take our dog with us all over the place, and I am constantly fighting the shedding problem, unfortunately his fur gets pretty embedded in the stock carpet in-between driver and passenger seats, how does the carpet do with dog fur? Same issue? Or?
|
Have you had any issues yet with the volume of air decreasing from your heater/AC? I ask because i take my dogs with me as well everyplace. About two years ago my AC seemed to quit blowing air all of the sudden 50 miles from home.
Turned out that the blower was sucking dog hair into the vent and blowing it threw the AC evaporator and completely clogged it up with dog hair to the point that no air was blowing threw it. It obviously was not an overnight event and clearly had been sucking in dog hair for some time.
It took me every bit of two hours to clean all the dog hair out of the fins with a tiny fine wire brush. 
|
|
|
|
|
08-16-2023, 09:11 AM
|
#263
|
|
Senior Member
Join Date: Feb 2020
Location: Bend, OR
Posts: 312
|
Quote:
Originally Posted by CGgonzo12
How are you feeling about the carpet now? How does it do with dog fur?
We take our dog with us all over the place, and I am constantly fighting the shedding problem, unfortunately his fur gets pretty embedded in the stock carpet in-between driver and passenger seats, how does the carpet do with dog fur? Same issue? Or?
|
After having it in the van for quite a while I would still say it was one of the best additions I have added to the van! Our dog is a German Shepherd otherwise known as a German "Shedder" and the rug has held up well to his hair. I haven't had it really embedded into the rug at all, and due to it still being a relatively smooth surface most of the hair can be swept or wiped off pretty easily. I do have a touch of OCD though so to be honest the van usually doesn't go more than a day without me sweeping and vacuuming it while on trips. The rug makes this easy though because like I said it's still a relatively smooth surface to 90% of stuff including sand and dirt will sweep right out and then a quick hit with a cheap rechargeable handheld car vacuum that we keep in the cabinet and then it looks good as new again. Also, it's been invaluable for giving him a grippier surface while we are driving and a small amount of insulation for keeping the floors a little warmer for those cold mornings.
Quote:
Originally Posted by ScrapIron
Have you had any issues yet with the volume of air decreasing from your heater/AC? I ask because i take my dogs with me as well everyplace. About two years ago my AC seemed to quit blowing air all of the sudden 50 miles from home.
Turned out that the blower was sucking dog hair into the vent and blowing it threw the AC evaporator and completely clogged it up with dog hair to the point that no air was blowing threw it. It obviously was not an overnight event and clearly had been sucking in dog hair for some time.
It took me every bit of two hours to clean all the dog hair out of the fins with a tiny fine wire brush. |
Luckily I haven't had any issues with that yet! It's something I will for sure have to keep an eye out for and at least now I will have an idea of what could be causing that if I do end up seeing a lose of volume on the heater/AC.
__________________
Vandit - 2013 E250 Ground Up Build- Full Custom DIY Interior Build
- DIY U-Joint Off Road 6" 4x4 Conversion
|
|
|
|
|
08-16-2023, 10:07 AM
|
#264
|
|
Senior Member
Join Date: Oct 2009
Location: Portland, OR
Posts: 1,257
|
Quote:
Originally Posted by aarcaris
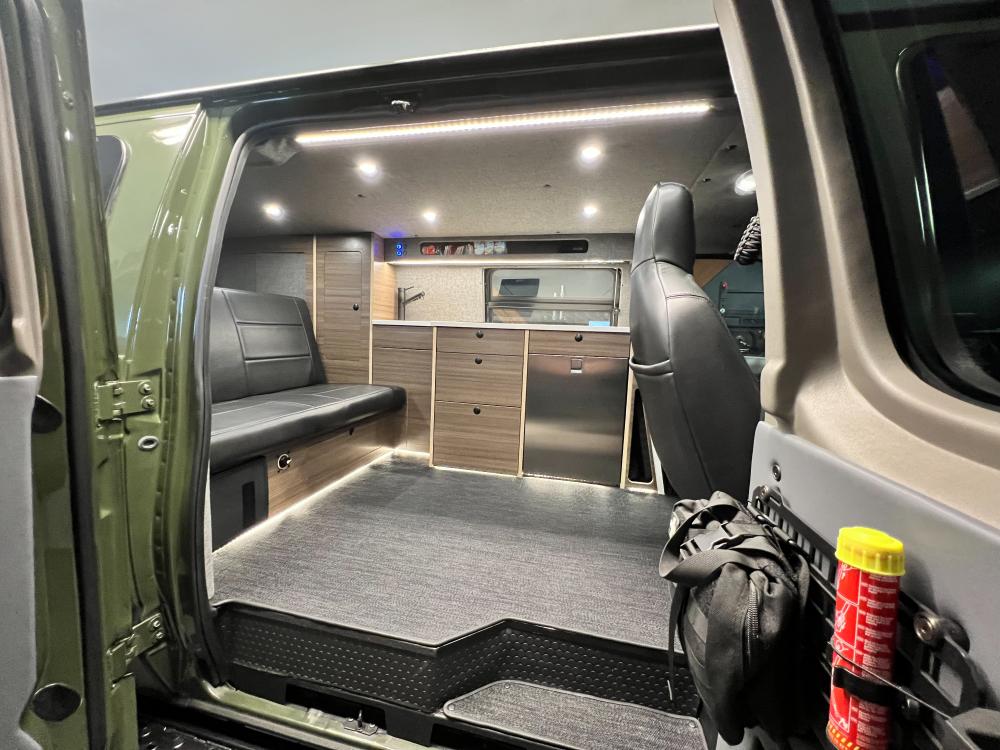
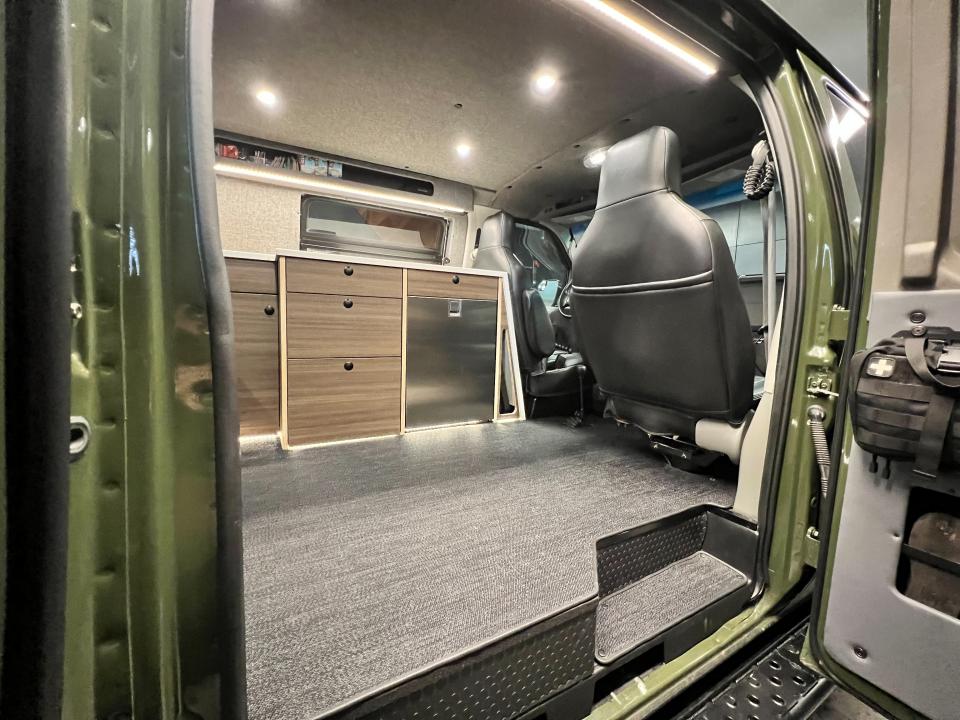
Update:-Since completing the interior build we have been trying to find a solution to one of one problem that we were not really expecting, which was the flooring. We love the coin flooring and have been super happy with it and would do it exactly the same way if we were to do it again, but our dog Ace is not as much of a fan of it. Something that we have noticed especially now that he's getting a little older he tends to slide around a lot on it while we are driving if he walks around. For the most part, he's good about just lying down, but there are times that he is feeling antsy and then he just can't seem to get a good grip on it. Our temporary solution was adding in a small rug which helped a lot, but that meant he really could only again stay in one spot while driving. In addition to him sliding around at times, we have also worried about if we did damage teh floor in any way it wouldn't really be an option to redo it as it runs under all the cabinets. The flooring is extremely durable but we figured there must be a good solution out there.
After some internet searches, I came across inhabit Design Works out of portland Oregon which makes custom rugs/floor mats for sprinters using a woven vinyl material. From all the reviews everyone who has them seems to love them say they help provide a softer floor, they're easy to clean, and suppose to give more grip for a dogs. So after reaching out to them to get a quote to do a custom floor mat/rug set up I decided it was worth some effort to figure out how to do it myself. Don't get me wrong I think they make a great product, but it was too steep of a price to make it worth it for us.
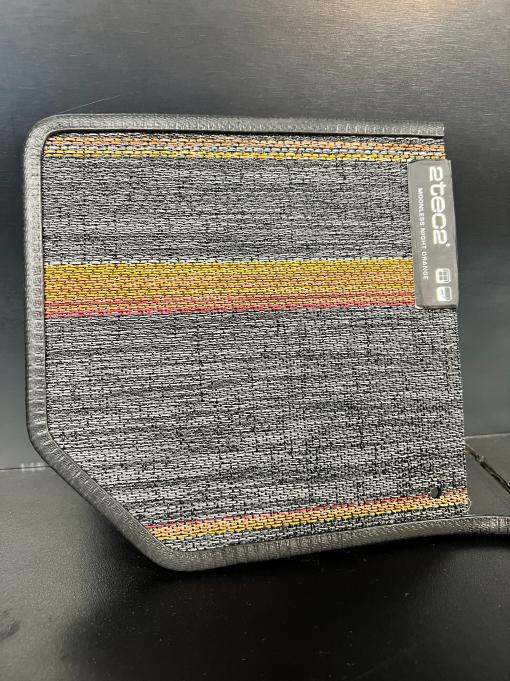
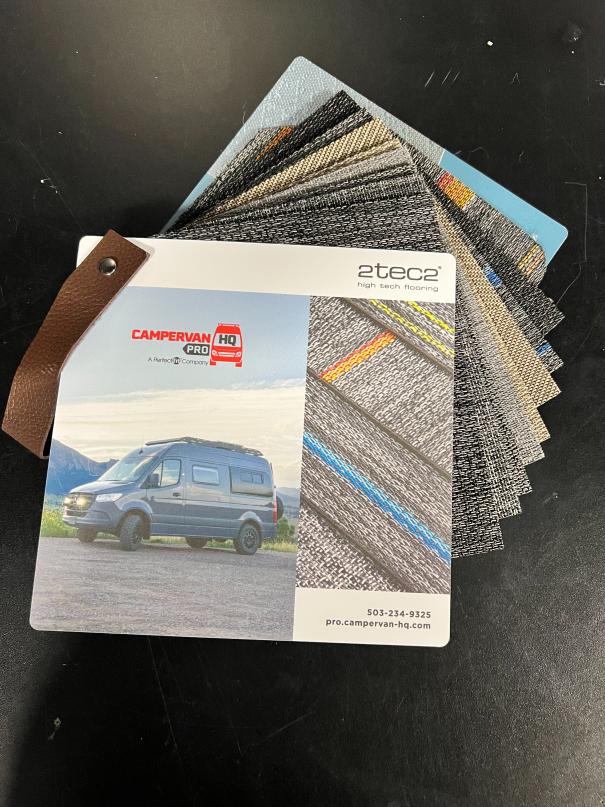
So I started on my search for a product that would get the job done. After some time I found 2tec2 flooring on Perfectfit's website. This product is very similar to the Chilewich material used by inhabit but was more affordable (still very pricey though). I order a sample pack just to make sure it was what we wanted and so we could see the colors in person.
The material felt very durable, easy to clean, more easily replaceable/ repairable if damaged, and seems like it will give more grip for our dog. Also due to it having a felt backer, I think it will help keep the floor a little warmer for those cold winter nights. Once we got the samples we did some tests just to make sure it would be a good fit for us. It passed our scratch test with flying colors though the grip test wasnt 100% conclusive but it does seem like would be an improvement over the coin flooring. I was the least confident in how the material would handle a water test. For that, we first ran water over it in the sink and surprisingly it beaded right off so we took it up a notch and submerged it for a while in the sink. Unsurprisingly the felt did soak up some water but after an afternoon on a window sill in the sun, it was 100% dry! That sealed the deal for me and sent me on the next search, how to finish the edges without a sewing machine, and how to secure it in place. After thinking through multiple ideas for finishing off the edges I finally came across an idea that I liked and seemed like it would work! The plan was to use a rubber edge seal trim. This would be easy to install, easy to replace, inexpensive, and give it a clean finished look without the added cost or struggle of trying to sew through the thick material. So I ordered a bunch of different options from Amazon and started testing them out on the sample pieces. After doing a couple of tests I found our favorite one and placed an order for the material and edging. Then it was time to test how well a snap would work in the material. I ordered a cheap tool from amazon to help do that install and it worked perfectly so it was go time! I ordered all my materials and started on my template.
 Test Piece Number One Test Piece Number One
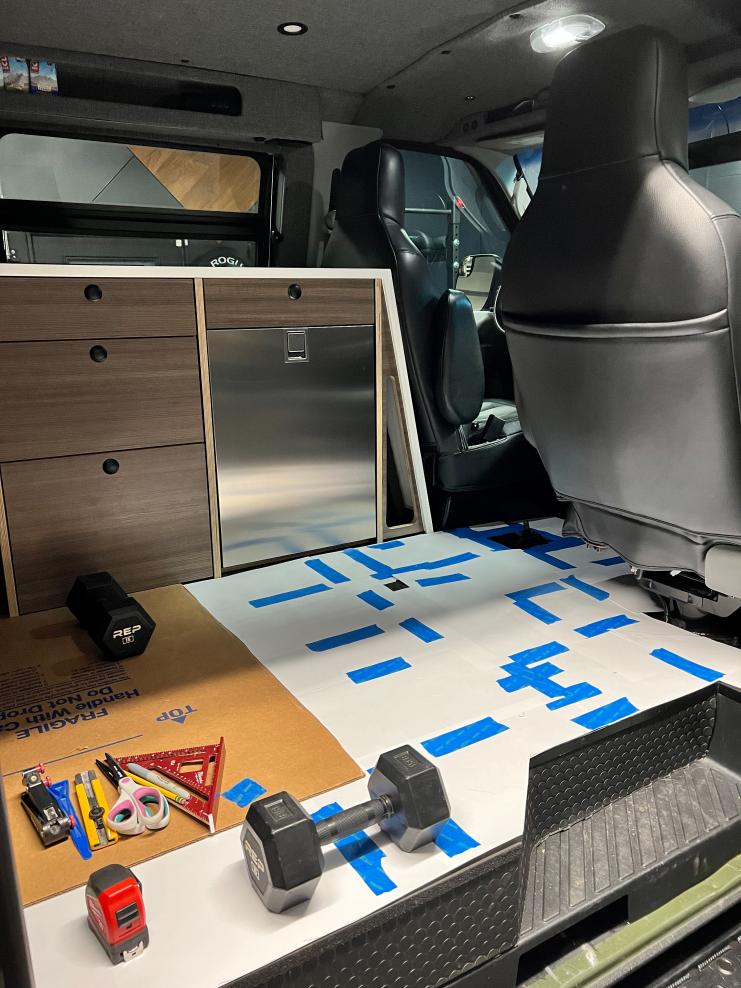 The Start of The Template
Since I have toe kick lighting I decided to only use the edge trim on the outside edges to help minimize the impact on those lights. The material is still run all teh way back under the toe kicks though to help lock it into place and give it a seamless look.
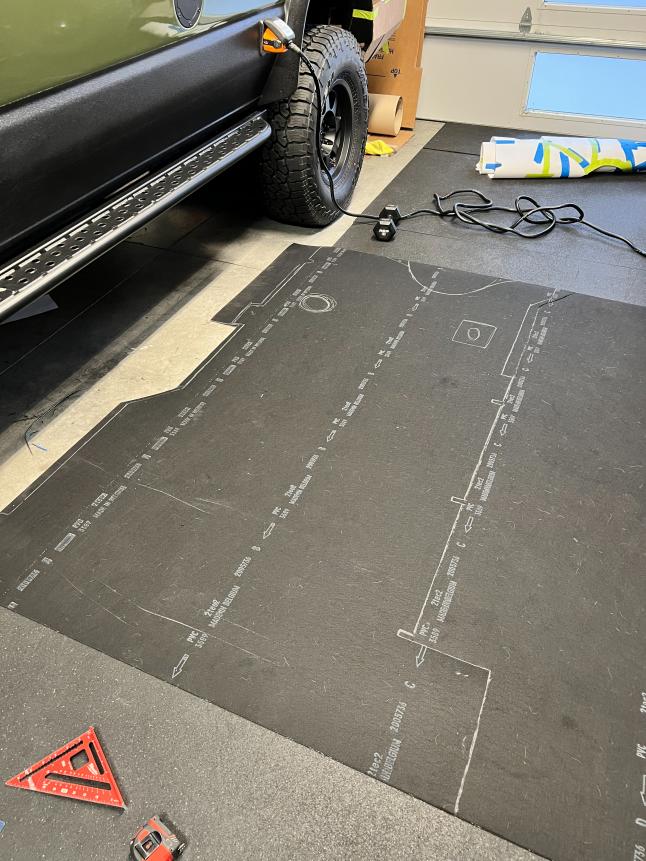 Traced the template out on the backside of the material.
 First Test piece in the van.
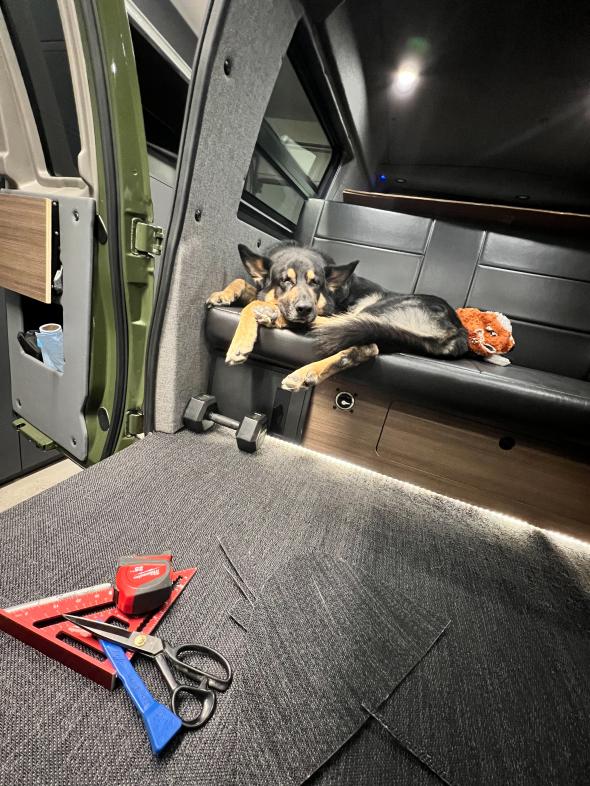
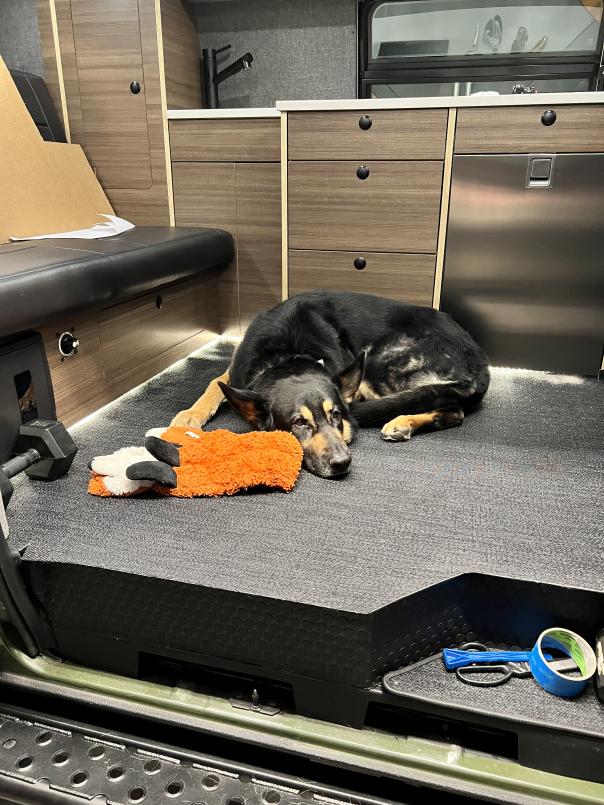 Ace approves of the floor mat
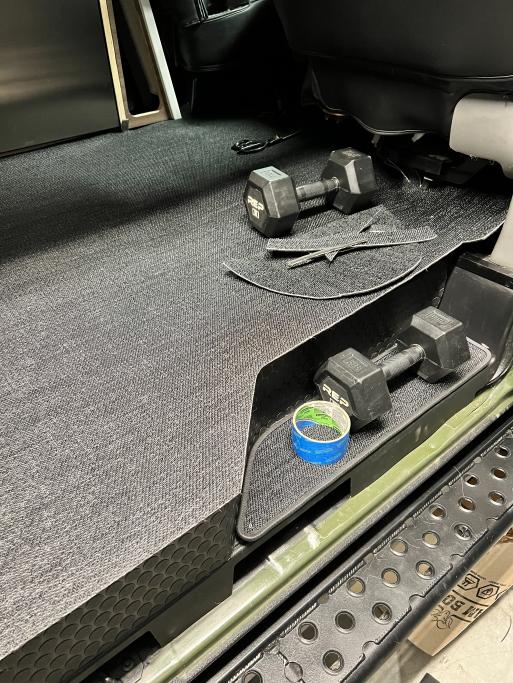 Decided to cut the outside edge after getting the inside edge all locked in.
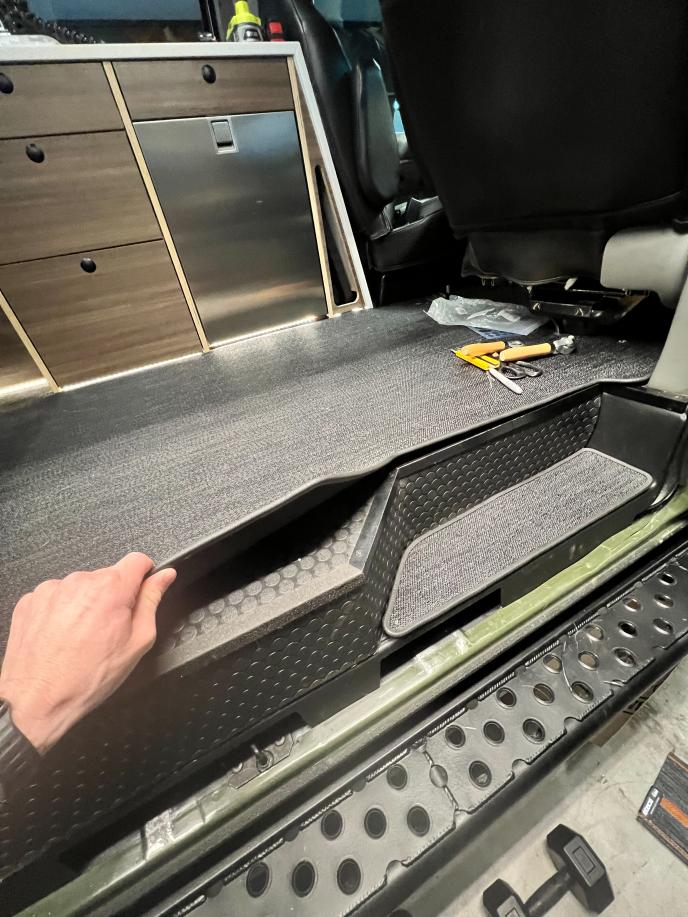 Still pretty thin even with the rubber edge seal installed.
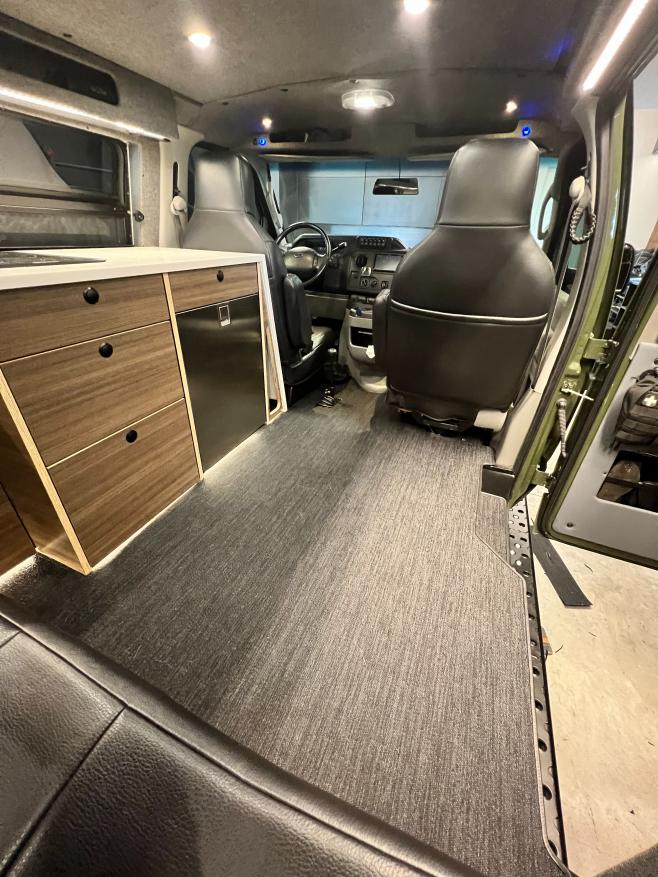 Was able to run it all the way up to under the front Husky floor liners.
 Still might add a few snaps on the outside edge but so far it's not moving
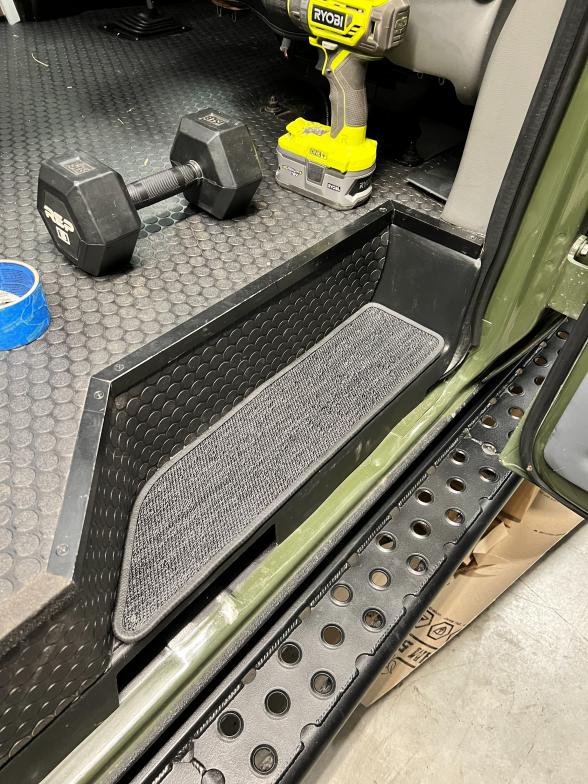
After getting the main floor section done I had quite a bit of material left over so I went ahead and used it for the factory step locations.
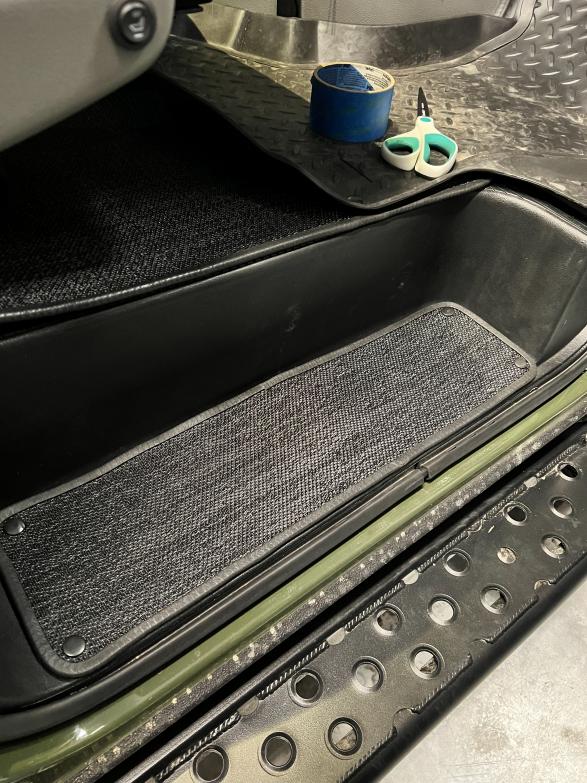 Passenger side step
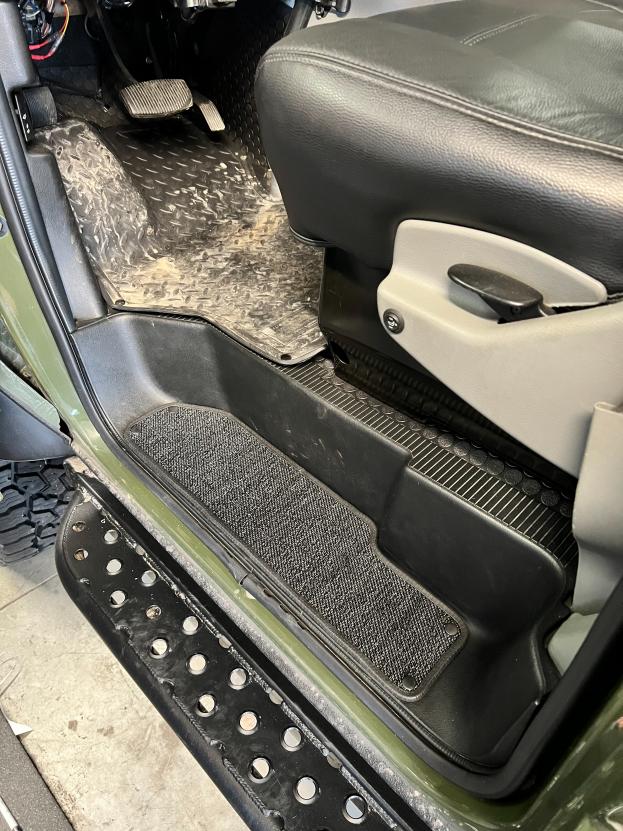 Driver side step
I still have a decent amount of material left over so I am going to make inserts for all the drawers in the van. I will post some more pictures once I get those done and any other added areas I may do depending on how much material I have left after those.
|
Do you remember how many feet of this you ordered?
__________________
2001 Ford RB 7.3 Quadvan (sold)
2006 Sportsmobile EB Transformer 6.0
|
|
|
|
|
08-16-2023, 10:58 AM
|
#265
|
|
Senior Member
Join Date: Feb 2020
Location: Bend, OR
Posts: 312
|
Quote:
Originally Posted by vandiesel
Do you remember how many feet of this you ordered?
|
Just looked back at my order and it looks like I had ordered 7 Feet of material. I believe it's 2 meters wide which was almost enough for me to be able to use that dimension as my length but it was a little bit short and I really wanted it to fully cover the floor so I went with 7 feet just to make sure.
__________________
Vandit - 2013 E250 Ground Up Build- Full Custom DIY Interior Build
- DIY U-Joint Off Road 6" 4x4 Conversion
|
|
|
|
|
03-13-2024, 01:42 PM
|
#266
|
|
Senior Member
Join Date: Feb 2020
Location: Bend, OR
Posts: 312
|
Update:
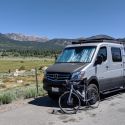
-It's been a while since I last updated this thread, but everything has been running smoothly with the van. We embarked on a decent trip back in the fall, taking us from Bend to Grand Tetons, Yellowstone, and Glacier National Parks. We found some great camping spots, saw beautiful places, and truly enjoyed our time in Vandit!
-As Black Friday rolled around, we decided it was time to tackle some additional items on our build list. Sales started popping up, and we began placing orders. First up was finally sorting out our heater situation.
-We decided to take a chance and ordered an Espar Airtronic Heater AS3 B2L (Gasoline) from eBay. The store's reviews were great, and the price made it seem worth the risk. Two days after placing our order, it arrived at our house, and everything looked perfect! We chose this heater for its compact size, efficiency, and its redesigned system allowing for auto elevation adjustments up to 13,200 feet.
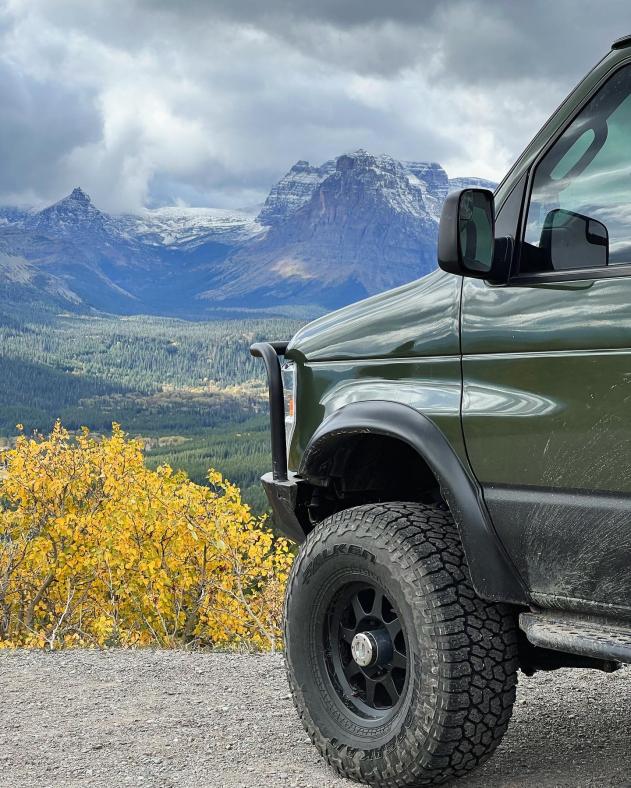
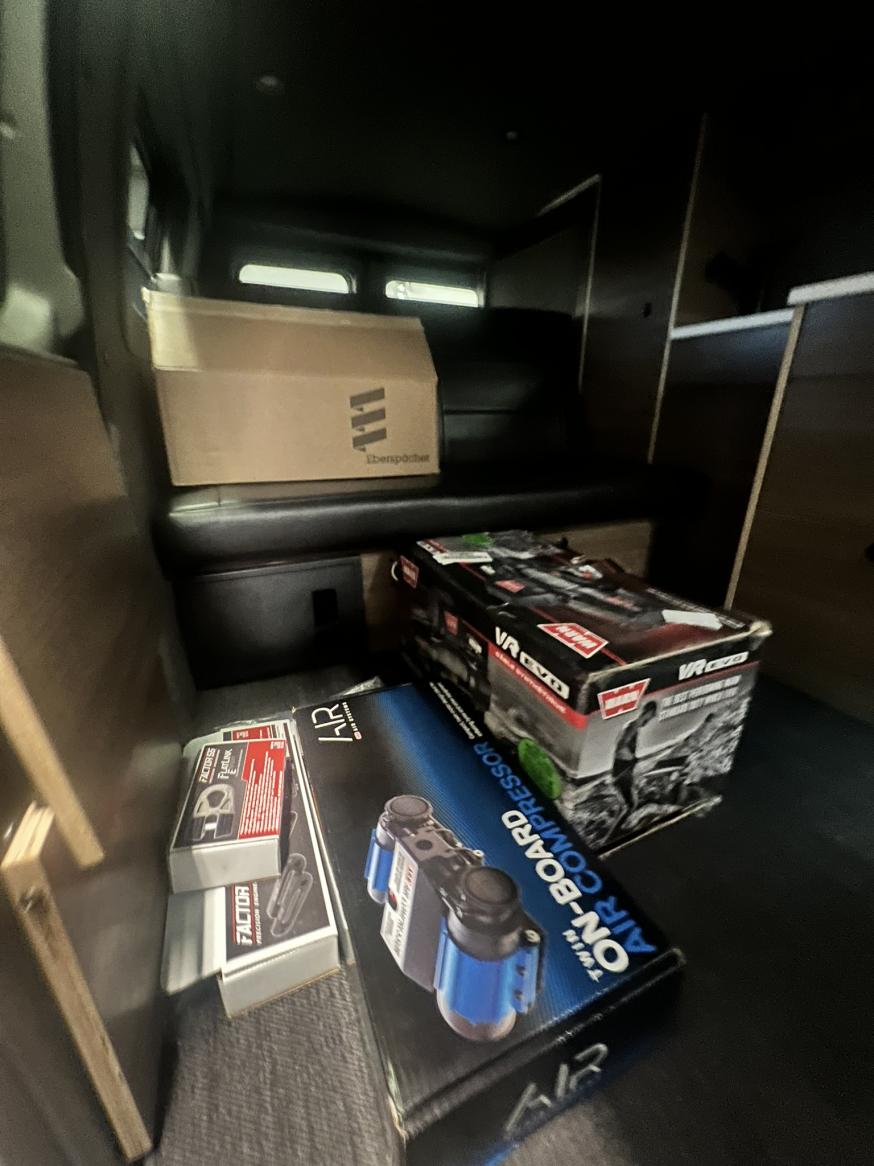
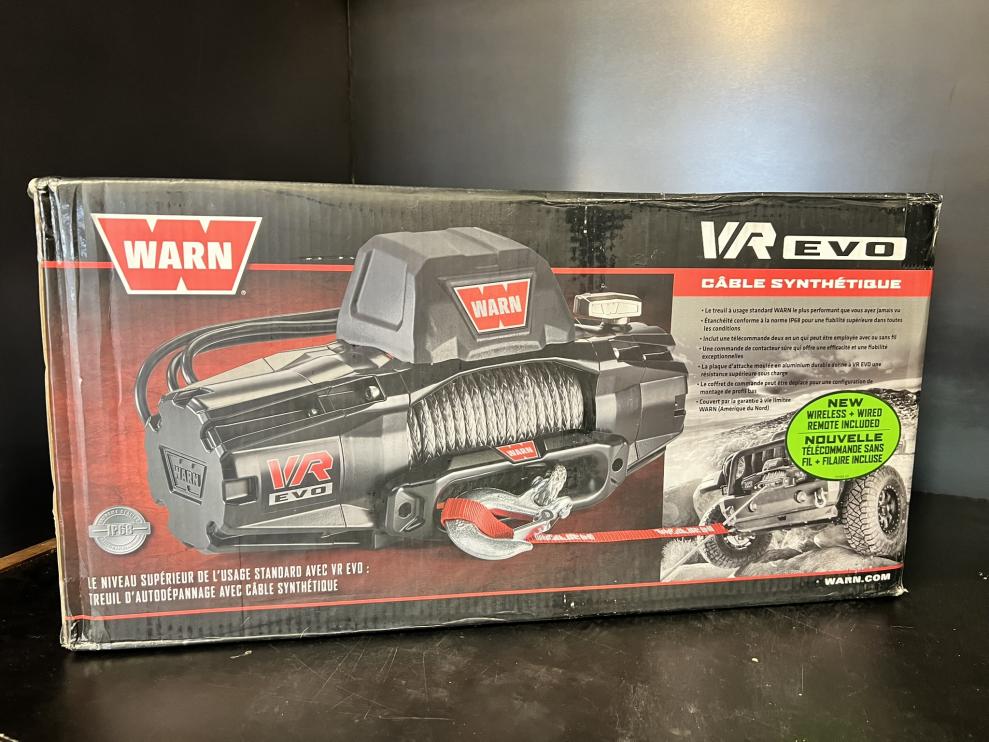
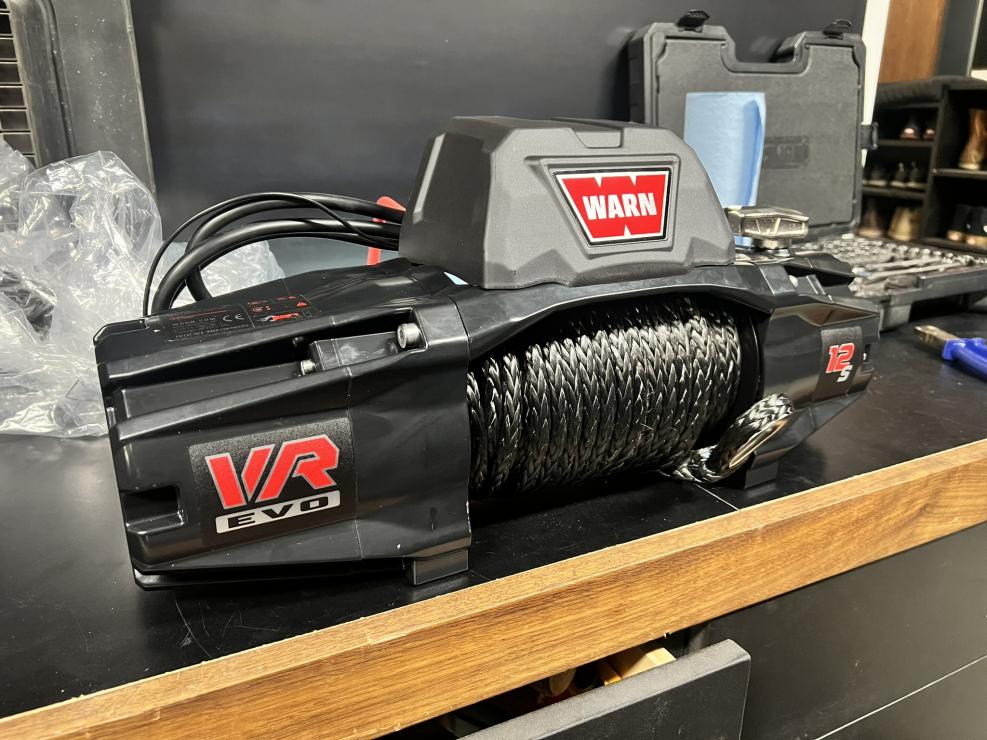
-The next item on the list was getting a winch to provide some peace of mind when we are out on our own. I found a great deal on a Warn VR EVO 12-s winch, with over $200 off the list price. Along with the winch, we ordered a Factor 55 Fairlead and shackle to give it a clean look.
-The last item for this round was ordering our ARB twin air compressor.
-After everything arrived, things sat for a bit due to the busy time of year, but as things slowed down, I began the installation of everything.
Winch Install:-I started with the winch installation as it was the most straightforward. Luckily, the winch box in the Aluminess bumper was deep enough so the winch didn't require any relocation of the control box. After ensuring it all fit correctly, I moved on to wiring, following my typical method of using wire wrap in addition to wire loop and heat-shrinking it all. I connected directly to the battery for now but may eventually come back to add in a shut-off switch for an added layer of safety. But for now, the winch is considered complete!
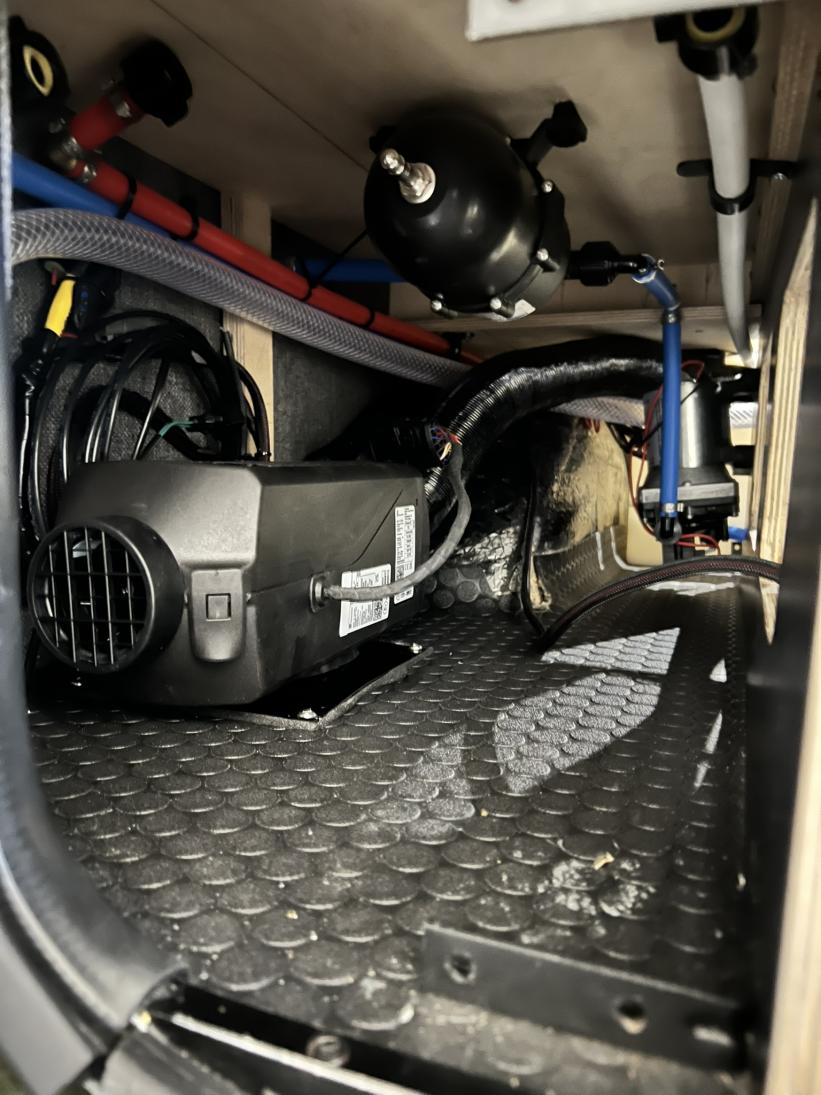
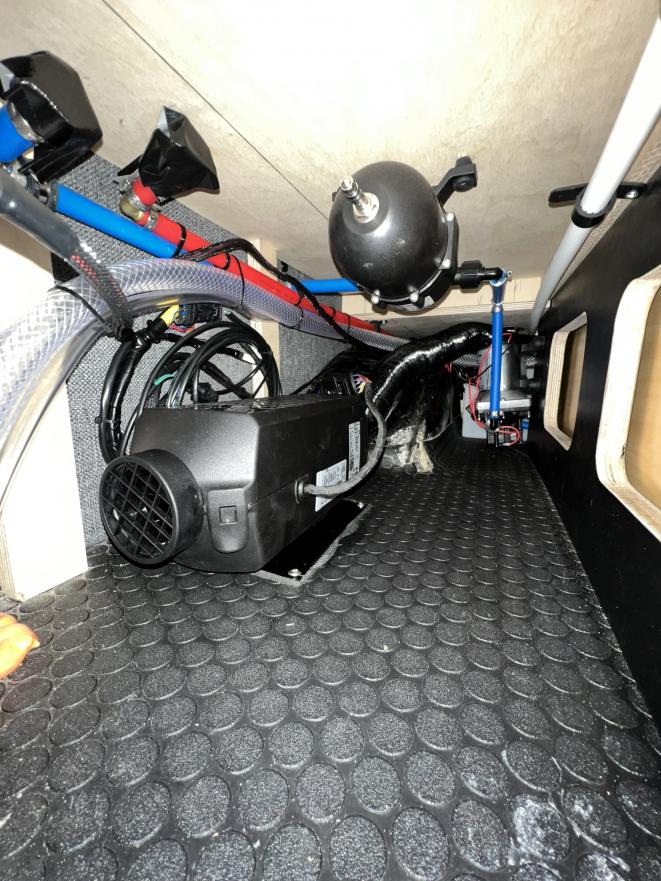
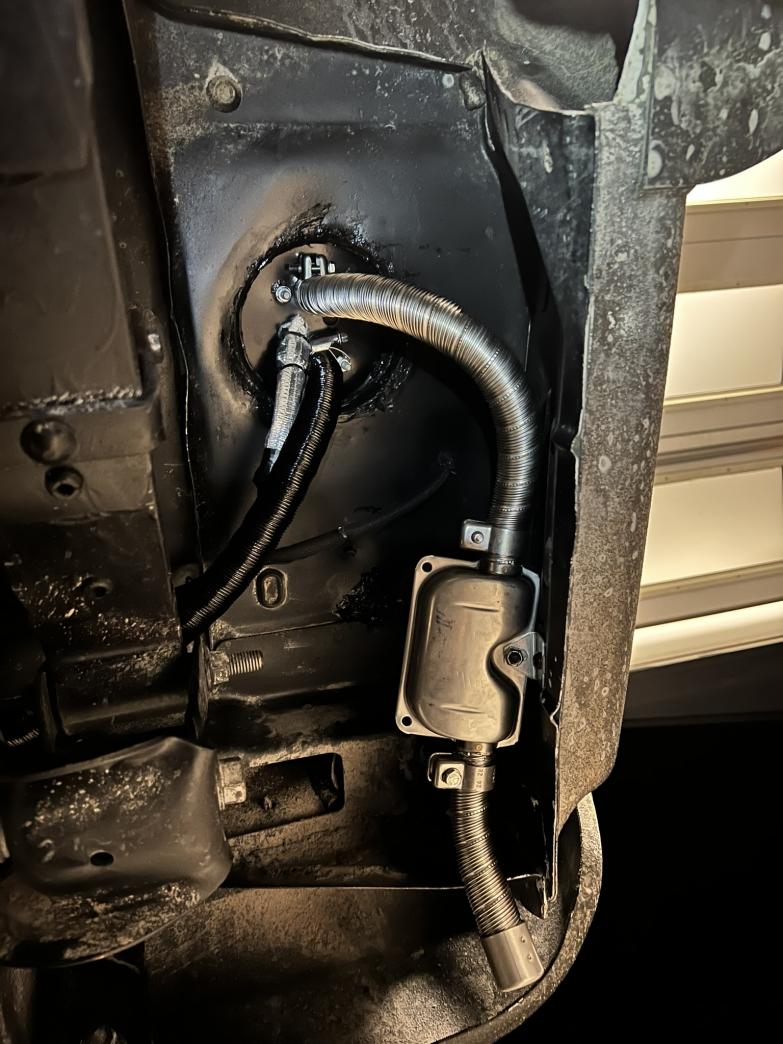
Heater Install:-Next on my list was the heater. This was something I was a little hesitant to do since it would require me to remove quite a few things in the process. I started off by mocking up the heater in the location I was thinking to make sure it was all going to fit. After doing this, I realized that my water pump accumulator was somewhat in the way, so I had to reroute some of the plumbing to get things to fit in my tight space. I also realized that the vent lines for both my gray water tank and fresh water tank were not looking great and again somewhat in the way. So, I went ahead and changed them out and relocated them to a better spot. At the same time, I also increased the size of the vent line for the fresh tank to help it release pressure faster while filling up the tank since I noticed it sometimes built pressure during filling.
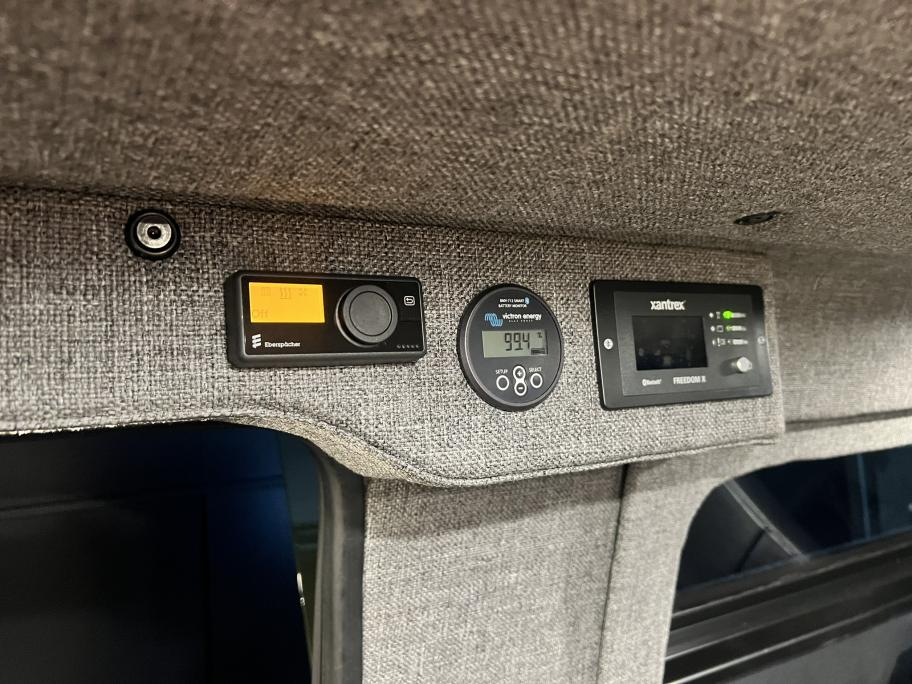
-After making sure I got the space I needed for the heater and the plumbing all reworked, I started routing all my wiring. Luckily, I had the foresight at the start of my build to run wires back to the heater location but still had to route the wiring loom for my heater controller. I was very thankful that I made my wall panels easily removable because, with just a few bolts undone, I was able to snake my wire right up through the wall to where I mounted the controller. I also shortened up all the unnecessary wiring in the factory loom to try to get things as tidy as possible.
-After getting the wiring all buttoned up, I moved on to the big hole cut in the floor. I decided to use a turret-style baseplate, so all I had to do was drill a 5 hole through the floor along with a small hole for the fuel pump wiring. This was pretty straightforward but always a bit nerve-wracking to put large holes in the van.
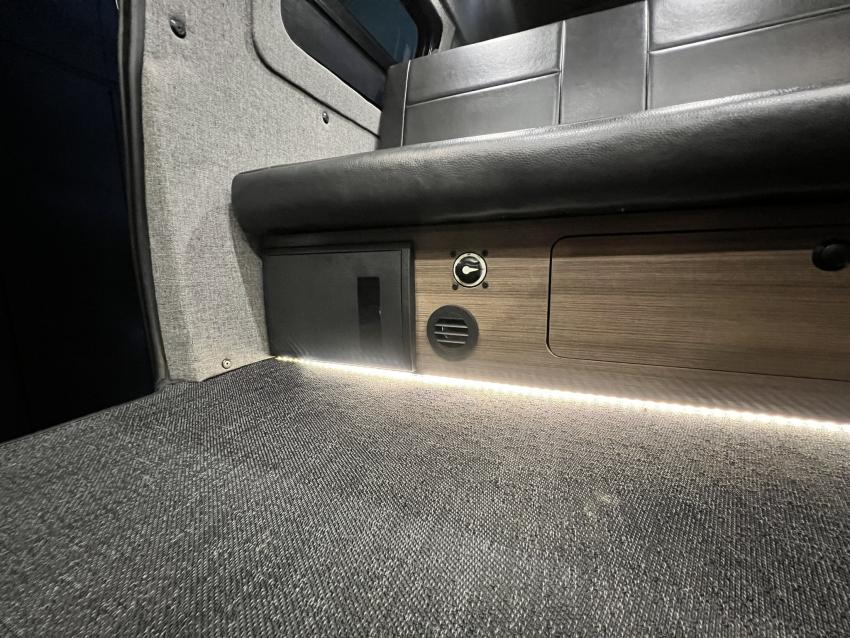
-After getting the location locked in, I started on the ducting. I am very limited on space for all this but was able to find a route that worked to get my vent up in the cabinet face below the bench. I used a couple of 90 fittings to help tighten up the radius required.
-After getting most of the interior work done, it came time for the not-so-fun job of dropping the tank to install the fuel pick-up. I was able to get it down by myself using a floor jack, but it is not a job I want to do again anytime soon! The pick-up was relatively easy to install as I drilled and mounted it directly through the top plate of the fuel pump since my pump did not have an aux pick-up port. Once that was all complete, I did a quick connect to the fuel pump just to make sure everything was working before getting the tank back up in place. Everything worked right, so it was then on to remounting the tank and getting everything finalized on the underside of the van.
-I got the tank back up and found a good spot for the fuel pump to be mounted out of the way in between the C-channel section of the frame. I finished everything else up by mounting the muffler and exhaust plumbed to the back corner of the van, got the air intake routed over toward the rear, the electrical for the fuel pump through the floor wrapped in a wire loom protective sleeve, fuel line wrapped in a heat-resistant wrap and loomed, and everything plumbed to the pump. Then it was onto final testing and clean up.
-As soon as I started up the heater, I was surprised at how loud the intake was. So, after a quick search, I found there is an intake silencer that I was hopeful would help quiet it down. Once it showed up, I swapped the intake out for the silencer and was shocked at how much it helped. Now it is virtually silent, and the heater is working great! Haven't had a chance to use it on a trip, but look forward to having a nice warm van from here on out!
-I still haven't gotten around to doing my air compressor install, but hoping to get that sorted soon. There are a few ideas I am still trying to sort through for my OBA system, but more to come on that. For now, these are the latest additions to Vandit, and like always there is more to come!
__________________
Vandit - 2013 E250 Ground Up Build- Full Custom DIY Interior Build
- DIY U-Joint Off Road 6" 4x4 Conversion
|
|
|
|
|
03-13-2024, 01:58 PM
|
#267
|
|
Senior Member
Join Date: Mar 2015
Location: Maryland
Posts: 3,384
|
Nicely done! Winch is more of a confidence builder; most people rarely find the need for it, but can save your a$$ if/when the situation presents itself.
__________________
TwoXentrix
"AWOL"
|
|
|
|
|
03-13-2024, 02:33 PM
|
#268
|
|
Senior Member
Join Date: Feb 2020
Location: Bend, OR
Posts: 312
|
Quote:
Originally Posted by Twoxentrix
Nicely done! Winch is more of a confidence builder; most people rarely find the need for it, but can save your a$$ if/when the situation presents itself.
|
Yes, that is definitely true! Happy to have one more level of safety onboard.
__________________
Vandit - 2013 E250 Ground Up Build- Full Custom DIY Interior Build
- DIY U-Joint Off Road 6" 4x4 Conversion
|
|
|
|
|
03-13-2024, 05:36 PM
|
#269
|
|
Senior Member
Join Date: Nov 2016
Location: FL and VA
Posts: 1,954
|
Yeah, what he said. Nicely done. Great photos too.
__________________
Chris
2008 GMC 3500 Quigley Weldtec 4x4 Savana SMB
|

|
|
|
03-14-2024, 04:44 PM
|
#270
|
|
Senior Member
Join Date: Feb 2015
Location: Durango, Colduhrado
Posts: 687
|
Like button. Like button. Like button. Nice!
__________________
All things being equal - fat people use more soap.
|
|
|
|
|
|
 Posting Rules
|
You may not post new threads
You may not post replies
You may not post attachments
You may not edit your posts
HTML code is Off
|
|
|
|
 » Recent Threads
 |
|
|
|
|
|
|
|
|
|
|
|
|
|
|
|
|
|
|
|
|
|
|
|
|
|
|
|
|
|
|
|
|
|


 Vandit
 Vandiesel II


 AWOL
AWOL 2008 GMC 3500 SMB
 Linear Mode