|
|
 11-12-2020, 01:26 PM
|
#1
|
|
Senior Member
Join Date: Feb 2020
Location: Bend, OR
Posts: 312
|
"Vandit" A Build Thread
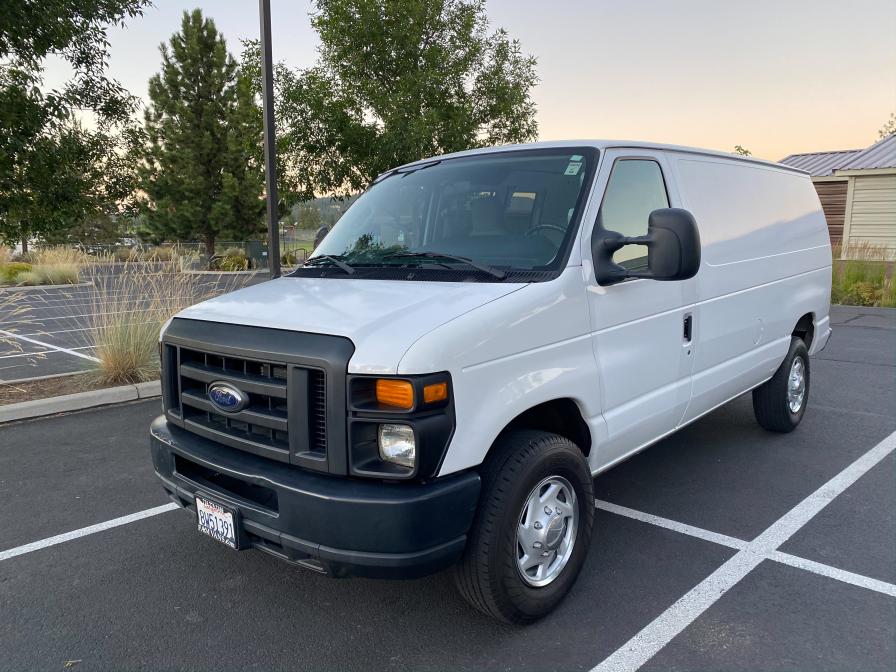
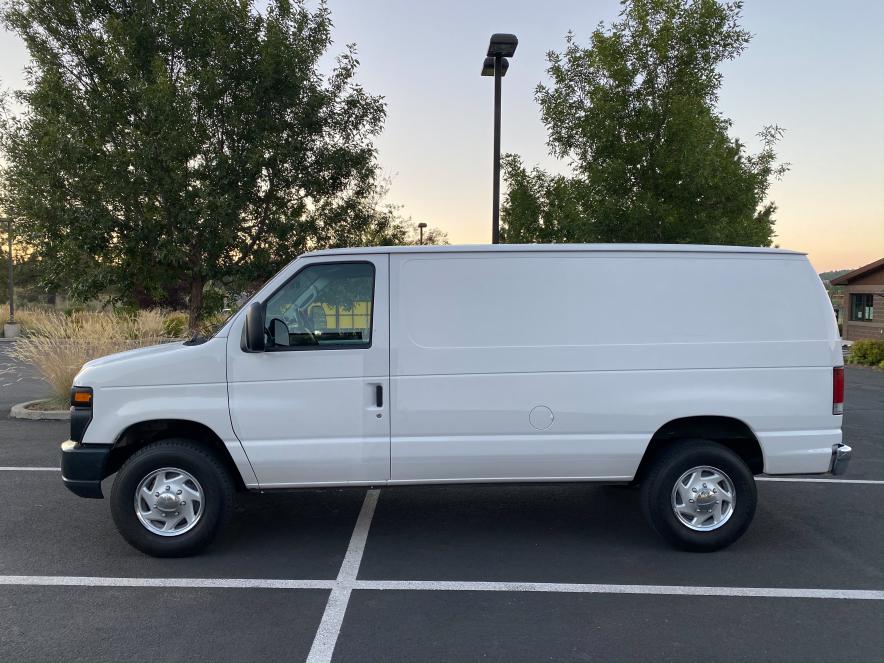
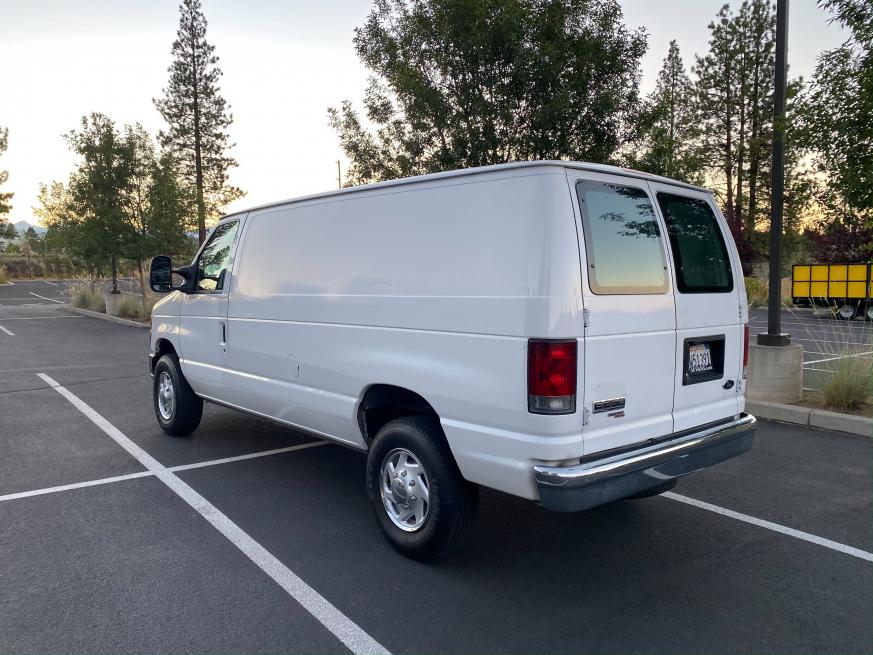
2013 Ford E250 STD Cargo
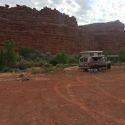
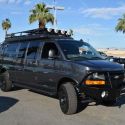
Van Name: Vandit Intro: So it begins again! This is my 4th and our 3rd (my wife and I) vehicle build, but first van, so should be interesting. This thread will be used to help document our process, as well as hopefully get some collective knowledge working through any issues we come across. I figured I would start by giving some background, and then dive into the actual plan and build. Background:We have officially caught the van bug and decided to really jump head first into it! It started about 2-3 years ago, but here's some background for how we got here. About 7 years ago I had built out a 2003 Land Rover Discovery II (Build Link). I basically did everything you could to it including 35 Nitto Trail Grapplers, front and rear air lockers, custom axles, custom suspension, custom bumpers and the list goes on. It was a very off-road capable vehicle and got us to lots of cool places, but the reliability of it especially as it got more and more miles on it started to worry us. So we made the jump and sold it while we could and bought a 2013 Toyota Tacoma. That started a pretty quick build process including lift, tires, racks, interior, and camping mods etc.. Then we took it on our maiden voyage to Bend, OR. Long story short we fell in love with Bend and transitioned all our efforts into finding a way to move. Camping and traveling was put on hold and we put our heads down while we put our plans in motion. We ended up willing a way to keep our jobs, work from home and be able to move in less than 8 months after making the decision. Once we moved we knew we wanted to find a house to buy, so we again put traveling on hold and got to work. We got lucky and found a builder with a lot, and we were sold. We started building our home! Again travel and camping was put on hold while we built our new home. After our home was completed and we were moved in it started making it a home chapter. So we spent the last year or so doing numerous projects from building furniture, to pouring concrete. All the while both of us yearning to strike some better balance between work and travel! We started trying to use our Tacoma and CVT roof top tent for some local weekend trips, and soon started to see issues that we didn't have before. One being that I was getting tired of carrying our 75lbs german shepherd Ace up and down into the roof top tent. Another thing that became abundantly clear was after having a very nice new home the roof top tent was just not as comfortable anymore. We know that's silly, but that's where were at. Another issue we were having is the inability to be stealth camp, or quick to set up and break down. So this really reignited our interest into a possible van.
So we spent the next 6 month doing research and test driving every option out there. We tried a 4x4 sprinter, which was nice, but the initial cost, cost of repairs, and the limited 4 wheel drive and the limited availability kicked it off our list. We had a similar experience with the Ford Transit, especially since their AWD system seemed like it would be a big limiting factor. During this test drive period I happened across an ad for a sportsmobile at a local used car dealership. All though out of our price range it seemed like the perfect opportunity to do a quick test drive to see if it really would be right. Well after driving it and getting to see how the Penthouse top worked in person we were officially hooked! So we began our search for a Sportsmobile. After lots of searching we kept coming across the same issues either it was out of our price range, or we would be paying for lots of things we felt needed to be changed immediately. So we shifted again and started looking for some good starting platforms.
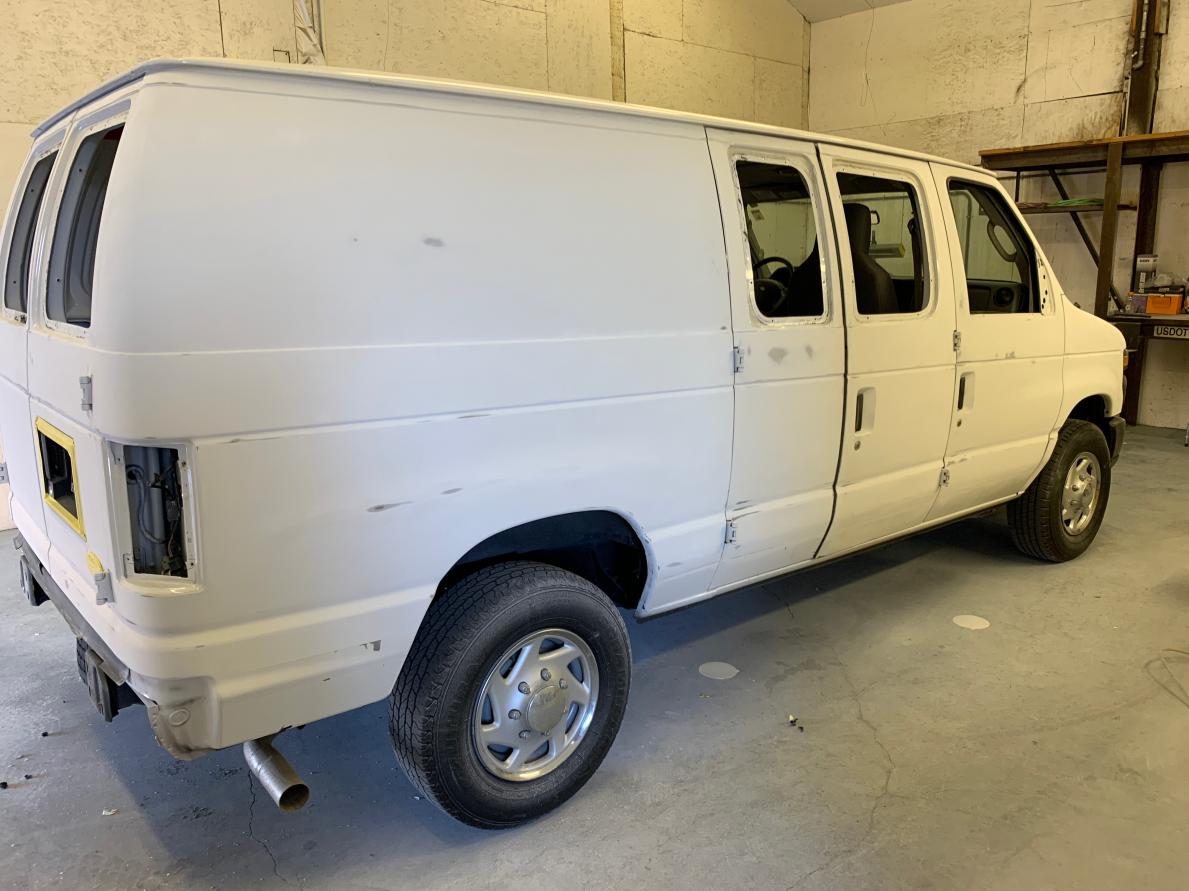
After months of searching and numerous deals failing we finally found a low miles 2013 Ford E250 Cargo in California. Unfortunately for us with a global pandemic it wasnt the easiest thing to actually get it, but we finally got it with only a few surprises considering we bought it sight unseen! So we found ourselves happy new owners of a van with potential! The Goal: Our goal is to build a van that is capable, reliable and very sturdy for years to come. Something we can feel comfortable in exploring forest roads of the pacific northwest while also making it possible to sleep in friends and families driveways while we are visiting. To have sleeping for two and our dog with the future option of sleeping/driving for 4 (just in case we have any friends or family coming). This will be our go to rig for multi week excursions as well as day trips to the lakes and mountains. The Inspiration:Given my field of work I figured it would be a good idea to try to sort through some of the problems and ideas I had by laying it out on the computer first. I may have gone a little overboard especially since I had my modeling pretty well done before we even had a van! Now these were more for basic ideas, and not perfectly to scale, but I tried to get it relatively accurate using the Ford builder book and some basic knowledge I had gathered from my hours of research. The renderings below are meant for basic concepts and to show some of the form and finish.
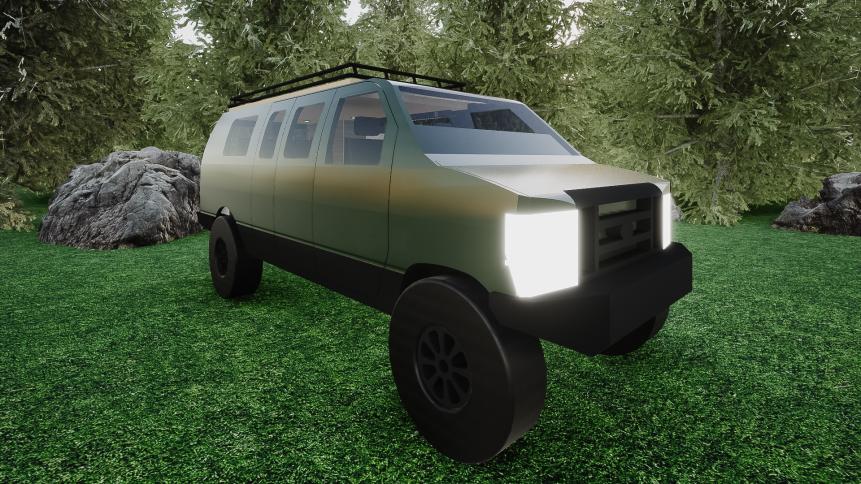
Exterior Front Render
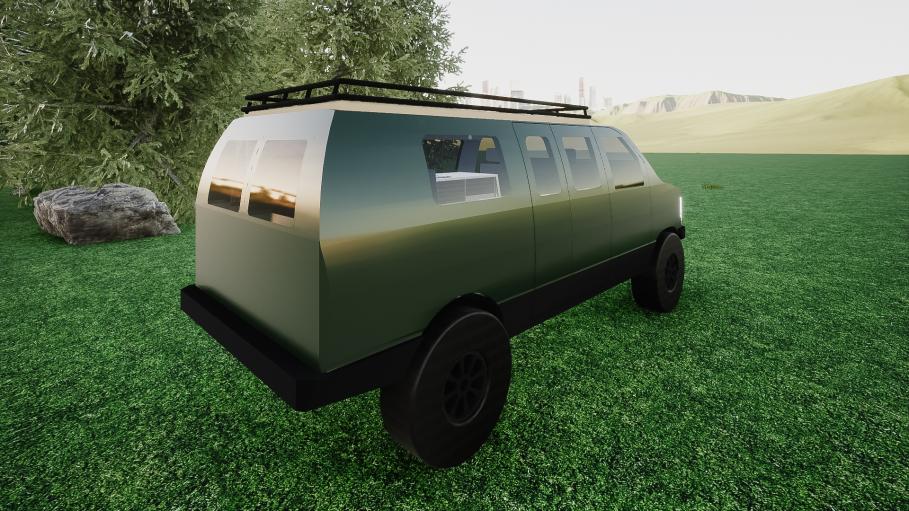
Exterior Rear Render
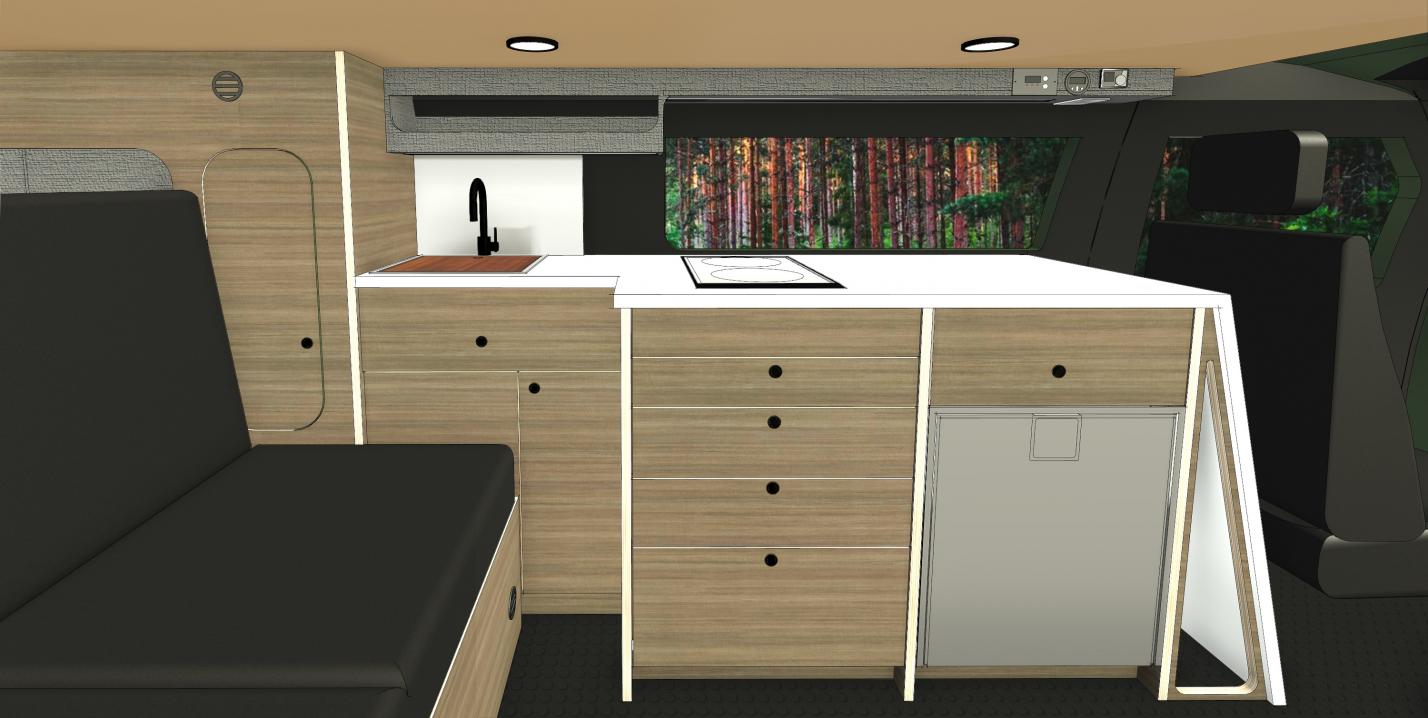
Interior Perspective
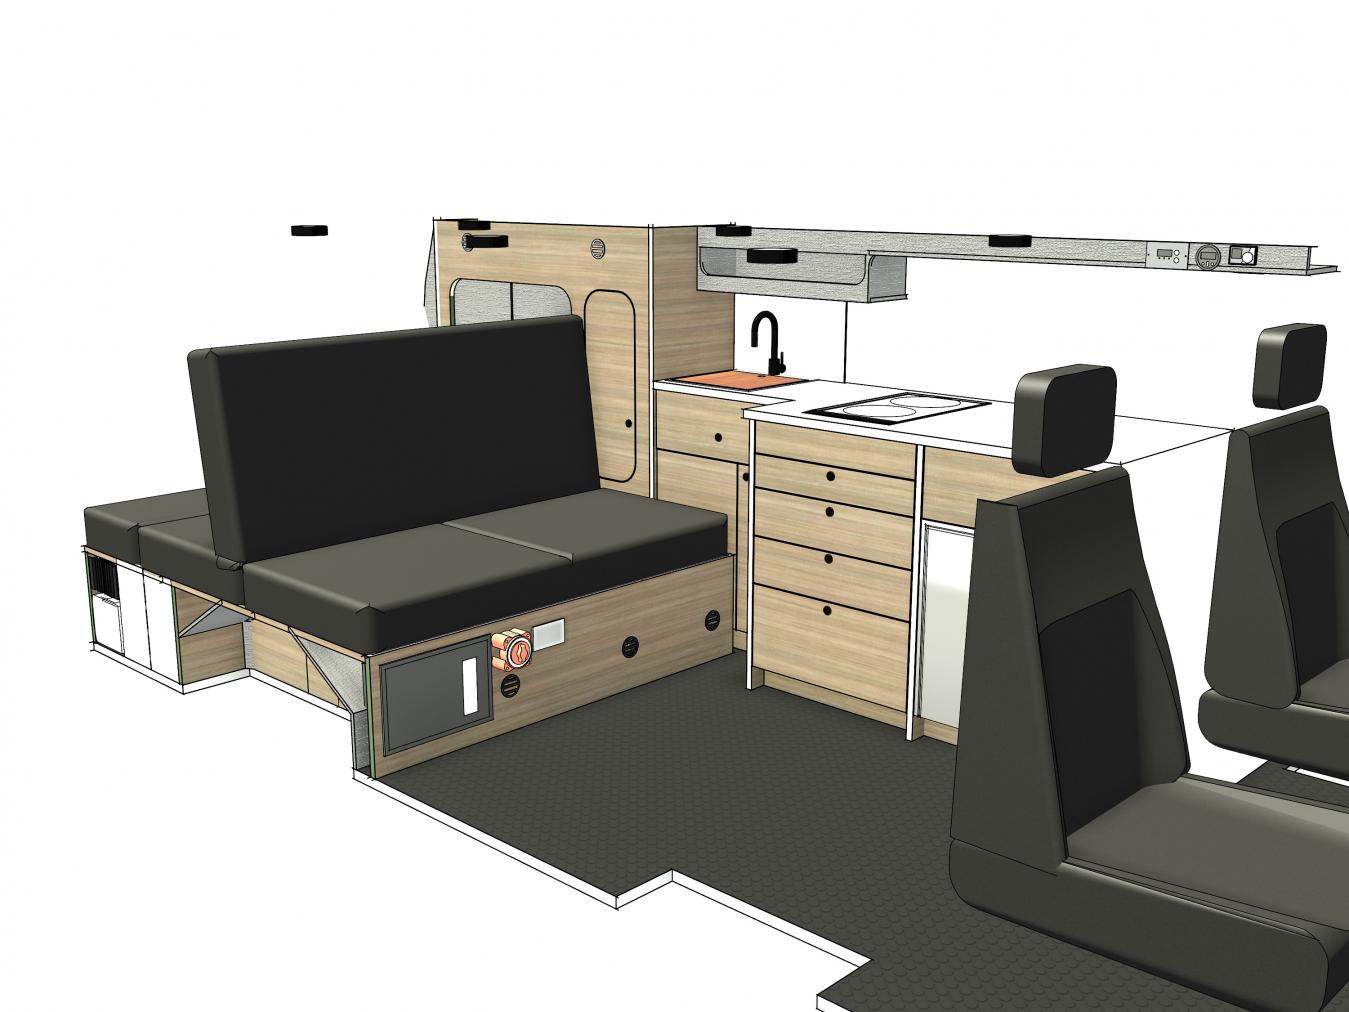
Interior ISO
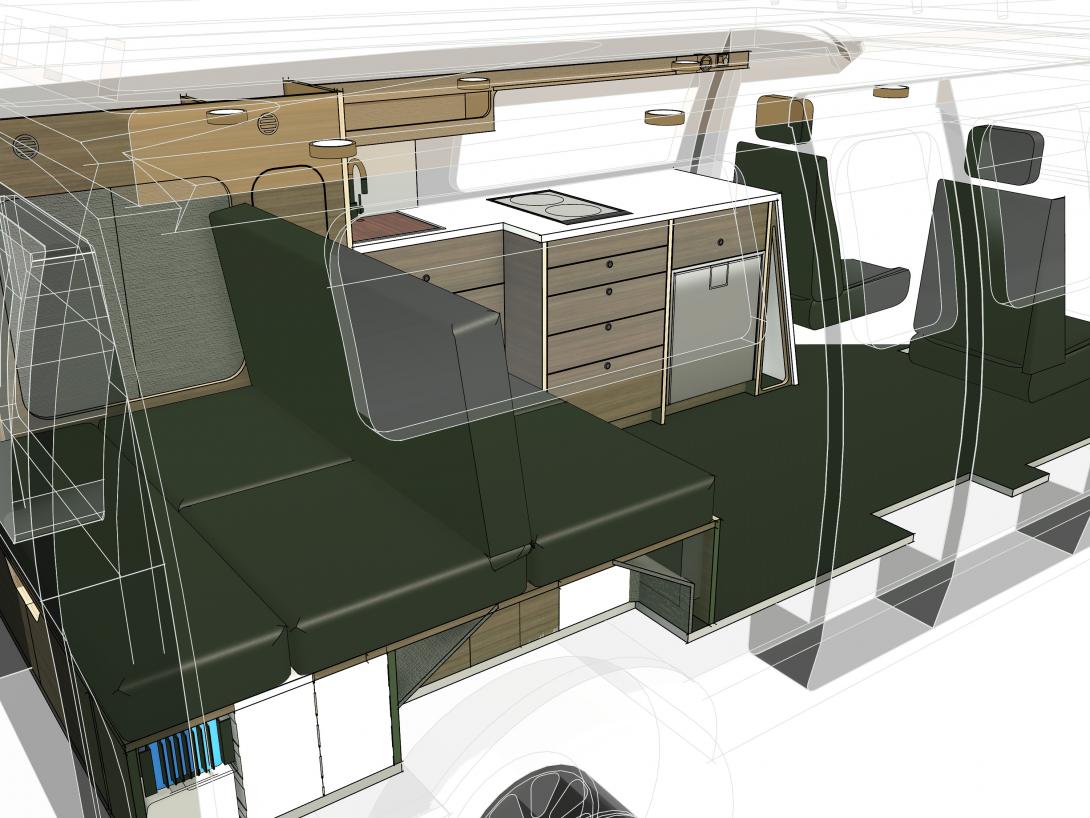
Interior ISO with Van Body
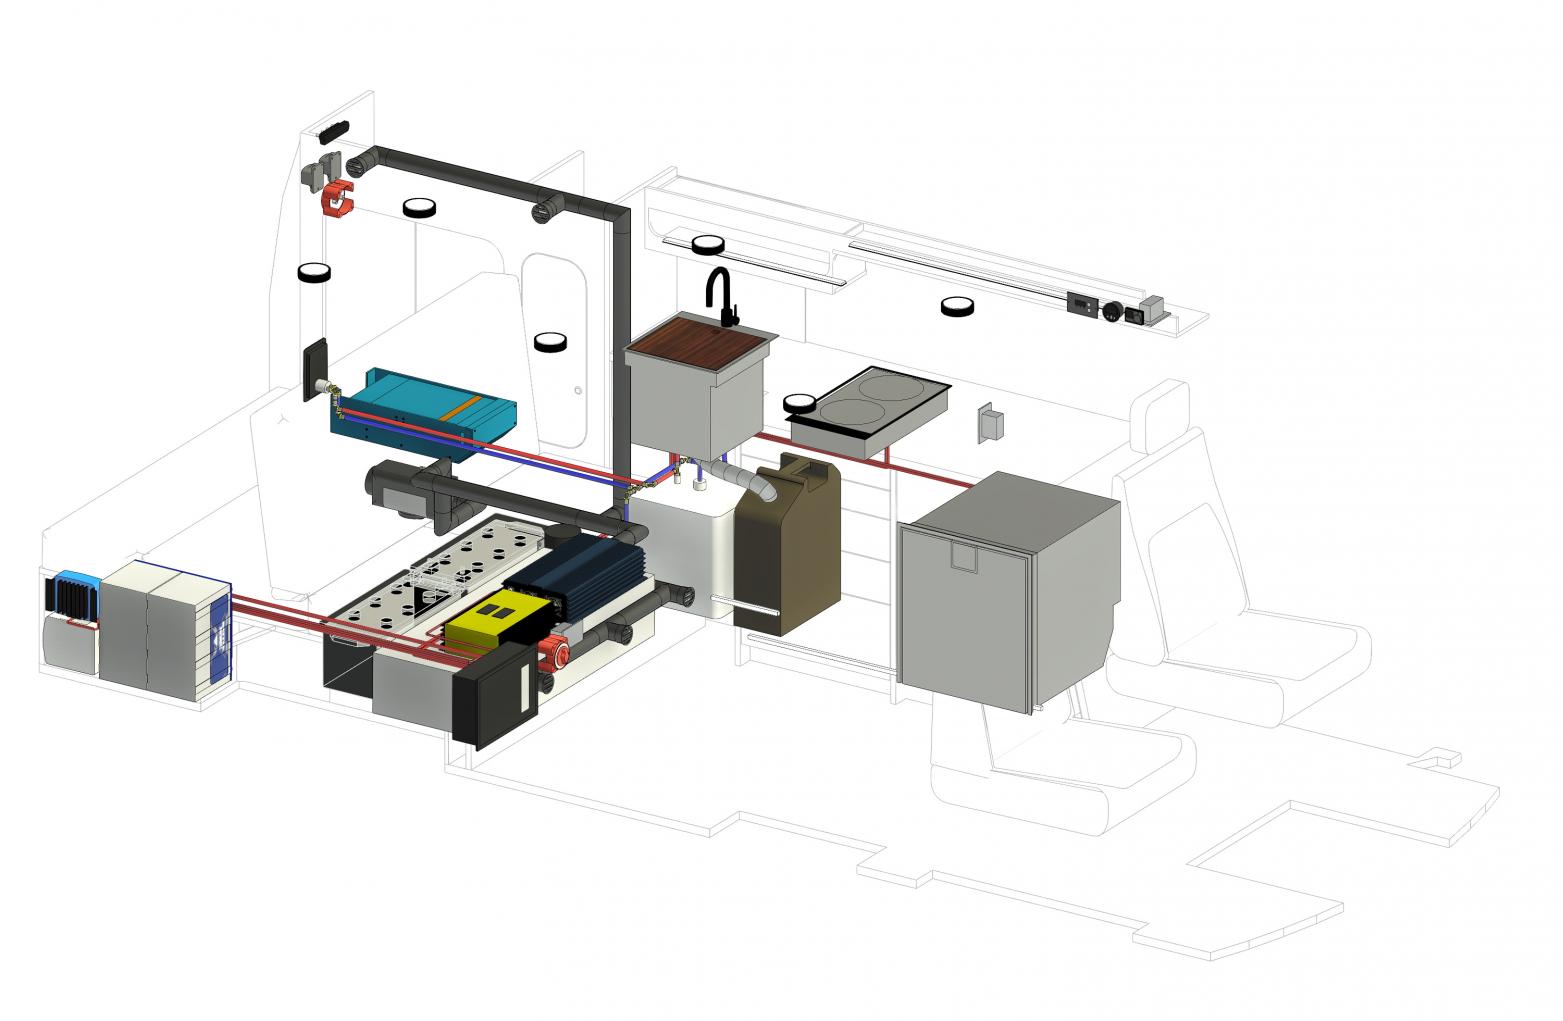
Mechanical/Electrical ISO
|

|

|
|
11-12-2020, 01:30 PM
|
#2
|
|
Senior Member
Join Date: Feb 2020
Location: Bend, OR
Posts: 312
|
The Plan
Timeline:Don't hold your breath, because it's going to be a process! Since we are doing the work ourselves, and are not working with endless amounts of money it will be a staged build, over a few years till its mostly done with little mods I'm sure for many more to come. Hopefully the plan is to have most done in the next 3-5 Years. Basic Stages: Stage 1: Paint!!
Stage 2: Main Interior Build
Stage 3: 4x4 Conversion (Leaning toward U-Joint)
Stage 4: Poptop (SMB or CCV)
Stage 5: Exterior Mods (Bumpers Racks, etc.)
Stage 6: (Im Sure there will be more
)
Break Down by Section of our Plan in no particular Order:
Exterior Modification: - New Paint
- Bedliner Rocker Panels
- Front Aluminess Bumper With Brush Guard
- Rear Bumper with Dual Swing out and Full Size Spare
- Aluminum Low Profile Roof rack
- Bushwacker Fender Flares
- Aluminess Passenger Side Ladder
- Black AMI Billet Fuel Door
- Two CRL FW904RS awning Windows (One Each Side)
- Stubby antenna from a 2006 F150
- Tinted Windows
Drivetrain Modifications - 4x4 Conversion Using U-Joint off road kit
- Possible upgrade to 2.5 Shock with adjustable remote reservoir
- Possible Hydraulic Bump Stops
- 35 or 37" tires (undecided on brand/pattern)
- 17 Method 704 Matte Black Wheels
Interior Modifications - Basic EB 50 Layout
- Wall Panels with Marathon Gray Tweed Wrap
- G-Floor Small Coin Black Flooring (Garage Flooring LLC)
- Baltic Birch Cabinets with Wilsonart Studio Teak Laminate
- Leather Rear Sofa Bed to match Front Leather seats
- Rear Drawer System
Cockpit Modifications - Kenwood Excelon DNX996XR head unit GPS
- Coverking Genuine Leather Seat Covers ( Until Upgrade to Scheelman)
- Rear Video Mirror replacement
- Front Facing Camera linked to Monitor
- Husky Floor Liners
- Leather Wrapped Steering wheel to match seats
Insulation/Climate Control Modification: - Noico Sound Deadening (100% wall, front floor,50% Floor Ceiling)
- 3M Thinsulate SM600L (Walls/Ceiling)
- MiniCell Insulation (Floor Insulation)
- 3M Thinsulate TAI 1547 (Floor Insulation)
- Webasto Air Top 2000 gasoline heater
Electrical System Modifications - 200 AH Lithium LiFePO4 house battery
- Xantrex Freedom XC 2000W/80A inverter Charger
- Victron Smart Solar MPPt 100/30 Charge Controller
- 200W of Solar
- Sterling BAT to BAT Charger 12v 30A Alternator Charger
- 30A Distribution Box
- Victron Battery Monitor
Electrical Loads Interior - LED Slim Puck Lights in Ceiling
- LED Undermount Strip Lighting
- Dometic Coolmatic CRX 65S
- Lippert Furrion Single Burner Stove
- 12V sockets throughout
- 120v Outlets hooked to inverter
- Shurflo 3GPM Water Pump
- 12v Water Heater (Copying Boywonder)
Electrical Loads Exterior - Baja Designs S2 Sport (Rear Back Up High Mount)
- Baja Designs Squadron Sport Angled (Camp Side Scene Light)
- On Board Air System
- Baja Designs Squadron SAE (Front Fog Lights)
- Baja Designs Squadron Sport Flush (Rear Bumper Lights)
- Baja Designs Rock Lights
- 12,000LBS Warn Winch
- sPod Switch Pod
Plumbing System Modification - 23GAL Freshwater Tank
- 5GAL Grey Water tank for sink
- 15x15 Ruvati Workstation Sink
- Rear Exterior Shower Set Up
|
|
|
|
|
11-12-2020, 01:37 PM
|
#3
|
|
Senior Member
Join Date: Feb 2020
Location: Bend, OR
Posts: 312
|
The Build Begins!
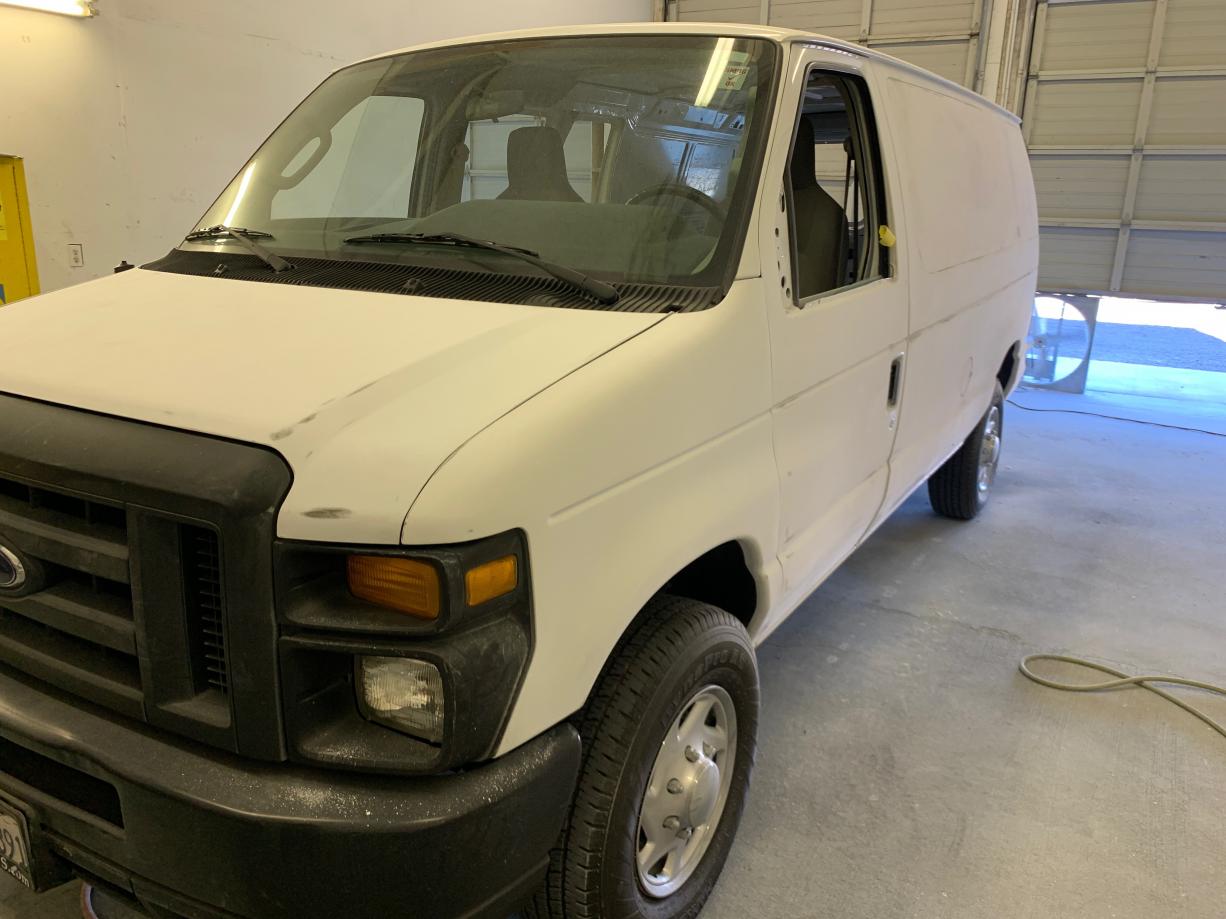
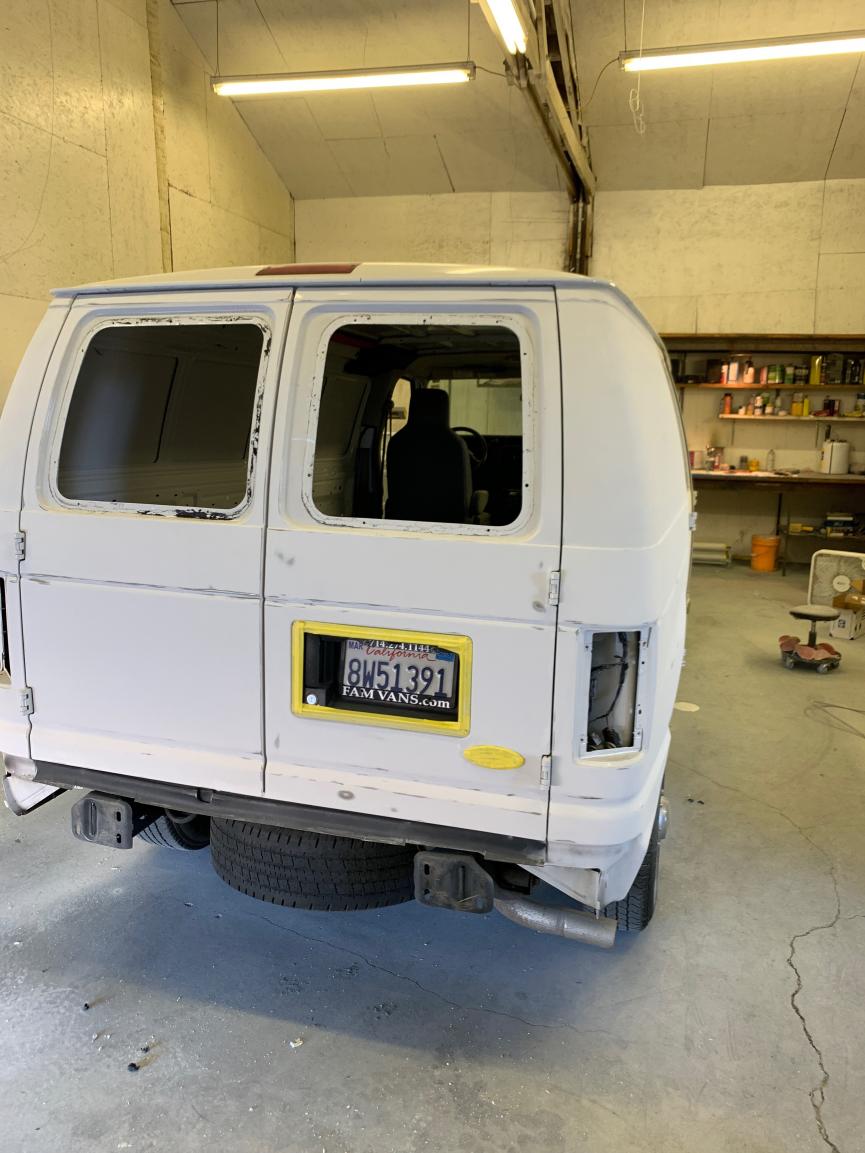
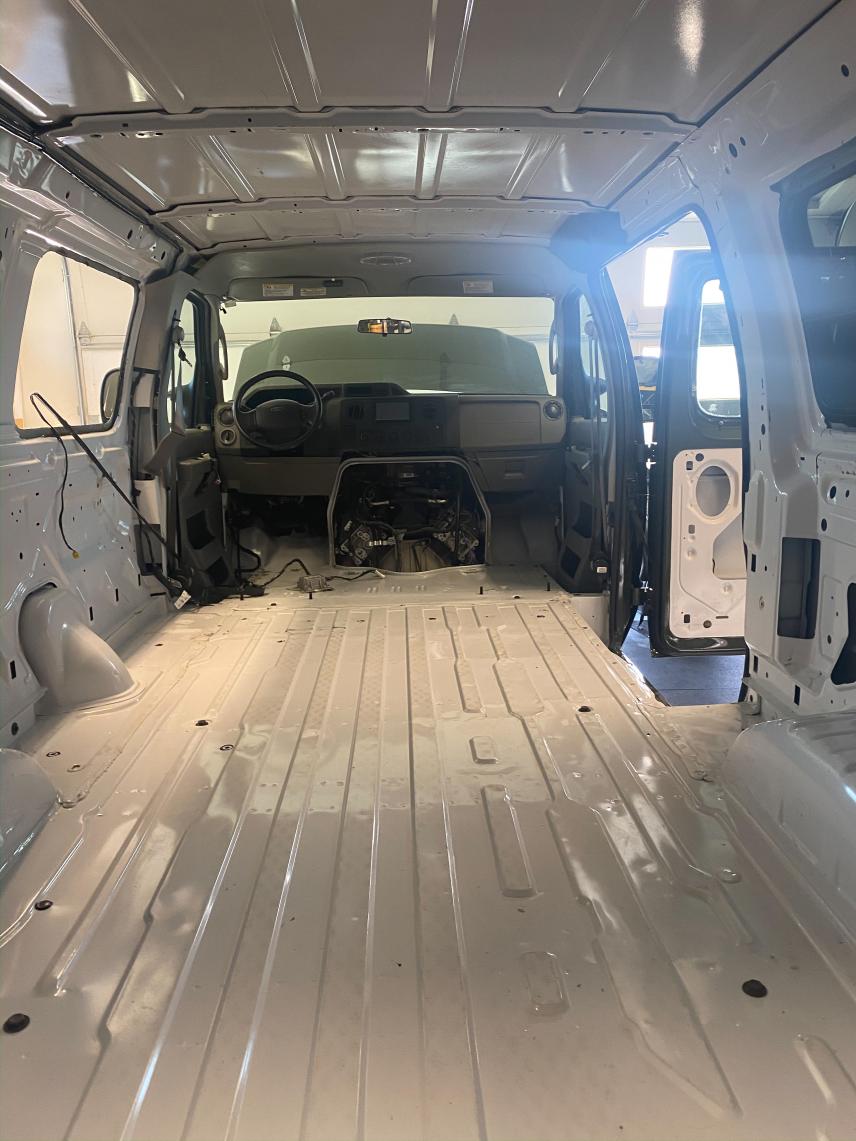
- Almost immediately we started ripping things apart. First thing to go was the no window side doors. I found some passenger doors on craigslist in decent shape for $150 so we jumped on that deal and made the switch! First step to decreepify done!
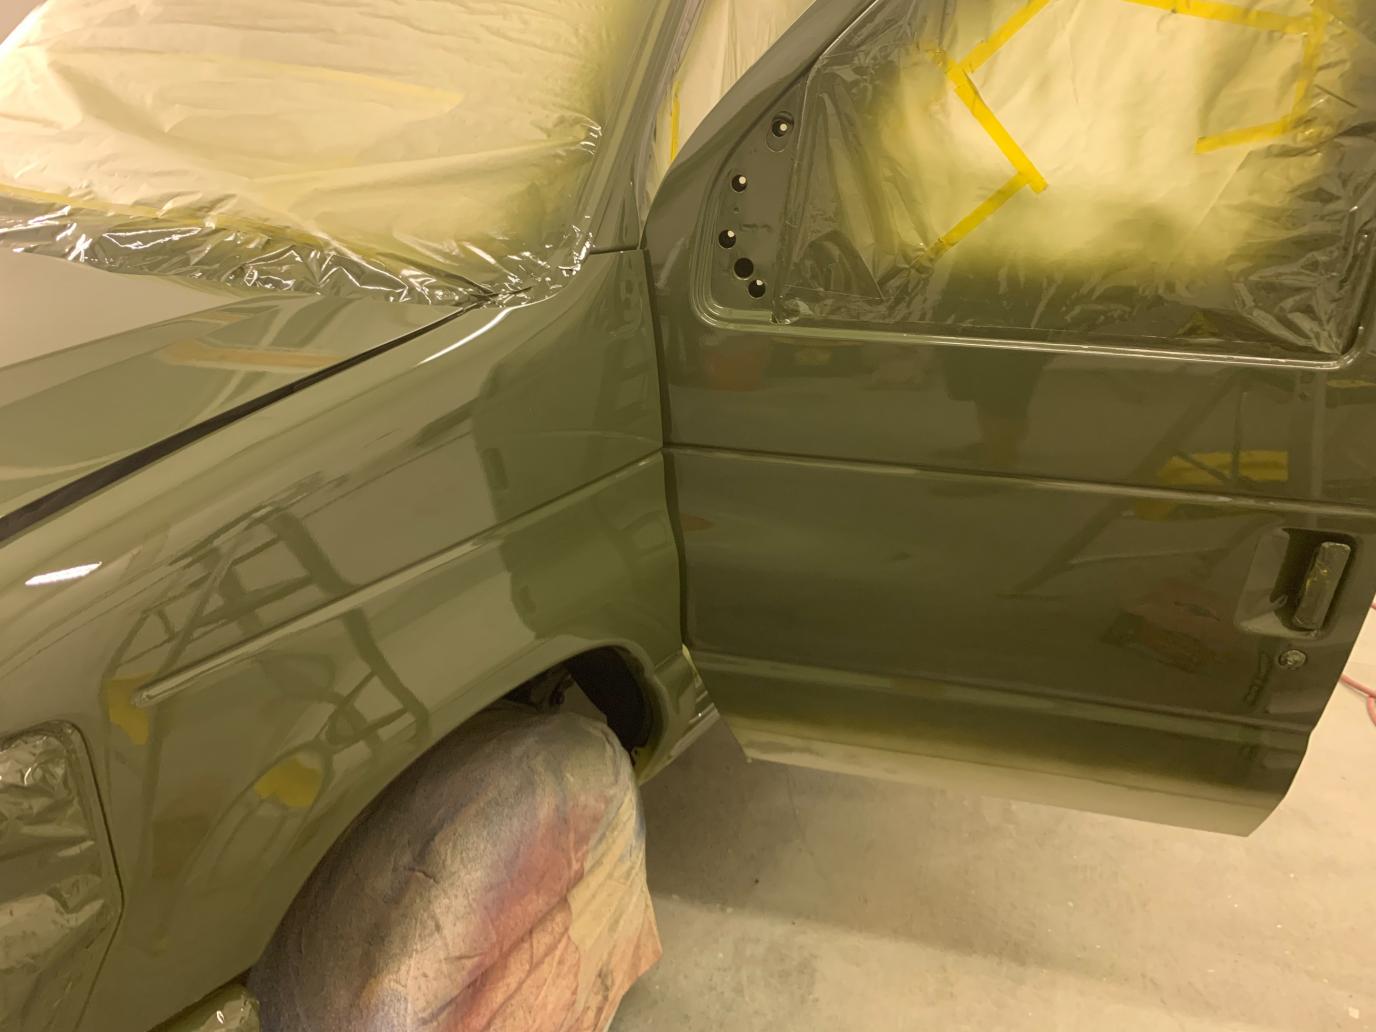
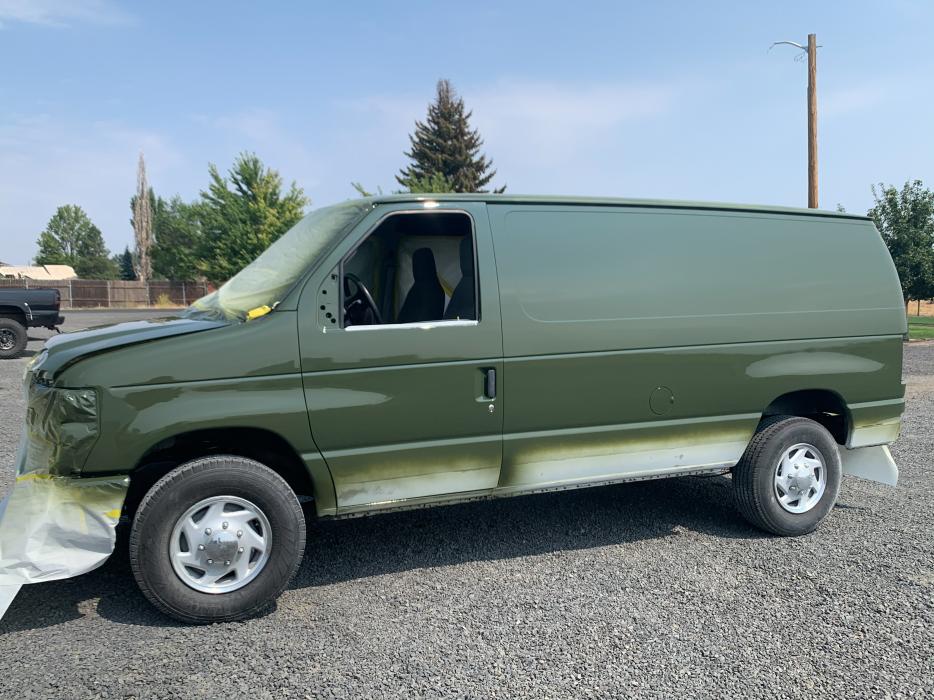
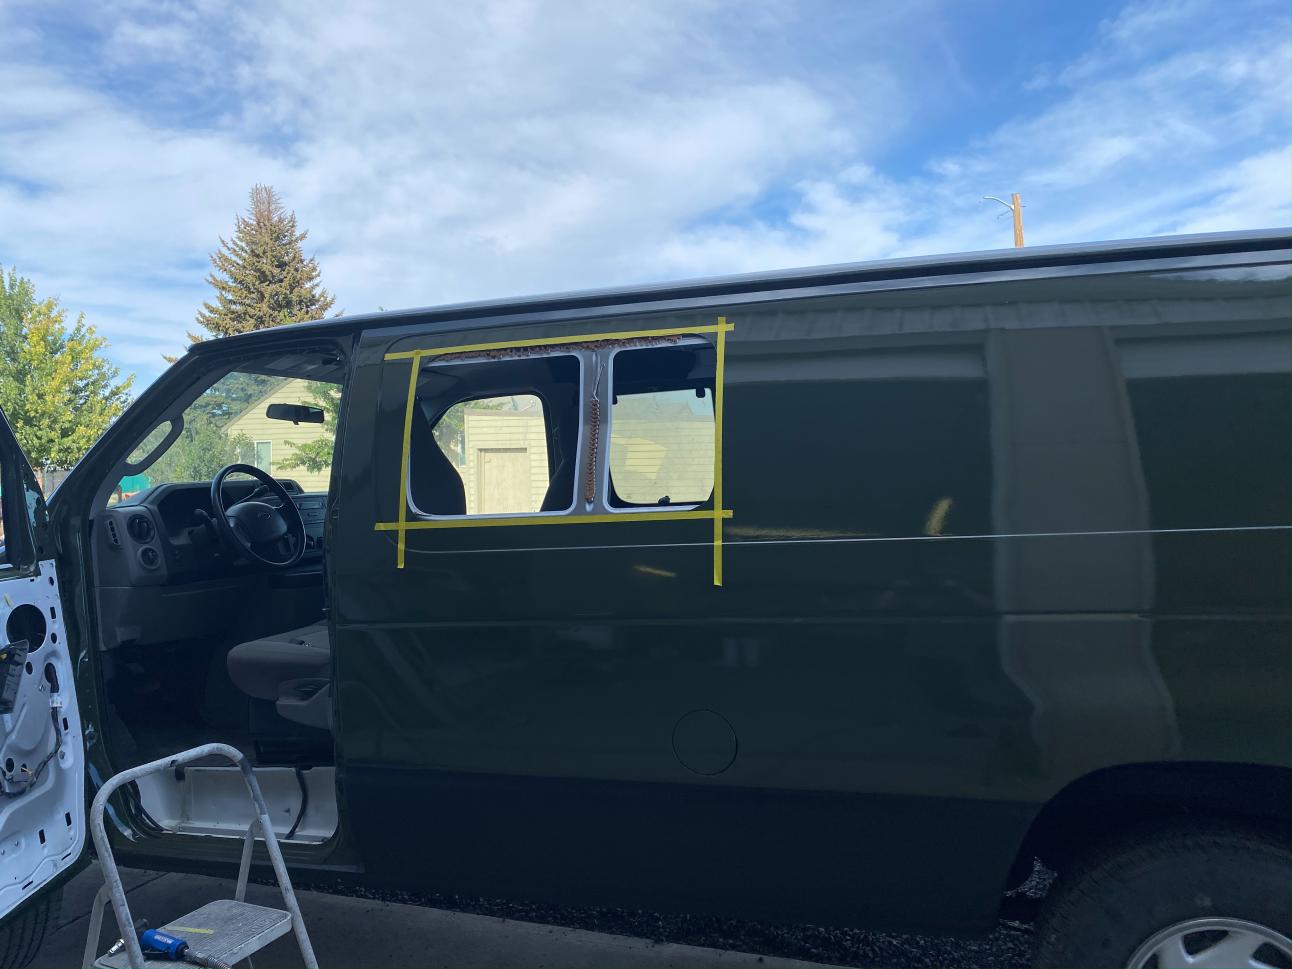
- The next thing we did was get lined up with our now buddy Zach with Vert INC paint. This was pretty urgent, since when we received the van it had white house paint rolled on over old decal residue. Still not sure why they painted over rather than goo goning it, but at least it's gone now. Zach took on the big task of stripping down the van, pulling the windows and getting it all painted to the perfect color we wanted. A dark Olive green! We also got the lower rocker panels bedlinered for aesthetics and to protect from rocks and rust. While at his shop he offered to cut out the holes for our new CRL awning windows, and we are happy we let him do that. That is for sure a nerve wracking experience! It became especially nerve wracking when we went to install the second window and we couldn't get it to fit right. After some trial and error we figured out the second window was missing a seal. So we temporarily installed it without one so we could get it home from paint and start on our interior stuff while we sorted out the seal with CRL.
|
|
|
|
|
11-12-2020, 02:09 PM
|
#4
|
|
Senior Member
Join Date: Feb 2020
Location: Bend, OR
Posts: 312
|
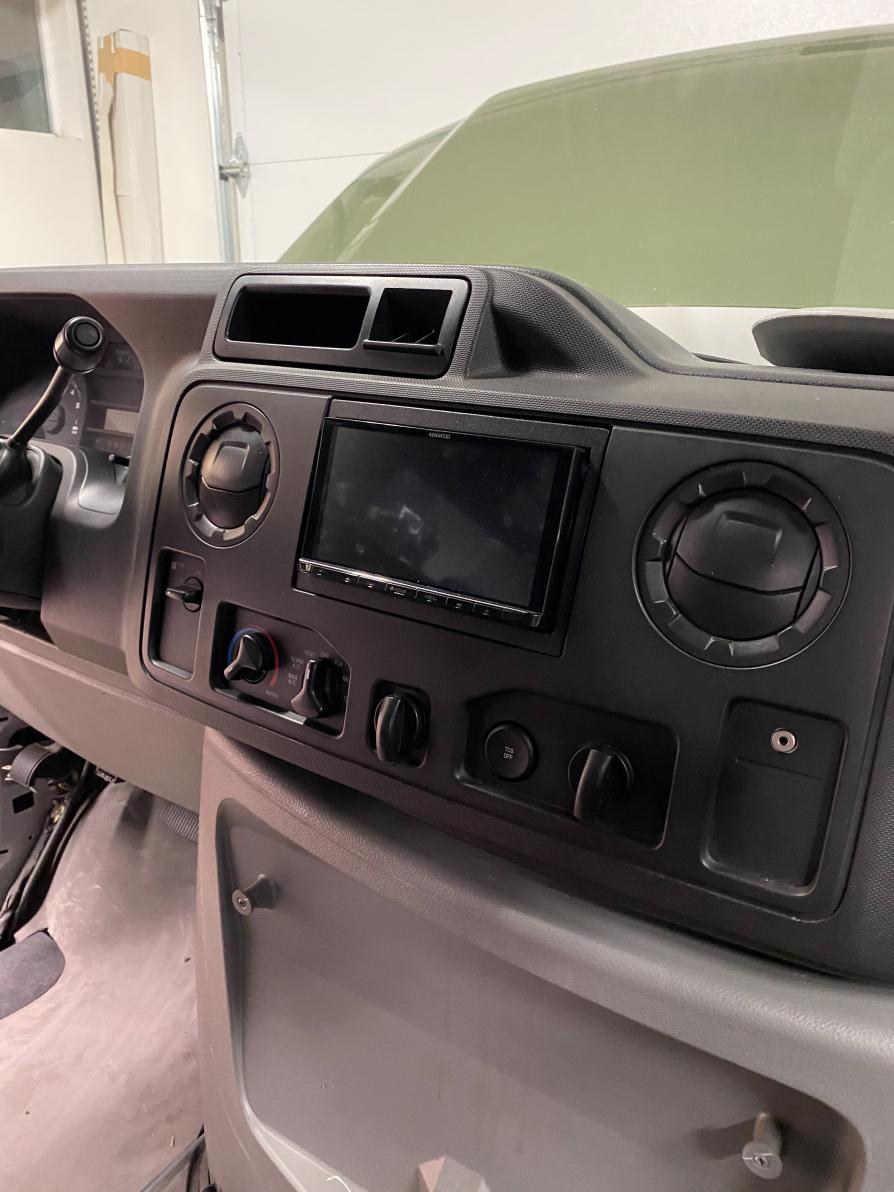
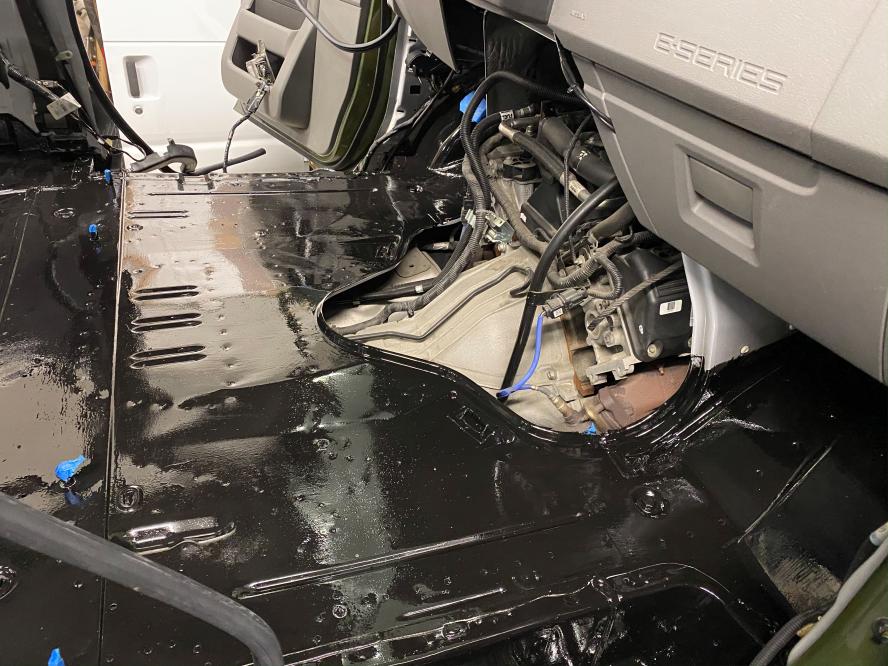
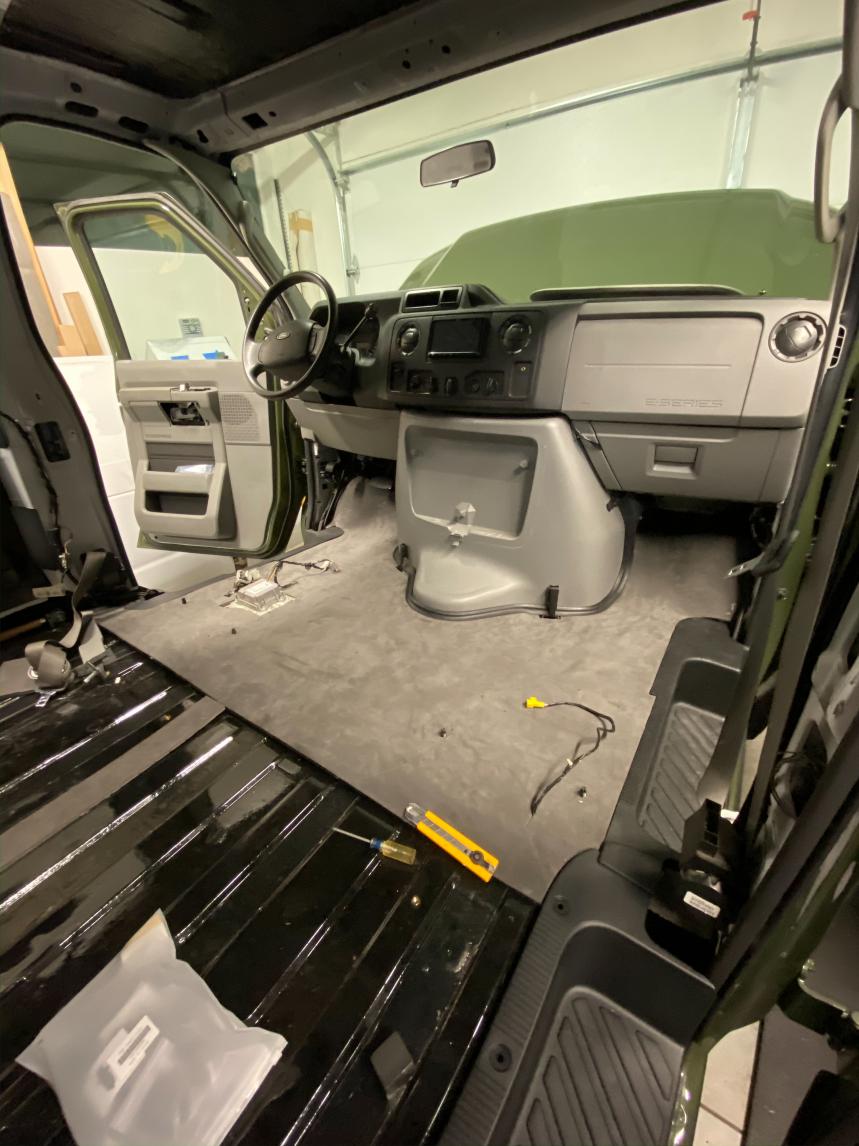
- Once we got it home it was time to rip it apart even more. First thing I did was get the factory stereo out and our new Kenwood Excelon DNX996XR head unit in. I ordered it from Crutchfeild, and with all their stuff it was a relatively quick and easy process.
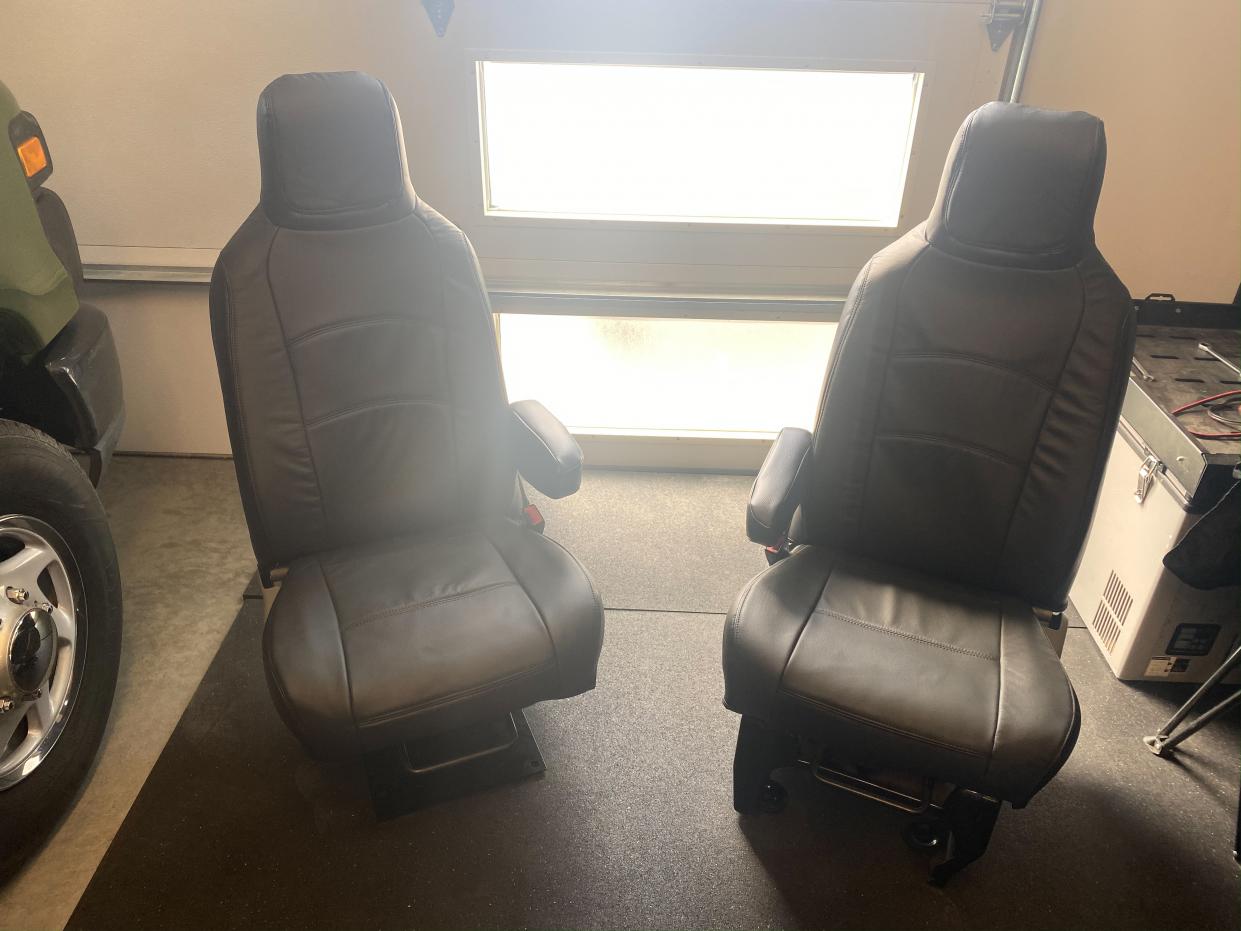
-I took the seats out to prep for flooring and insulation, so while those were out I went ahead and installed our Cover King Genuine leather seat covers we got from Costco. They feel very nice and can say I am very happy with how they fit! I also got our passenger seat swivel installed. Thanks again to forum member Ray 1der!
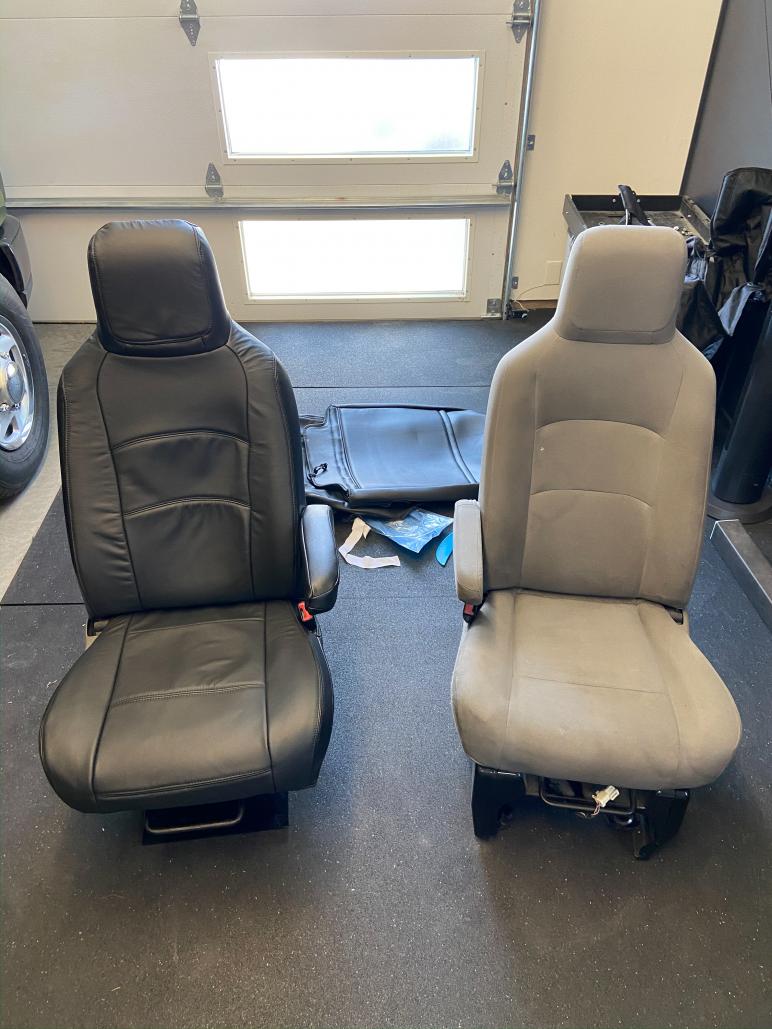
Side by Side comparison
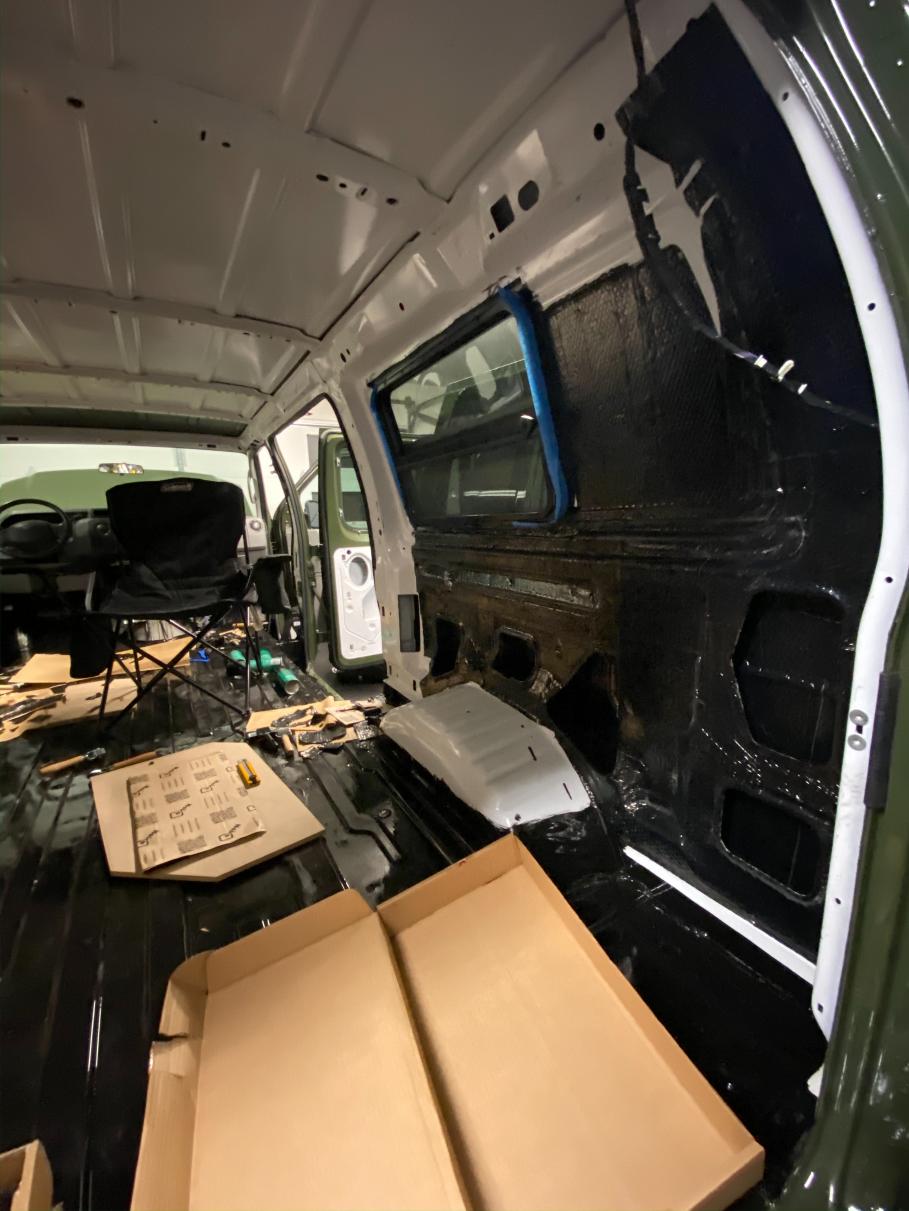
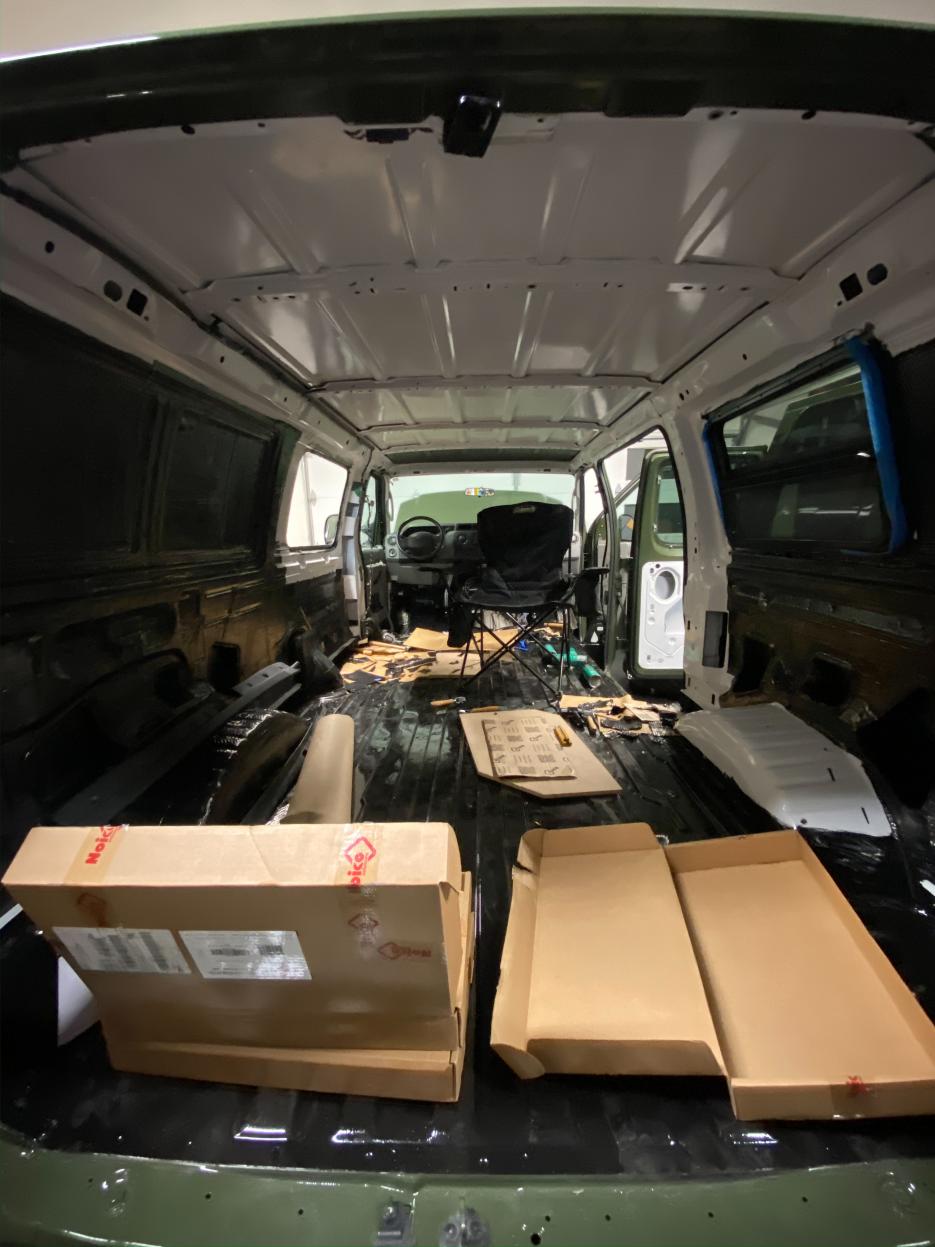
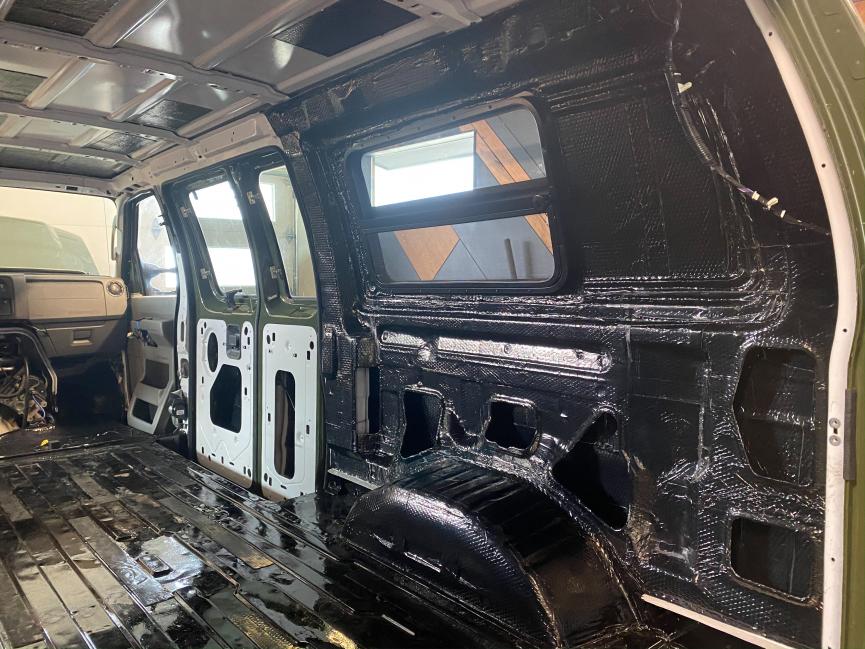
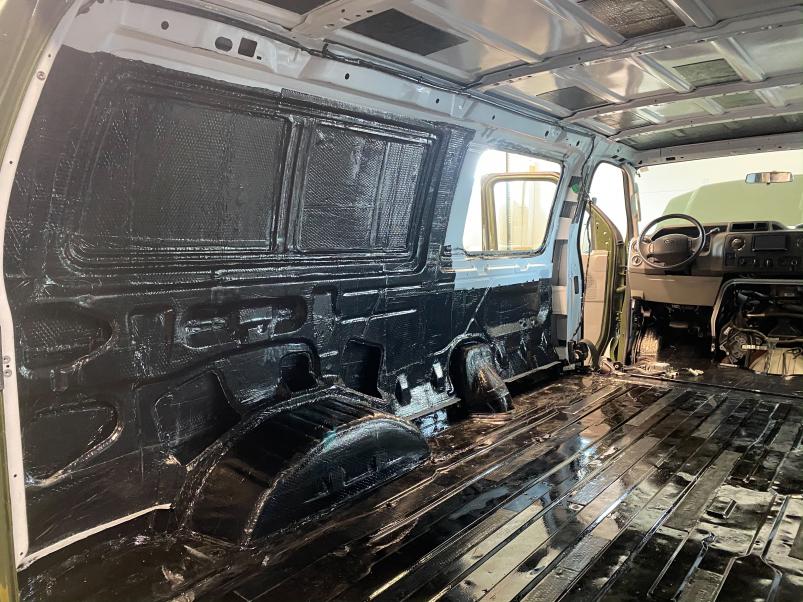
-The next thing we got done was some sound deadening on the front doors. Tried to get as much of the rear panel as I could reach covered, and a complete coving of the inner panel.
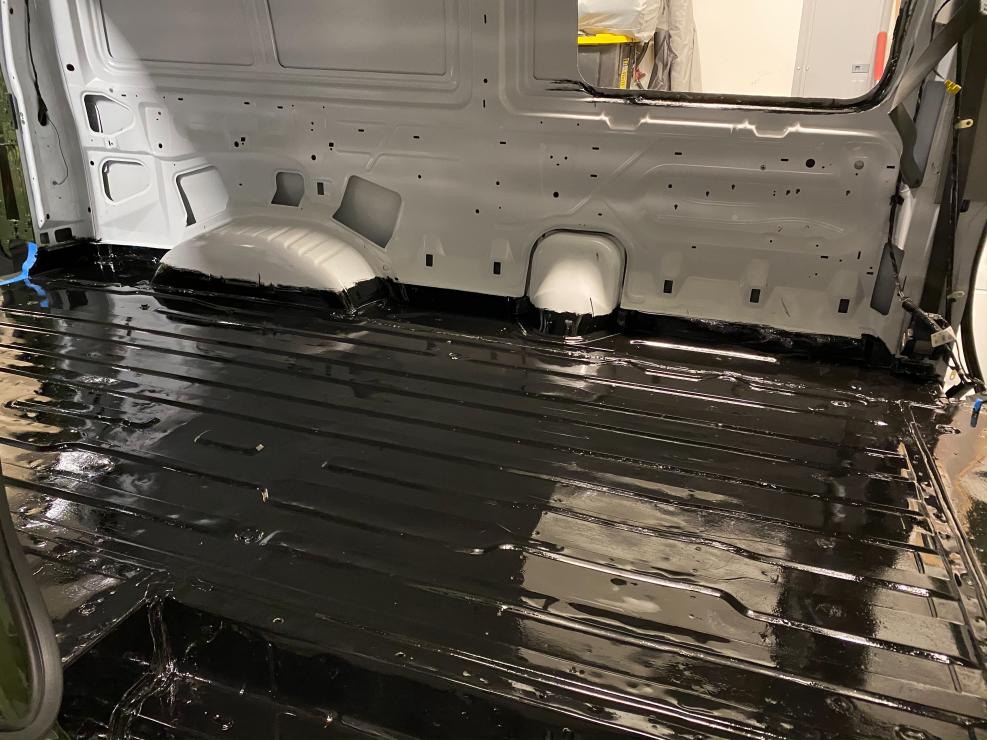
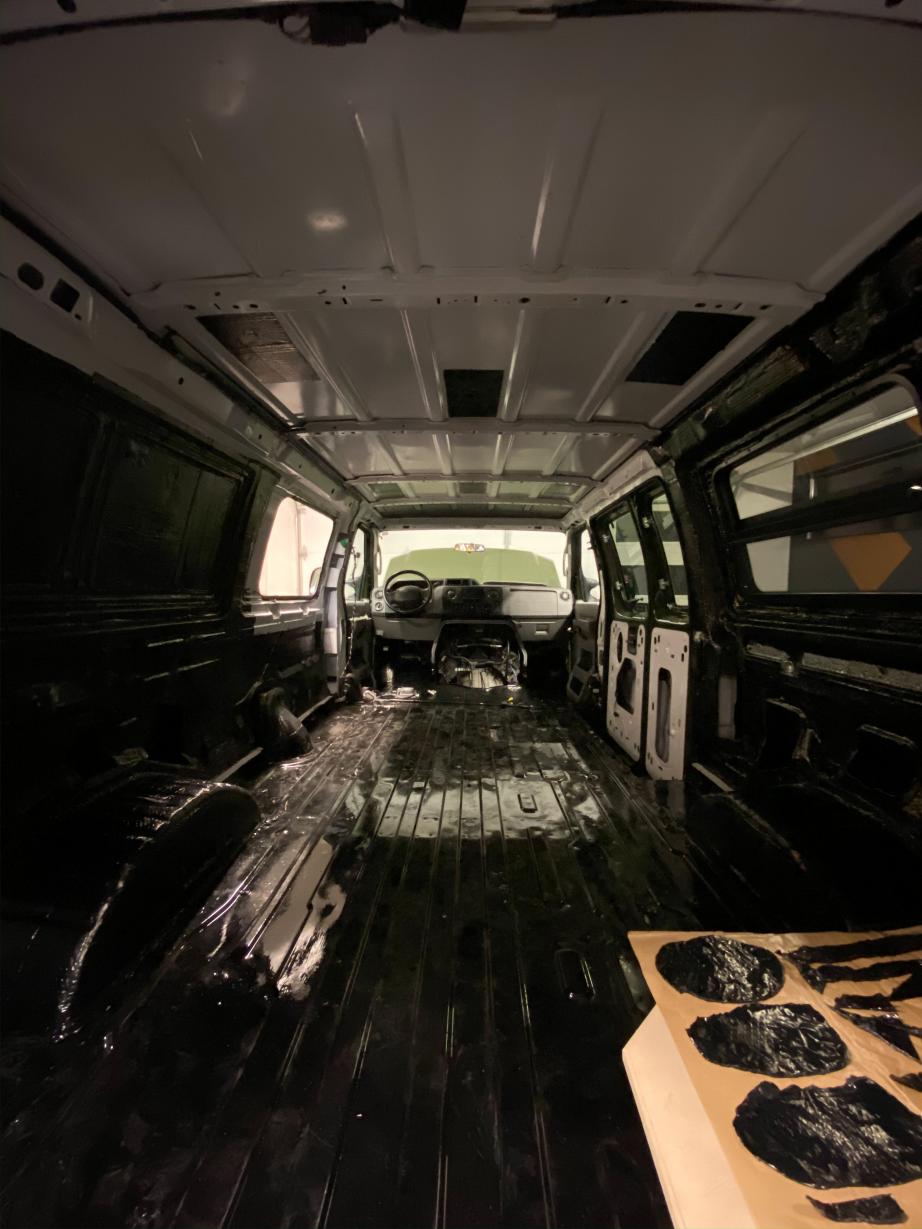
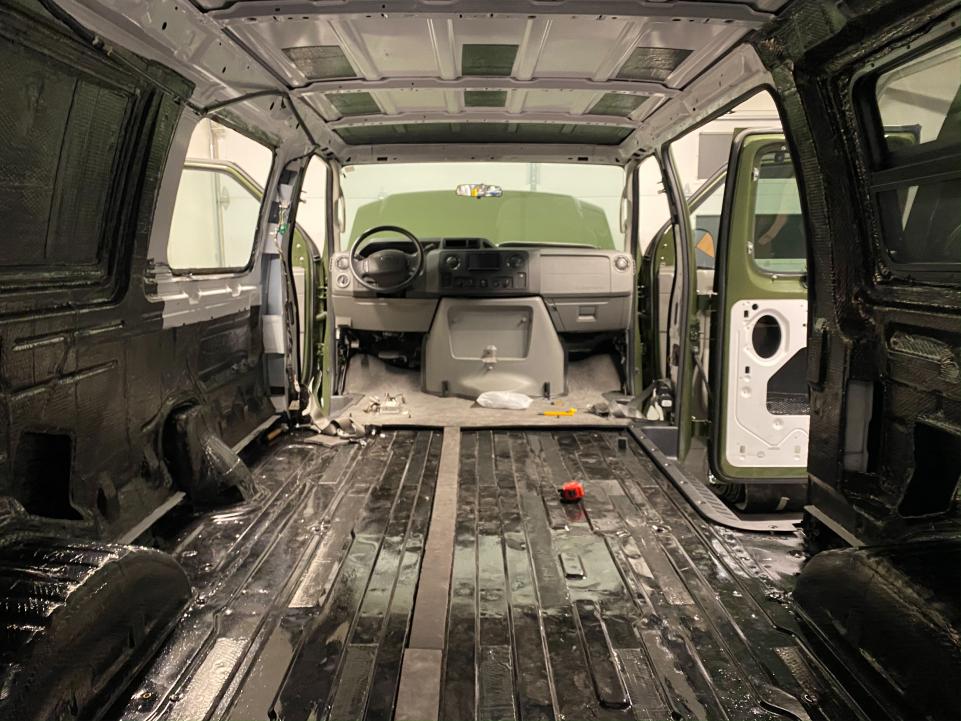
-After that we did a complete strip and clean of the floor, filling all holes and and removing everything in prep for a full coating of POR 15.
-Two coats of POR 15 later we had a nice solid black floor from firewall to rear doors.
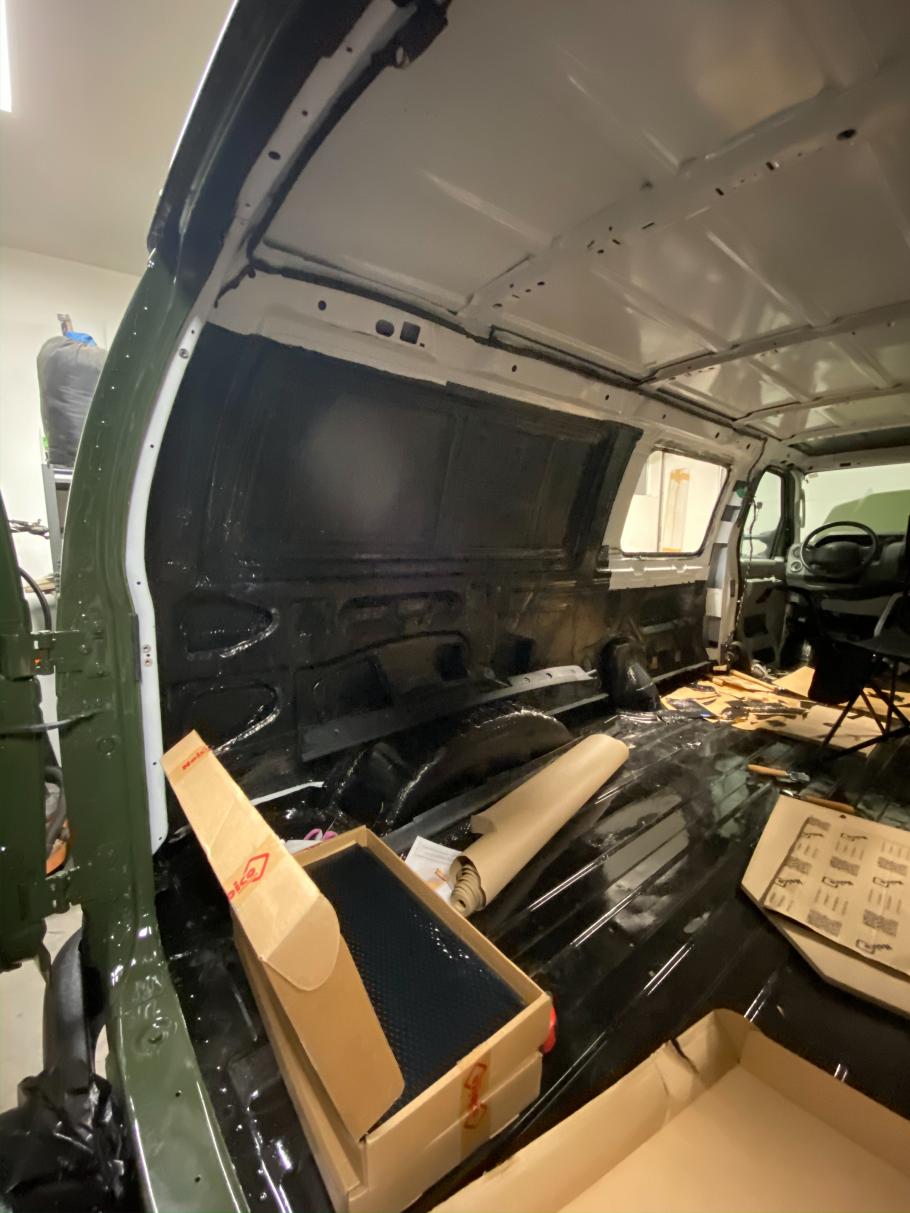
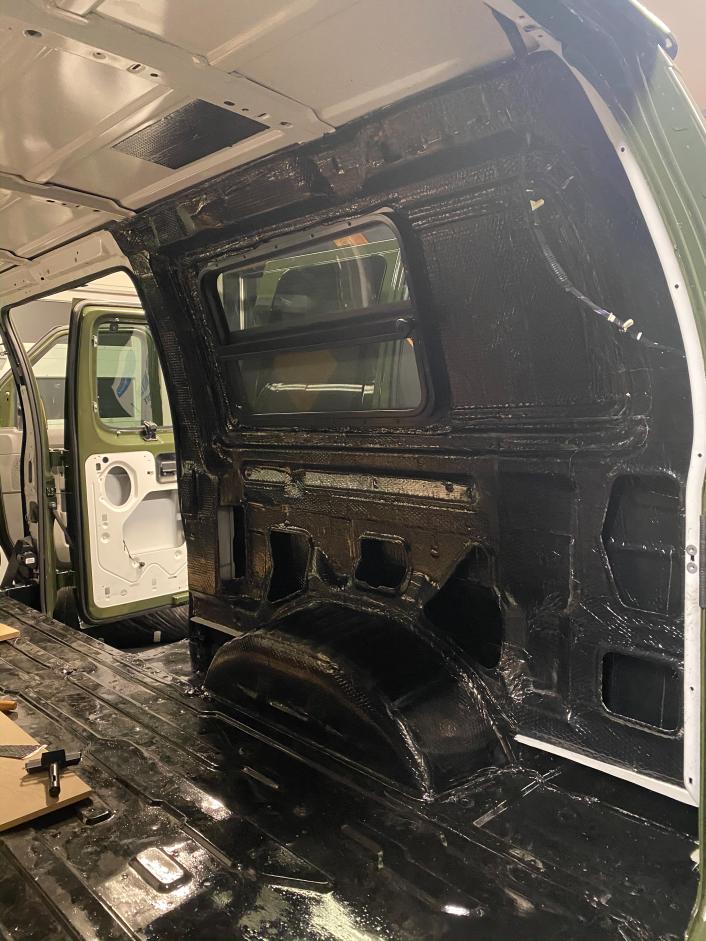
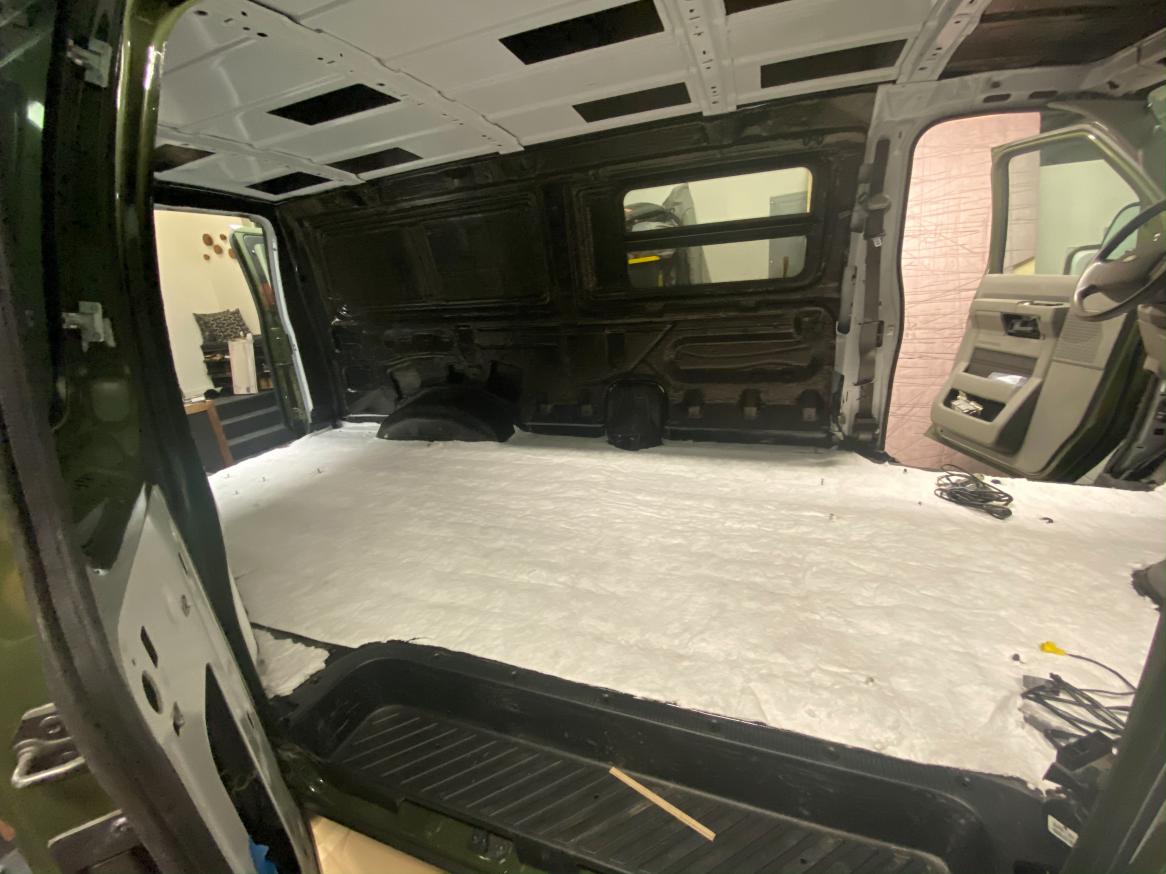
-Next up was starting on Sound deadening the side walls and ceiling. Again we covered the outer panel as much as we could and the inner panel 100%. Might be over kill, but figured well only do it once (Hopefully).
|
|
|
|
|
11-12-2020, 07:40 PM
|
#5
|
|
Site Team
Join Date: May 2007
Location: Southern New Mexico
Posts: 10,179
|
Well, you just jump straight into the deep end, didn't you?
Herb
__________________
SMB-less as of 02/04/2012. Our savings account is richer, but our adventures are poorer.
|
|
|
|
|
11-12-2020, 07:54 PM
|
#6
|
|
Senior Member
Join Date: Jul 2011
Location: TN
Posts: 10,254
|
Well damn. Welcome aboard! If your build is anything like your post/proposal I'm sure this will be amazing!

|
|
|
|
|
11-13-2020, 03:52 AM
|
#7
|
|
Senior Member
Join Date: Nov 2016
Location: FL and VA
Posts: 1,953
|
Yeah, well done and getting after it. Looking forward to following along.
__________________
Chris
2008 GMC 3500 Quigley Weldtec 4x4 Savana SMB
|
|
|
|
|
11-13-2020, 03:01 PM
|
#8
|
|
Senior Member
Join Date: Feb 2020
Location: Bend, OR
Posts: 312
|
Quote:
Originally Posted by BroncoHauler

Well, you just jump straight into the deep end, didn't you?
Herb
|
Yes, its becoming clear that this is a trend in our lives! If your going to do it might as well do it 110%
Quote:
Originally Posted by 86Scotty
Well damn. Welcome aboard! If your build is anything like your post/proposal I'm sure this will be amazing!
|
Thanks, hopefully over time it will all come together how we want!
Quote:
Originally Posted by marret
Yeah, well done and getting after it. Looking forward to following along.
|
Thanks, we plan on keeping the thread up to date the best we can! Speaking of which I should probably get the next round of stuff uploaded...
__________________
Vandit - 2013 E250 Ground Up Build- Full Custom DIY Interior Build
- DIY U-Joint Off Road 6" 4x4 Conversion
|
|
|
|
|
11-13-2020, 03:56 PM
|
#9
|
|
Senior Member
Join Date: Mar 2015
Location: Maryland
Posts: 3,384
|
At this pace, Think you're trending well ahead of your timeline...funds withstanding.
__________________
TwoXentrix
"AWOL"
|
|
|
|
|
11-13-2020, 04:10 PM
|
#10
|
|
Senior Member
Join Date: Feb 2020
Location: Bend, OR
Posts: 312
|
-After getting a good start on the sound deadening we decided it was time to get our insulation, so we headed to DIYvan in Hood River. That drive was a struggle since we went when all of Oregon was on fire and blanketed in hazardous levels of smoke.
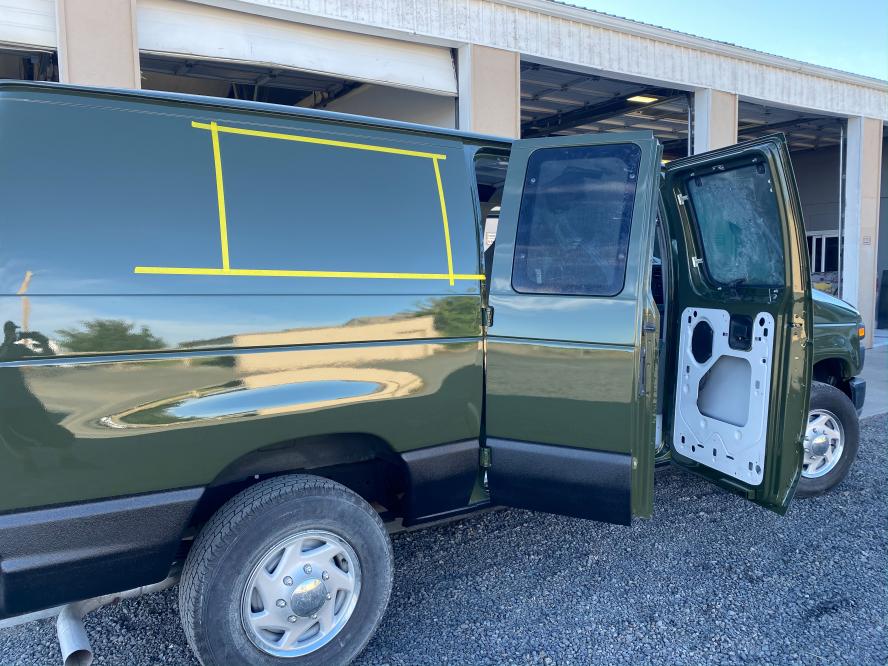
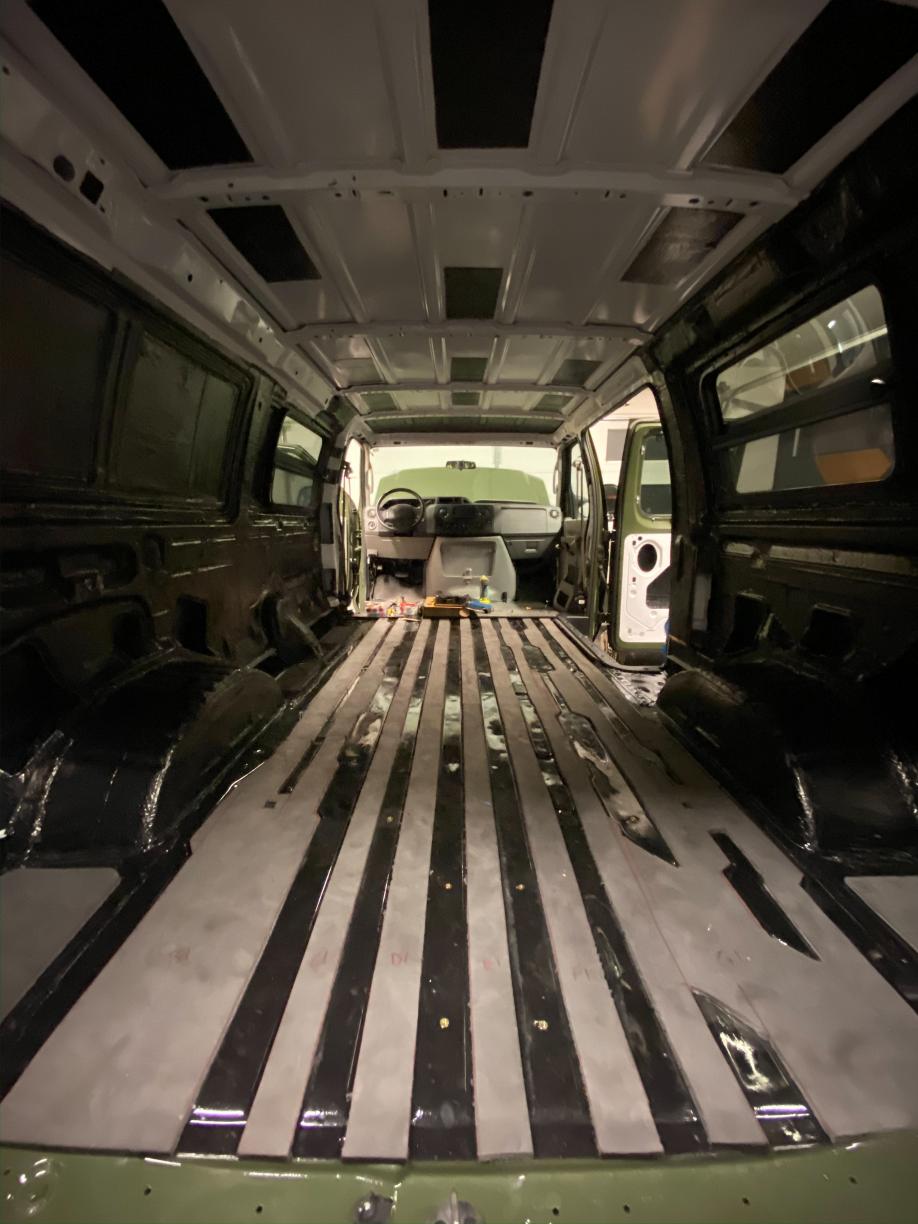
-After we got most of that done I started on laying out and installing rivnuts for our floor structure. I didn't put in a ton, but enough to help suck the wood structure down to the insulation.
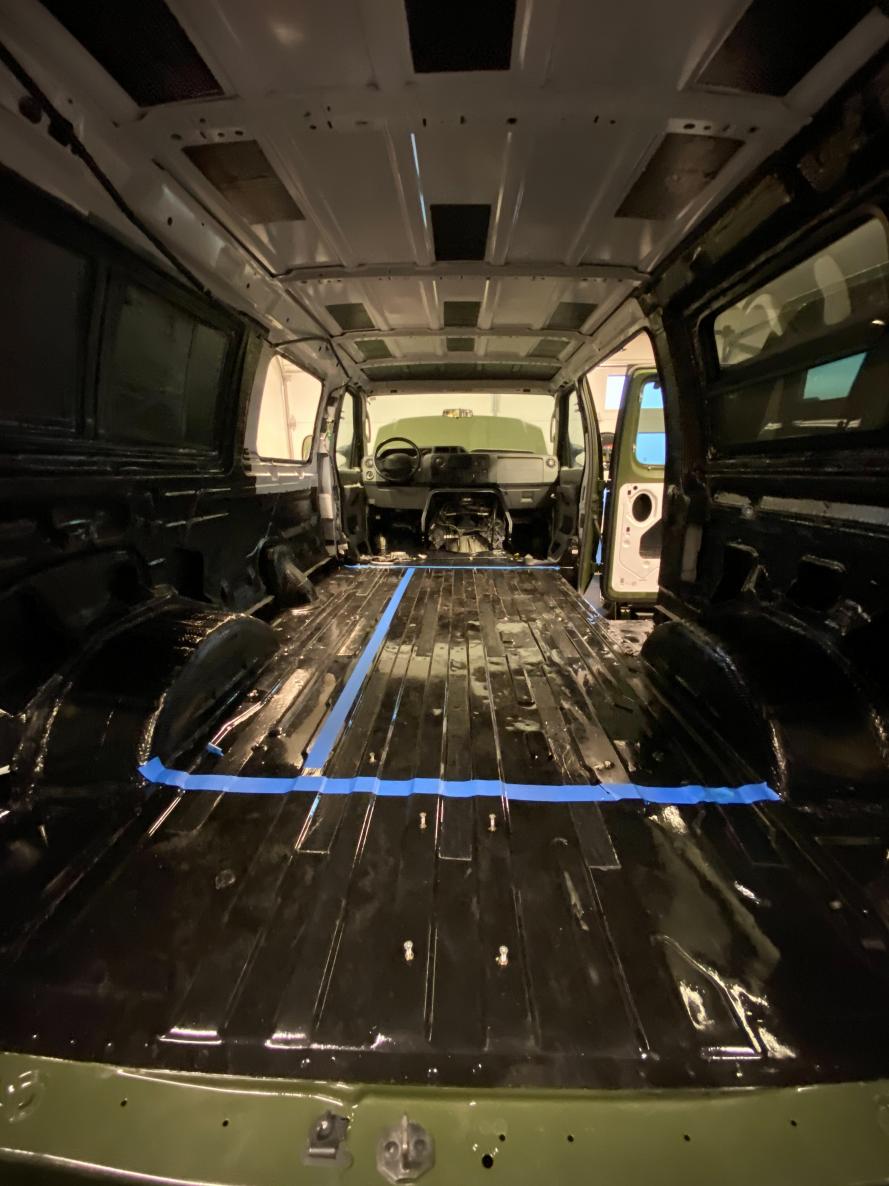
Tape lines for where the Plywood will fall
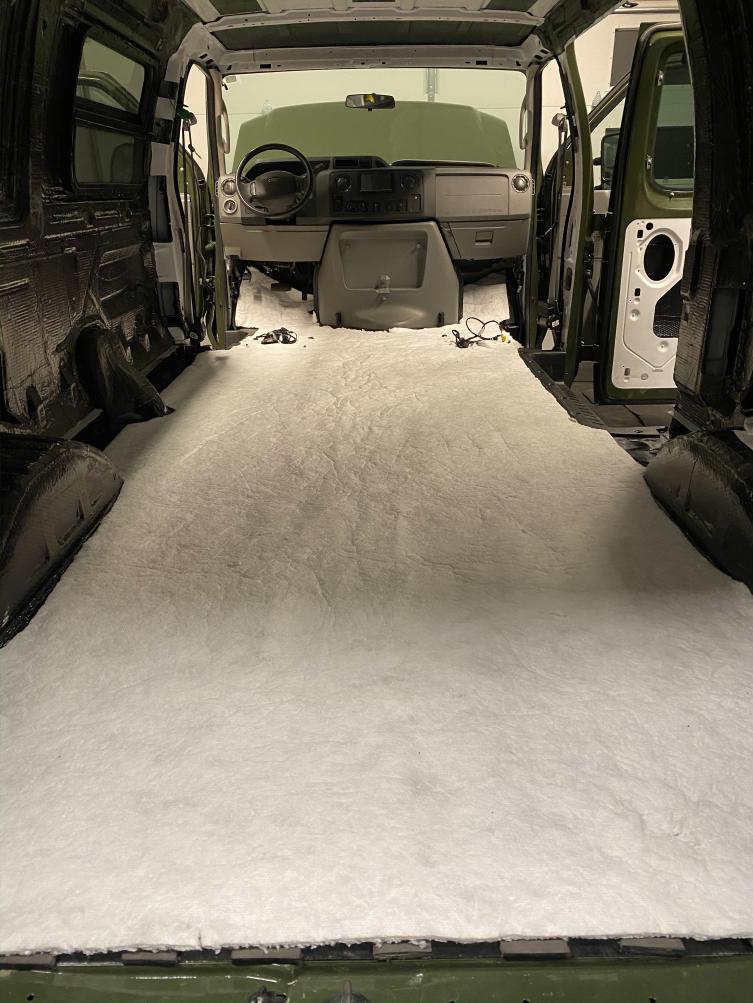
-The next step was starting on the lowest layer of insulation. We are filling all the grooves with Minicell foam from recommendations of other forums as well as blog post by Faroutride. Measuring and cutting each oddly shaped valley is a slow process.
-After about 3 weeks we finally got the window seal from CRL and got the window re-installed and then it worked perfectly!
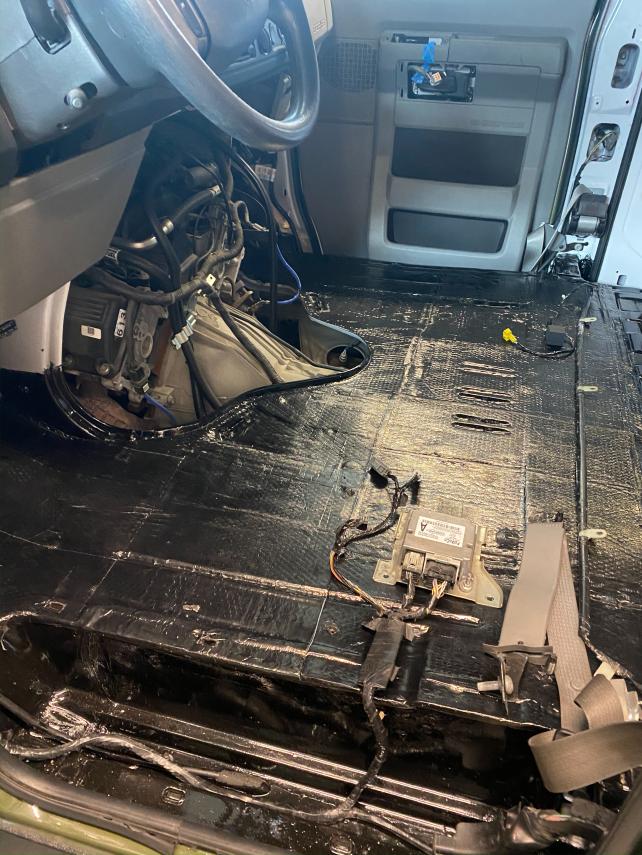
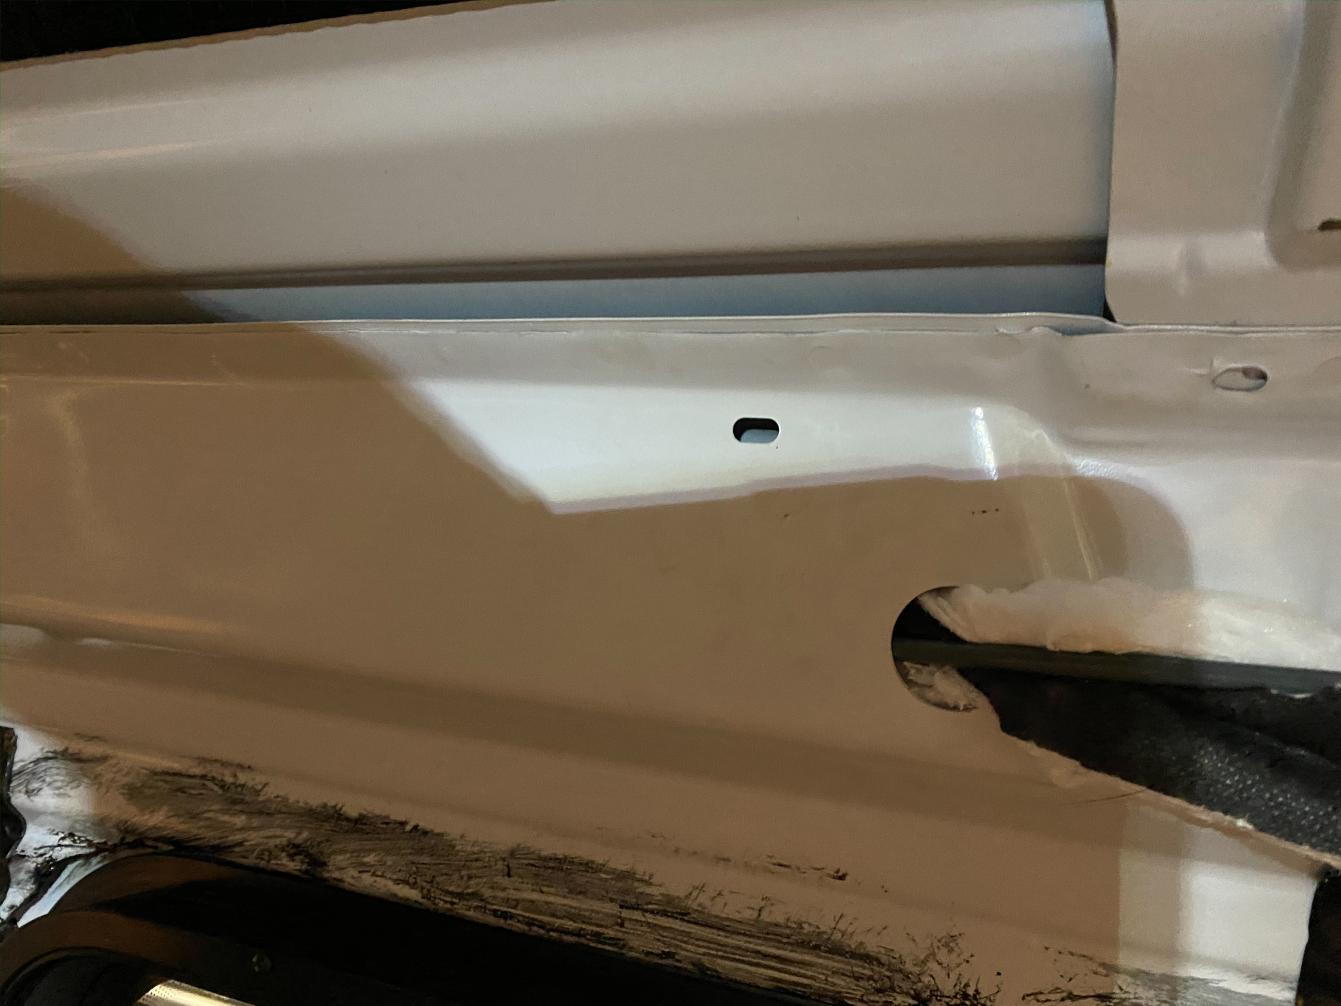
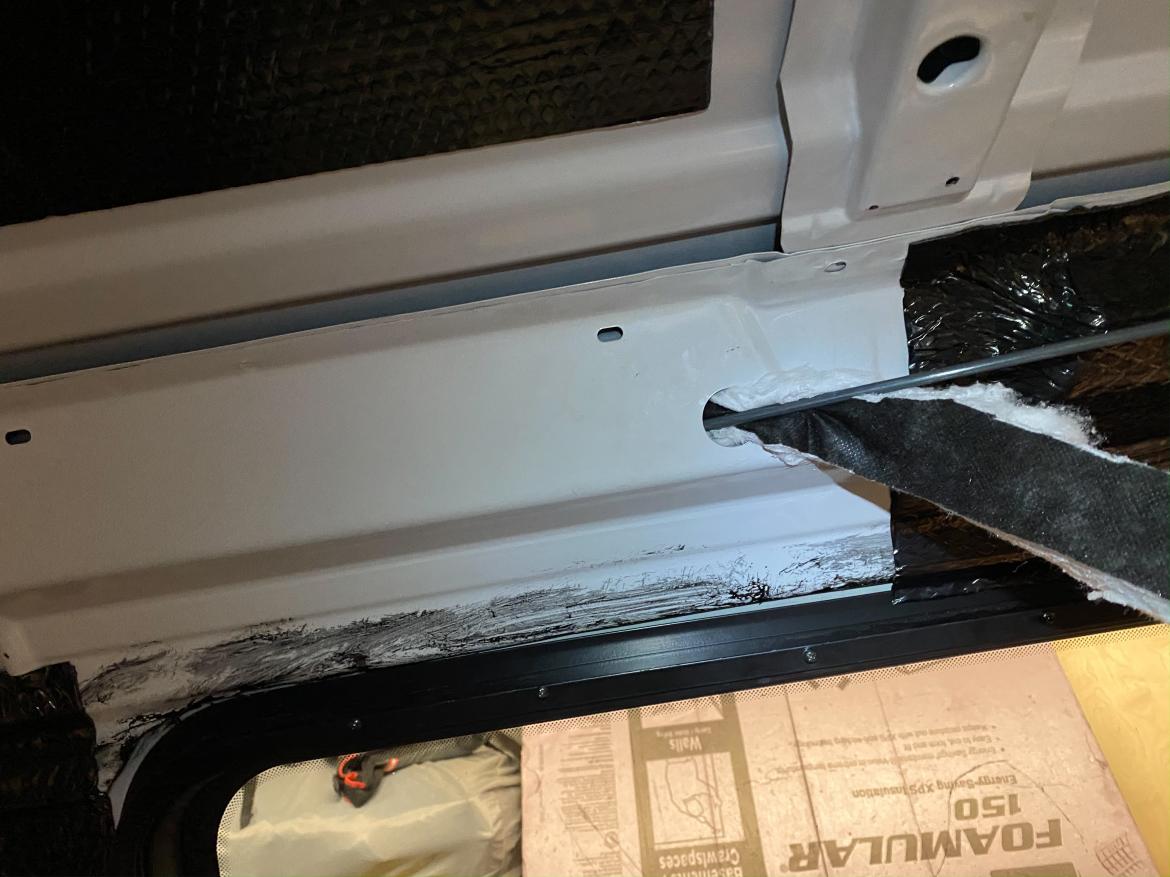
-Next I started on rerouting all the factory wiring harnesses. I followed the lead of a few posts I have seen on the sportsmobile forums for this including posts by cthayn and skinny. After the wiring harness was rerouted I stuffed the cavity with Thinsulate as well as resecured as much of the loom as I could.
-The next step was to finally finish off all the sound deadening. Again I know it's probably unnecessary, but I know I'll be happy to know there isnt anymore I could have done.
You can see this in the later pictures
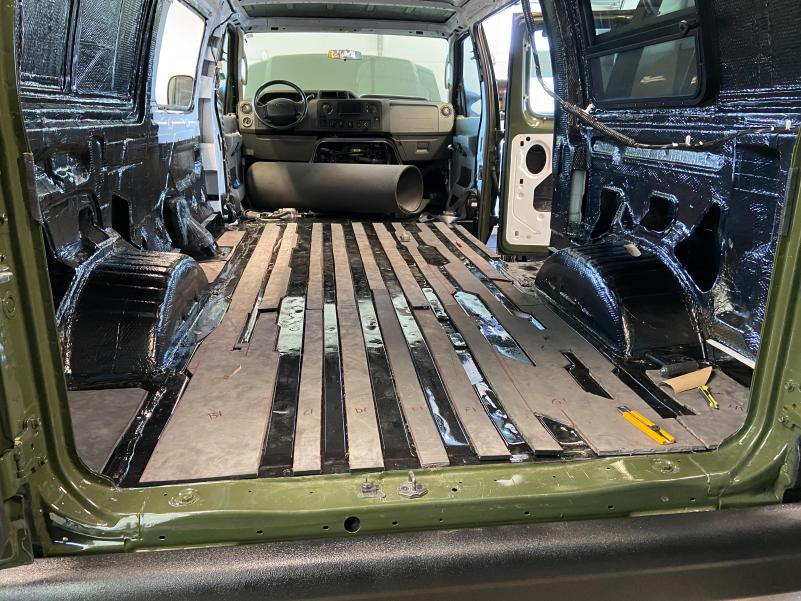
-After that I went ahead and started on my next layer of floor insulation. A thinner layer of Minicell.
Couldn't find any pictures 
-I used the top layer of minicell foam as my template for my Thinsulate TAI 1547 layer that will be between the two layers of foam for some additional R value. This came and the recommendation for Hein at DIYvan.
__________________
Vandit - 2013 E250 Ground Up Build- Full Custom DIY Interior Build
- DIY U-Joint Off Road 6" 4x4 Conversion
|
|
|
|
|
|
 Posting Rules
|
You may not post new threads
You may not post replies
You may not post attachments
You may not edit your posts
HTML code is Off
|
|
|
|
 » Recent Threads
 |
|
|
|
|
|
|
|
|
|
|
|
|
|
|
|
|
|
|
|
|
|
|
|
|
|
|
|
|
|
|
|
|
|


 Vandit
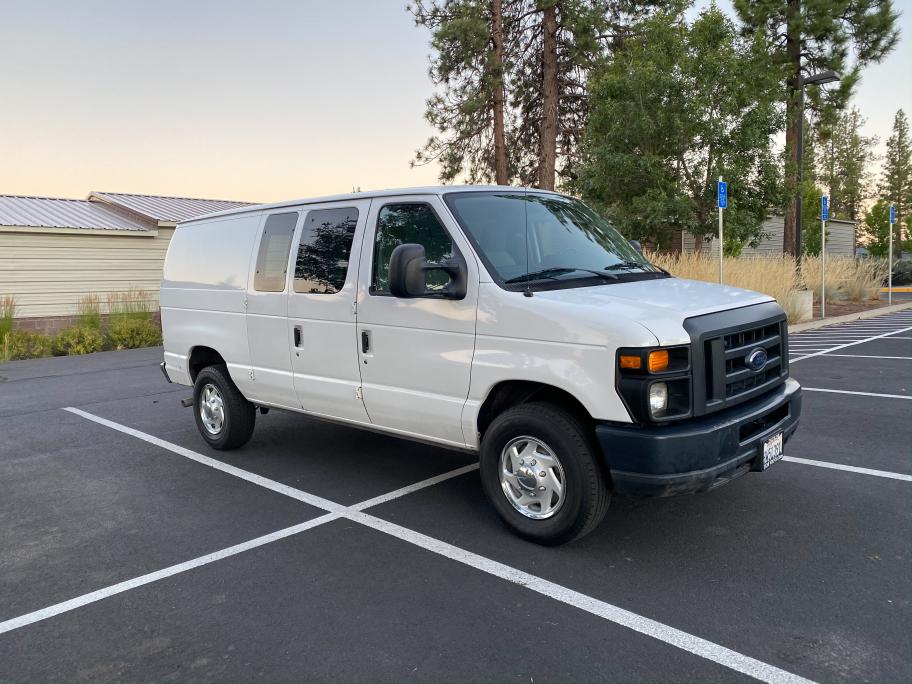


 2008 GMC 3500 SMB
 AWOL
AWOL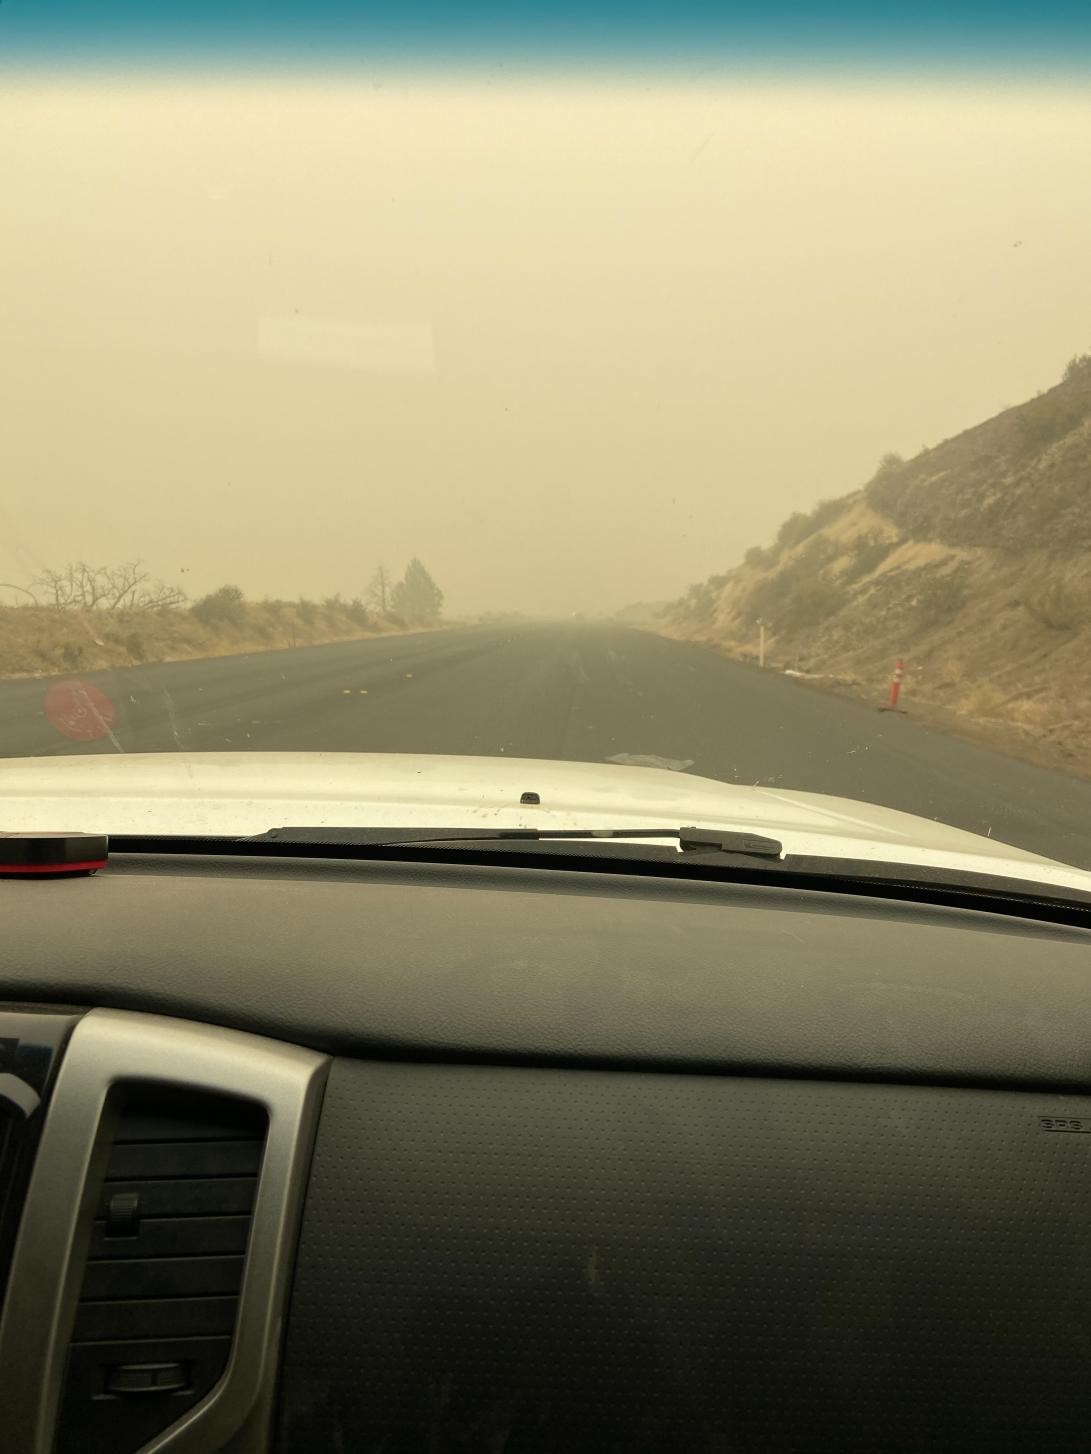


 Linear Mode