|
|
 07-03-2019, 05:48 PM
|
#1
|
|
Member
Join Date: Oct 2014
Posts: 44
|
Solar panel replacement: Solara ---> Zamp
My van is 14 years old and I'm about to remove and replace my 2 delaminating Solara 60-watt solar panels (amazingly the Solaras are still working, but for how much longer is anyone's guess). I'm going to replace with a 170-watt Zamp kit, as I spoke with Peter at Sportsmobile and Zamp is what they're currently installing. I was told the pre-existing wiring will work fine so no need to route new wires.
I assume I will have to remove the original rooftop plug/connector and splice in the new one. Anyone had to do this? How to best waterproof the splice connection? Heat shrink tubing and waterproof tape?
Do I absolutely need to replace the charge controller as well, or can I leave the existing one in place? Assume replacing is recommended but worth asking at the risk of making public my ignorance.
Many thanks.
__________________
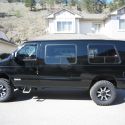
2004 EB50 SMB 4x4 V-10. Buckstop front and rear bumpers, Pro Comp 7069 wheels, Cooper ST Maxx rubbers, and a Line-x roof
|

|

|
|
07-03-2019, 07:28 PM
|
#2
|
|
Senior Member
Join Date: Apr 2013
Location: San Francisco, CA
Posts: 3,292
|
Wow, Zamp is sure pricey. $600+ range delivered??
Are you going with a rigid panel or back to flexible? (Hopefully rigid but maybe the flexible is desired for other than performance reasons)
Where are you located?
What model Solar Controller do you have?
If the connectors on the roof are MC4 style, then it should be plug and play perhaps with extensions (easy) if needed.
There are way cheaper solutions to what you want to do.
__________________
Ray
Beastie 3: 2002 7.3 EB Cargo: Agile TTB, CCV High Top, Custom Walk Through, Lots of stuff added. www.BlingMyRig.com
|
|
|
|
|
07-03-2019, 08:31 PM
|
#3
|
|
Member
Join Date: Oct 2014
Posts: 44
|
Going rigid for surenot taking any chances with flexible again. Certainly not opposed to saving some cash on a less expensive option, provided it's high quality, although I already conditioned myself to spend the $$$ on Zamp.
I'm nearish Seattle.
Solar controller is a Mark PV Controller (photo attached)
Roof connectors are 2 pin, not MC4 style (photo attached)
Thanks.
__________________
2004 EB50 SMB 4x4 V-10. Buckstop front and rear bumpers, Pro Comp 7069 wheels, Cooper ST Maxx rubbers, and a Line-x roof
|
|
|
|
|
07-03-2019, 08:59 PM
|
#4
|
|
Senior Member
Join Date: Apr 2013
Location: San Francisco, CA
Posts: 3,292
|
Quote:
Originally Posted by UnaccomplishedAngler

Solar controller is a Mark PV Controller (photo attached)
Roof connectors are 2 pin, not MC4 style (photo attached)
Thanks.
|
Excellent choice on the rigid panels. Of course, now comes the necessity for mounting the panel)s) to the roof.
Controller - Mark PV I do not see in the literature if it has three stage charging. This would be important. The controller is definitely old school a there is better out there today. That being said it can handle the panel output voltages of up to 26v. A single 170w panel or two 100w panels in parallel will be within his parameter.
The 2 Pin Pass through - That can be used again provided the wire gauge is 10awg. You could use MC4 connectors to the panel an then splice that to the two pin connector to pass the current through the roof to the solar controller.
Considerations before proceeding:
What is the roof layout (vents, racks, etc) and roof space that can be allocated to solar? Reasonably exact dimensions will help., pictures also.
Mounting can bee accomplished with 1/16" thick 2"x 2'" Alumin angle.
What are electrical usages? What size house battery bank do you have? is it sufficient or should that be changed?
Solar Controller change - the location in the interior and cutout may dictate a particular model. You can probably get by with the existing SCC for now if you are looking at 200w.
Renogy makes high quality panels. They have a 100w (use two) that is
https://www.renogy.com/renogy-100-wa...l-black-frame/
or:
https://www.renogy.com/renogy-100-wa...ompact-design/
__________________
Ray
Beastie 3: 2002 7.3 EB Cargo: Agile TTB, CCV High Top, Custom Walk Through, Lots of stuff added. www.BlingMyRig.com
|
|
|
|
|
07-03-2019, 09:06 PM
|
#5
|
|
Senior Member
Join Date: Apr 2007
Location: Santa Barbara, CA
Posts: 1,841
|
I can't believe your Solaras lasted that long. Mine delaminated and crapped out after 7 to 8 years on my 2007 SMB. I replaced them with two 100 watters from Renogy. Rigid monocrystaline, I believe. I used my existing Blue Sky controller. I needed to make a front cross bar and install the modern connectors. It wasn't hard. I got the two panels both for $250. The 65 watt Solaras were around $900 each when new!
|
|
|
|
|
07-03-2019, 09:10 PM
|
#6
|
|
Senior Member
Join Date: Mar 2015
Location: Maryland
Posts: 3,406
|
I would consider adding a auxiliary method of hook up - just add these in the wiring after the panels and just before entering the pop-top, then just add a 75ft cable that you can use a suitcase panel to help draw in amps when you're parked in the shade (or more so when parked in the sun):
https://www.amazon.com/BougeRV-Conne...ateway&sr=8-19
Most of the time we tend to park in the shade if its available, so roof tops panels become less effective - allowing for this option helps battery(s) maintain charge.
Just saying....
__________________
TwoXentrix
"AWOL"
|
|
|
|
|
07-03-2019, 10:08 PM
|
#7
|
|
Member
Join Date: Oct 2014
Posts: 44
|
Quote:
Originally Posted by Jeffrey
I can't believe your Solaras lasted that long. Mine delaminated and crapped out after 7 to 8 years on my 2007 SMB. I replaced them with two 100 watters from Renogy. Rigid monocrystaline, I believe. I used my existing Blue Sky controller. I needed to make a front cross bar and install the modern connectors. It wasn't hard. I got the two panels both for $250. The 65 watt Solaras were around $900 each when new!
|
When I acquired the van from my brother (original owner) 5 years ago, they were already starting to delam. I wrapped the edges with foil-backed water proof plumbing tape which I think probably helped preserve their lifespan.
Thanks for the recommendations.
__________________
2004 EB50 SMB 4x4 V-10. Buckstop front and rear bumpers, Pro Comp 7069 wheels, Cooper ST Maxx rubbers, and a Line-x roof
|
|
|
|
|
07-03-2019, 10:21 PM
|
#8
|
|
Member
Join Date: Oct 2014
Posts: 44
|
Quote:
Originally Posted by Twoxentrix
I would consider adding a auxiliary method of hook up - just add these in the wiring after the panels and just before entering the pop-top, then just add a 75ft cable that you can use a suitcase panel to help draw in amps when you're parked in the shade (or more so when parked in the sun):
https://www.amazon.com/BougeRV-Conne...ateway&sr=8-19
Most of the time we tend to park in the shade if its available, so roof tops panels become less effective - allowing for this option helps battery(s) maintain charge.
Just saying.... |
That's a great idea. If I go with the Zamp kit, it has a three port roof cap which makes the kit expandable. I assume I could plug an auxiliary panel into one of those ports as well, to be used as you noted.
__________________
2004 EB50 SMB 4x4 V-10. Buckstop front and rear bumpers, Pro Comp 7069 wheels, Cooper ST Maxx rubbers, and a Line-x roof
|
|
|
|
|
07-03-2019, 10:46 PM
|
#9
|
|
Member
Join Date: Oct 2014
Posts: 44
|
Quote:
Originally Posted by 1der
Excellent choice on the rigid panels. Of course, now comes the necessity for mounting the panel)s) to the roof.
Controller - Mark PV I do not see in the literature if it has three stage charging. This would be important. The controller is definitely old school a there is better out there today. That being said it can handle the panel output voltages of up to 26v. A single 170w panel or two 100w panels in parallel will be within his parameter.
The 2 Pin Pass through - That can be used again provided the wire gauge is 10awg. You could use MC4 connectors to the panel an then splice that to the two pin connector to pass the current through the roof to the solar controller.
Considerations before proceeding:
What is the roof layout (vents, racks, etc) and roof space that can be allocated to solar? Reasonably exact dimensions will help., pictures also.
Mounting can bee accomplished with 1/16" thick 2"x 2'" Alumin angle.
What are electrical usages? What size house battery bank do you have? is it sufficient or should that be changed?
Solar Controller change - the location in the interior and cutout may dictate a particular model. You can probably get by with the existing SCC for now if you are looking at 200w.
Renogy makes high quality panels. They have a 100w (use two) that is
https://www.renogy.com/renogy-100-wa...l-black-frame/
or:
https://www.renogy.com/renogy-100-wa...ompact-design/ |
Somehow my lengthy reply got lost in space, I'll try again:
I can see that I'll need to replace the charge controller. Unfortunately that means I'm going to end up with a hole in my wall that's probably larger than a new unit. Guess I can get creative with a piece of paneling glued over the hole. Things could be worse.
My roof is devoid of anything other than the existing two panels, and I have no plans to add anything else up there. If I go with the Zamp kit, it comes with mounting legs/brackets so I shouldn't need to fabricate a mounting frame/bracket.
My house battery is a Group 4D mounted under the van. It is sufficient for my uses, which are not cold weather camping. I run my fridge, water pump and sporadically a couple of interior lights. Never felt like I needed more power.
I just looked at a video on the Zamp site and the 2 pin connection will work on the roof, so plug and play. If I wanted to add a portable panel or expand to another rooftop panel their kit comes with a 3 port roof cap I could use to replace my current single connection.
Thank you.
__________________
2004 EB50 SMB 4x4 V-10. Buckstop front and rear bumpers, Pro Comp 7069 wheels, Cooper ST Maxx rubbers, and a Line-x roof
|
|
|
|
|
07-04-2019, 11:07 AM
|
#10
|
|
Site Team
Join Date: May 2007
Location: Southern New Mexico
Posts: 10,186
|
Quote:
Originally Posted by UnaccomplishedAngler
Somehow my lengthy reply got lost in space, I'll try again:
I can see that I'll need to replace the charge controller. Unfortunately that means I'm going to end up with a hole in my wall that's probably larger than a new unit. Guess I can get creative with a piece of paneling glued over the hole. Things could be worse.
|
Just make an adapter plate that mounts to the same holes and which then has a cutout sized to fit your new controller. We've all experienced issues like this.
Herb
__________________
SMB-less as of 02/04/2012. Our savings account is richer, but our adventures are poorer.
|
|
|
|
|
|
 Posting Rules
|
You may not post new threads
You may not post replies
You may not post attachments
You may not edit your posts
HTML code is Off
|
|
|
|
 » Recent Threads
 |
|
|
|
|
|
|
|
|
|
|
|
|
|
|
|
|
|
|
|
|
|
|
|
|
|
|
|
|
|
|
|
|
|


 The Delta Flyer
 AWOL
AWOL
 Linear Mode