Journey with Confidence RV GPS App RV Trip Planner RV LIFE Campground Reviews RV Maintenance Take a Speed Test Free 7 Day Trial ×


Reply
 
Thread Tools Display Modes
 
Old 09-08-2018, 06:44 AM   #31
JWA
Senior Member
 
Join Date: Jan 2011
Location: Reynoldsburg, Ohio
Posts: 3,774
Send a message via Yahoo to JWA
BrianW's observation is correct---IF the B-pillar roof rib (side-to-side) and C-pillar are both intact and unmodified from the factory you don't lose too much upper body rigidity BUT should a roll over ever happen the fiberglass would disintegrate and not offer any protection to anything or anyone inside.

On my own 2005 E350 that was wheel chair lift equipped with raised roof and extended height rear doors DOT required a substantial roll cage welded to the original body. Here's an image link showing how this was accomplished: https://imgur.com/a/kbyVF

I also have a 2000 E250 that was originally similarly built with the removed C-pillar and integrated roll cage upper. In a fit of ignorance all that was removed and only after the fact did I dawn on me how "flexible" the upper body now was. That's an extreme situation but a good lesson perhaps about raised roofs and their support.

I would go with your car wrenching buddy's advice and at least drive by a race car fabrication shop for their "affordable" suggestions. For me I'd want something similar to an actual roll cage if only to partially replace the strength lost from removal of the intermediate roof rails. I completely understand wanting to maintain maximum interior space as I'm building out my E350 raised roof but this time keeping all the upper welded steel structure in place.

I do believe removing the aluminum cage as it exists now wouldn't be an issue--after all the van has been running around as is body wise since 2005 without any issues. IF you'll be any place where snow loading could be a problem some sort of support for the very top would be nice, something to catch the snow weight rather than the fiberglass alone bearing the load.

That's just me so YMMV.

JWA is offline   Reply With Quote
Old 09-08-2018, 08:57 AM   #32
Member
 
rnm115's Avatar
 
Join Date: Jun 2018
Location: HARRISBURG, PA
Posts: 85
Thanks for the feedback guys.

I ended up ripping it all out last night and I'm very glad I did.

It was all aluminum, not against the roof at all. It was only there for framing and mounting purposes. (see pics). When ripping it out, as soon as I removed a few screws the rest was VERY WEAK. I broke a lot of the welds by just bending the bars a bit. This thing would have disintegrated upon a rollover anyways. Probably would have actually been more dangerous, creating sharp flying objects. My car buddy said the aluminum frame would have been useless, and after ripping it out, I completely believe it.

After I get the new windows in, I will be checking out a race frame shop soon.

Thanks!
Attached Thumbnails
20180907_161451.jpg   20180907_161458.jpg   20180907_215757.jpg   20180907_215800.jpg  
rnm115 is offline   Reply With Quote
Old 09-09-2018, 05:57 AM   #33
JWA
Senior Member
 
Join Date: Jan 2011
Location: Reynoldsburg, Ohio
Posts: 3,774
Send a message via Yahoo to JWA
That's all great news then---easy out and gone, the found space no doubt very useful.

Glad this went so well---looking forward to your progress!
JWA is offline   Reply With Quote
Old 09-09-2018, 07:40 AM   #34
Senior Member
 
86Scotty's Avatar
 
Join Date: Jul 2011
Location: TN
Posts: 10,250
You can use Transit seats but they are very tall. Look at Sakurama's build over on Expo. He put some in a high top Ford and you can compare. They are great seats though! A bit more modern than the campfire ones.

86Scotty is offline   Reply With Quote
Old 09-09-2018, 10:00 AM   #35
Member
 
rnm115's Avatar
 
Join Date: Jun 2018
Location: HARRISBURG, PA
Posts: 85
Already have transit three seat row sitting in the garage and all of the mounting hardware. Need to crawl under the van and see where the easiest places are to get at the underneath to brace the bolts.

Transit seats are HEAVY! I had read they were heavy but it still didn't prepare me.

Windows and seats are my highest priority so the family can start using it.
rnm115 is offline   Reply With Quote
Old 09-11-2018, 07:00 AM   #36
JWA
Senior Member
 
Join Date: Jan 2011
Location: Reynoldsburg, Ohio
Posts: 3,774
Send a message via Yahoo to JWA
Quote:
Originally Posted by rnm115 View Post
Already have transit three seat row sitting in the garage and all of the mounting hardware. Need to crawl under the van and see where the easiest places are to get at the underneath to brace the bolts.

Windows and seats are my highest priority so the family can start using it.
Some time ago I had to secure a tool box I knew would grow considerably in weight as things were added. Wanting maximum secure mounting this is what I did, random photos showing my solution:


The tool box was already in place, holes drilled through the floor from above for 1/2-13 B7 threaded rod. The 3/16" 6061 aluminum L pieces were cut to fit snugly into the spaces and held in place to be marked for drilling holes.

Typically there aren't many things so close to the underside of the floor to worry about, nothing so close a bolt or fastener 1-2" long would damage. Naturally some locations require careful checking before drilling.

HTH
JWA is offline   Reply With Quote
Old 09-11-2018, 07:12 AM   #37
JWA
Senior Member
 
Join Date: Jan 2011
Location: Reynoldsburg, Ohio
Posts: 3,774
Send a message via Yahoo to JWA
Quote:
Originally Posted by rnm115 View Post
Already have transit three seat row sitting in the garage and all of the mounting hardware. Need to crawl under the van and see where the easiest places are to get at the underneath to brace the bolts.

Windows and seats are my highest priority so the family can start using it.
Some time ago I had to secure a tool box I knew would grow considerably in weight as things were added. Wanting maximum secure mounting this is what I did, random photos showing my solution, right behind the front seats:


The tool box was already in place, holes drilled through the floor from above for 1/2-13 B7 threaded rod. The 3/16" 6061 aluminum L pieces were cut to fit snugly into the spaces and held in place to be marked for drilling holes.

Typically there aren't many things so close to the underside of the floor to worry about, nothing so close a bolt or fastener 1-2" long would damage. Naturally some locations require careful checking before drilling.

HTH
JWA is offline   Reply With Quote
Old 09-17-2018, 09:53 AM   #38
Member
 
rnm115's Avatar
 
Join Date: Jun 2018
Location: HARRISBURG, PA
Posts: 85
get a junk van to steal parts?

Hi all,

The van is at the shop getting inspected and I'm having my mechanic mount the ford transit seat brackets while he has it on the lift and can see what's going on underneath.

I have a window on the way, should be here today. I'm considering the crank out windows for the back, but I'm looking at nearly $1500 in windows!

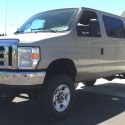
I saw this van on CL and I'm really considering buying it to steal the windows, door panels, dog house, etc. out of it. Even if I junk it back out for $400 when I'm done, I'm going to be ahead if I salvage even half of what I'm thinking from it. The van is listed for only $880 due to a frame part needing replaced.

Thoughts? Can a window be removed and reinstalled?

Here is what I would definitely take out of this to put in my van:
-pop out door windows
-interior door panels for the front doors (my driver side is broken)
-dog house engine cover and console (my doghouse is slightly broken, console has a bunch of damage)
-maybe rear side windows if they can come out
-wood dash trim
-rear door panels
-window blinds
-maybe rear doors!
-cruise control? (added with edit)

Thoughts?
https://harrisburg.craigslist.org/ct...698788690.html
rnm115 is offline   Reply With Quote
Old 09-18-2018, 04:50 AM   #39
JWA
Senior Member
 
Join Date: Jan 2011
Location: Reynoldsburg, Ohio
Posts: 3,774
Send a message via Yahoo to JWA
For that money it would be a great parts van. Your math is pretty spot on so yeah you'd not be too deeply invested in the parts you'd swap. Drive, tow or flat-bed trailer it home and let the dismantling begin.

The large aftermarket side windows can be recycled easily enough once most of the Tuscany interior is removed. Making a cut-out template for the new install would be easy once the units are removed--heavy paper at least 36" wide on a roll would work perfectly.

I was thinking since the CL van has CC but given the respective years that's not something useful on your van. The complete steering column would be good to remove and keep for a bit---that can be transferred to your's with very little modification, simply replace parts from the 2005 chassis.

Not a bad buy if that comes to be.
JWA is offline   Reply With Quote
Old 09-20-2018, 09:53 AM   #40
Member
 
rnm115's Avatar
 
Join Date: Jun 2018
Location: HARRISBURG, PA
Posts: 85
well, I sealed the deal on the parts van this morning and I'll get it this week yet.

Bad news is my mechanic decided he didn't want to tackle mounting the transit seat brackets for me, so no I need to figure that out for myself.

stay tuned
rnm115 is offline   Reply With Quote
Reply


Posting Rules
You may not post new threads
You may not post replies
You may not post attachments
You may not edit your posts

BB code is On
Smilies are On
[IMG] code is On
HTML code is Off
Trackbacks are Off
Pingbacks are Off
Refbacks are Off

» Featured Campgrounds

Reviews provided by

Powered by vBadvanced CMPS v3.2.3
Disclaimer:

This website is not affiliated with or endorsed by Sportsmobile SIP or any of its affiliates. This is an independent, unofficial site.


All times are GMT -6. The time now is 09:19 PM.


Powered by vBulletin® Version 3.8.8 Beta 4
Copyright ©2000 - 2024, vBulletin Solutions, Inc.