|
|
 08-21-2019, 05:54 AM
|
#181
|
|
Senior Member
Join Date: Jan 2011
Location: Reynoldsburg, Ohio
Posts: 3,776
|
Quote:
Originally Posted by shadetreevanman

Waiting on a couple of seals to put the AC back together. After I install the seals I'll pull a vacuum on the AC System for 24 hours before loading the R134a back in. My research indicates the R134a capacity is 30 ounces. What I couldn't find is if that capacity was for a dual air passenger van or a single air delivery van.
|
When my new engine is cold it'll show 85 PSI on the oil pressure---at hot idle it'll settle in about 35 PSI.
If your dual A/C is factory it should be 60 ounces for the combined system---40 if front only (60 oz for the combined front and rear, OEM There is or should be a tag on the core support just right of the hood latch looking like this:

HTH
|

|

|
|
08-21-2019, 02:55 PM
|
#182
|
|
Senior Member
Join Date: Jun 2017
Location: Riverside, CA
Posts: 385
|
Now thats funny JWA. I've seen that tag but never really stopped to read it.  Obviously my point of reference is incorrect. That's a lot more refrigerant than I had originally ordered. Doubled my order based on your post this morning.
__________________
Tim Potts
2012 Chevrolet Express 3500 6.0
|
|
|
|
|
08-21-2019, 09:00 PM
|
#183
|
|
Senior Member
Join Date: Jun 2017
Location: Riverside, CA
Posts: 385
|
__________________
Tim Potts
2012 Chevrolet Express 3500 6.0
|
|
|
|
|
08-30-2019, 10:49 AM
|
#184
|
|
Senior Member
Join Date: Jun 2017
Location: Riverside, CA
Posts: 385
|
Ever since I purchased this van, the passenger electric door lock mechanism has malfunctioned. It's been a PITA, remembering to manually relock it each time it is opened. I finally got around to ordering a replacement and swapped it out this week. I pondered how to reinstall the assembly since I don't have a large rivet gun to reinstall per factory, and it is a blind install where it's mounted. I had seen where some have installed a rivnut before reinstalling. I wanted to use what I had on hand, so I Super Glued a nut to the new assembly and then it was Super easy to reinstall. Little repairs like this make me happier with the van overall.
While out on the driveway I vacuumed and charged the AC. It blows nice and cool now. Just in time so we can use it to go visiting family this Labor Day Weekend.
The Autometer Pillar Gauge Mount I installed covers the original pillar trim on a 2008 or older van. In my 2012 the trim had the pull handle on it, and had to be modified to fit the pillar mount. I don't know if it's because of the modification or what, but the modified assembly now pulls away from the windshield, allowing you to look in behind the trim and see the wiring. I plan to pull the trim back off and build some aluminum brackets to screw to the van metal pillar, then screw the trim to the new bracket. Either that or just screw some long screws through the trim into the metal pillar directly. Not a big deal, just a minor tweak.
__________________
Tim Potts
2012 Chevrolet Express 3500 6.0
|
|
|
|
|
08-30-2019, 11:30 AM
|
#185
|
|
Senior Member
Join Date: Nov 2012
Location: Brentwood, CA
Posts: 1,051
|
Quote:
Originally Posted by shadetreevanman
...The Autometer Pillar Gauge Mount I installed covers the original pillar trim on a 2008 or older van. In my 2012 the trim had the pull handle on it, and had to be modified to fit the pillar mount. I don't know if it's because of the modification or what, but the modified assembly now pulls away from the windshield, allowing you to look in behind the trim and see the wiring. I plan to pull the trim back off and build some aluminum brackets to screw to the van metal pillar, then screw the trim to the new bracket. Either that or just screw some long screws through the trim into the metal pillar directly. Not a big deal, just a minor tweak.
|
Looking great, bud! 
My 95 has a factory trim panel with (3) metal clips attached to it, no grab handles on my model. The clips are male, they snap into some metal receptacles, that are factory spot welded onto the A pillar. The A pillar is curved, the center clip helps the trim panel bow to match the pillar contour, to hide the ugly underneath. When I added a wrecking yard handle and trim panel from a later Econoline, the old center clip's function, was replaced by the handle being screwed into place, holding the trim panel snug to the A pillar.
My Autometer overlay pod, attaches to to the factory trim panel using these 8 small blind snap in plugs. You match drill the ford trim to the Autometer overlay pod.
If you could maybe screw the ford trim panel onto the A pillar first, then attach the Autometer pod to it, maybe using reusable Honda trim plugs (O'Reilly's, next to the fasteners) instead of the supplied blind plugs, that might fix it, and still give easy access or changing bulbs and the like.
Gauge dimmer feature: I was able to probe the backside of the headlamp switch with my 12v continuity tester (12v bulb and alligator clip) and located the dimable supply wire to the dash instrument lights. I spliced into that wire, using it as a variable 12v supply to my Autometer gauge bulbs, so they also dim along with the rest of the dash gauges, with twist of the headlight switch.
I not sure how the later model E series dash lights dimmer works, probably Blue Tooth 
__________________
1995 E350 7.3 Diesel, 4x4 high roof camper, UJOR 4" lift
|
|
|
|
|
08-30-2019, 11:39 AM
|
#186
|
|
Senior Member
Join Date: Jun 2017
Location: Riverside, CA
Posts: 385
|
Ahh, that makes sense. The center of my trim isn't secured anymore. I really hadn't thought about the handle securing the trim, but it did. Maybe I'll swing by a salvage and get an older style trim that snaps in place in the middle.
I bought a small rotary dimmer for the gauge lights so I could dim them more than the dash if needed, since they are in my line of sight and I usually run my dash lights full bright.
__________________
Tim Potts
2012 Chevrolet Express 3500 6.0
|
|
|
|
|
08-30-2019, 12:47 PM
|
#187
|
|
Senior Member
Join Date: Nov 2012
Location: Brentwood, CA
Posts: 1,051
|
Quote:
Originally Posted by shadetreevanman
Ahh, that makes sense. The center of my trim isn't secured anymore. I really hadn't thought about the handle securing the trim, but it did. Maybe I'll swing by a salvage and get an older style trim that snaps in place in the middle
|
It's worth checking, your van might not have the spot welded-in receptacle. Mine didn't have the spot welded boss for the tapped handle screws, it seems you get one or the other
Quote:
Originally Posted by shadetreevanman
I bought a small rotary dimmer for the gauge lights so I could dim them more than the dash if needed, since they are in my line of sight and I usually run my dash lights full bright.
|
I'm real careful with my night vision too, cuts down on the night driving eyestrain.
If I didn't say this earlier, I am very impressed with how much van work you take on yourself, the transmission, then the recent engine swap, phew... And the quality of everything is top notch.
Time to enjoy that thing!
__________________
1995 E350 7.3 Diesel, 4x4 high roof camper, UJOR 4" lift
|
|
|
|
|
08-30-2019, 02:32 PM
|
#188
|
|
Senior Member
Join Date: Mar 2015
Location: Maryland
Posts: 3,398
|
Really glad I've kept up with your progress. I'll end out with a pillar gauge in the relatively near future, but would never have considered the dimming function until AFTER the bright lights began to aggravate me...So thanks - with both your commentary I believe I can get the horse in front of the cart on this one!
__________________
TwoXentrix
"AWOL"
|
|
|
|
|
08-30-2019, 02:37 PM
|
#189
|
|
Senior Member
Join Date: Jun 2016
Location: Chula Vista, CA
Posts: 158
|
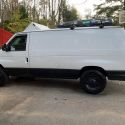
^Looks clean^ Do you have product details for the paint? Is that grey? I'm trying to paint some window trim.
Quick google scan revealed something like this... https://www.amazon.com/SEM-Vinyl-Pai.../dp/B003HF0Q68
__________________
Jean Claude Van Dad
|
|
|
|
|
09-03-2019, 07:19 PM
|
#190
|
|
Senior Member
Join Date: Jun 2017
Location: Riverside, CA
Posts: 385
|
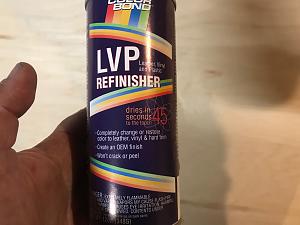
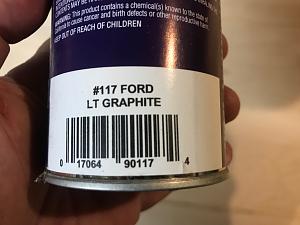
Thanks for the comments.
The vinyl paint I used that closely matched the pillar was Color Bond LVP Refinisher, #117 Ford Lt Graphite
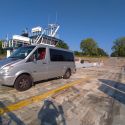
We drove the van down to Huntington Beach this weekend to visit my Aunt. The van ran 70-75 MPH just fine. Kept us nice and cool in the heat, and proved it is ready for a trip. Upon returning home I have a little over 200 miles on the engine/trans swap. Time to drop the pan and swap the trans filter, and change the oil and filter.
__________________
Tim Potts
2012 Chevrolet Express 3500 6.0
|
|
|
|
|
|
 Posting Rules
|
You may not post new threads
You may not post replies
You may not post attachments
You may not edit your posts
HTML code is Off
|
|
|
|
 » Recent Threads
 |
|
|
|
|
|
|
|
|
|
|
|
|
|
|
|
|
|
|
|
|
|
|
|
|
|
|
|
|
|
|
|
|
|


 AWOL
AWOL Linear Mode