|
|
 06-21-2020, 09:10 AM
|
#41
|
|
Senior Member
Join Date: Feb 2016
Posts: 208
|
Same here, finally installed pop-out windows in back, good writeup, very helpful, thanks; ready for summer!
I want to clarify something in the earlier part of the discussion, entries 11-13, where great care with tightening the bolts is cautioned. The design of the stationary windows and the pop-outs is quite different. The stationary window has 4 bolts that go directly through the glass and into the metal door frame. The pop-out has 9 bolts through a plastic frame which is in turn attached by 2 separate bolts to the glass through a flexible hinge at the top. It is true that installing a stationary window could be dicey because of the direct pressure of the bolts on the glass, however there is no direct pressure on glass with the pop-out. I was a bit nervous approaching this project, but easy-peasy. Hope this helps.
|

|

|
|
06-21-2020, 10:13 AM
|
#42
|
|
Senior Member
Join Date: Jan 2011
Location: Reynoldsburg, Ohio
Posts: 3,774
|
Quote:
Originally Posted by Jack K

Same here, finally installed pop-out windows in back, good writeup, very helpful, thanks; ready for summer!
It is true that installing a stationary window could be dicey because of the direct pressure of the bolts on the glass, however there is no direct pressure on glass with the pop-out. I was a bit nervous approaching this project, but easy-peasy. Hope this helps.
|
Without offense you were lucky IF you didn't over-tighten some of the fasteners and rack the mounting part as it contacts the door shell. You are correct in the two assemblies are different but that shouldn't be taken as its just a slip slop jam it together and have no worries.
The bolts being tightened evenly and not too tight makes for a leak-free installation, assuming you used fresh butyl tape.
Please know I don't come to these sorts of installations uninitiated---as I've probably already said I've been in the auto/truck glass biz for just about 30 years now.
Thanks for sharing!
|
|
|
|
|
06-21-2020, 12:08 PM
|
#43
|
|
Senior Member
Join Date: Feb 2016
Posts: 208
|
Understood, JWA. Working with glass takes great care. Your input is always timely and appreciated.
|
|
|
|
|
06-21-2020, 08:44 PM
|
#44
|
|
Senior Member
Join Date: Apr 2012
Location: Philadelphia, PA
Posts: 4,208
|
How-to Guide: Replacing rear windows with pop-outs
Quote:
Originally Posted by JWA
Without offense you were lucky IF you didn't over-tighten some of the fasteners and rack the mounting part as it contacts the door shell. You are correct in the two assemblies are different but that shouldn't be taken as its just a slip slop jam it together and have no worries.
The bolts being tightened evenly and not too tight makes for a leak-free installation, assuming you used fresh butyl tape.
Please know I don't come to these sorts of installations uninitiated---as I've probably already said I've been in the auto/truck glass biz for just about 30 years now.
Thanks for sharing!
|
I dont believe anyone advocated a slip slop jam it together job. They (and I) merely noted that the chance of breakage is much lower since the pop-out window frame is separate from the glass. In fact, the glass can be totally removed from the frame while the frame is installed. Also, since the pop-out frames use something like 6-8 mounting bolts, the chance of racking is much lower.
None of this is to negate the be careful message JWA is wisely preaching. But compared with the regular fixed windows, where the frame is basically part of the window and easily racked, leading to a window shattering (been there, done that on a barn door window... not fun), the pop-out set up is definitely more forgiving.
|
|
|
|
|
07-12-2020, 10:56 AM
|
#45
|
|
Junior Member
Join Date: Mar 2018
Location: Livingston, MT
Posts: 22
|
New*to me* Pop-Windows in 2003 Ford E350
Just installed a pair of pop-out windows that i purchased on eBay. They came with all hardware. One piece of glass was near perfect and the other had some minor scratches. The installation was a breeze b/c of this thread. They did not include buytl sealant, rather they included a gasket with adhesive backing. I will comment on leaks as time goes on.
I have no affiliation with the seller, and the eBay link is below. The MAJOR drawback is price of $257 (which is 175+82 for shipping)
https://www.ebay.com/itm/92-14-Ford-...53.m1438.l2649
__________________
____________________
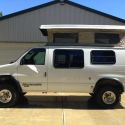
2003 E350, 7.3L, Sportsmobile Top, Advanture Interior, U-Joint 4WD/coil conversion and 2005 front clip
|
|
|
|
|
07-15-2020, 07:51 AM
|
#46
|
|
Senior Member
Join Date: Jan 2011
Location: Reynoldsburg, Ohio
Posts: 3,774
|
As an installer I'd be interested to see the gasketing material they sent.
If such a product works that'd make these sorts of DIY installs vastly easier for first timers. 
|
|
|
|
|
07-15-2020, 08:44 AM
|
#47
|
|
Senior Member
Join Date: Aug 2017
Location: Berlin
Posts: 134
|
One hint regarding working with butyl.
Ensure U use Nitril gloves instead of some other material as Latex or silicone hased gloves. The butyl does not stick on the Nitril gloves.
If used correctly I see no reason to use anything other than butyl tape.
It is quit easy to use and it is really proven and used by the manufacturer.
I thought about using silicone as some folks suggested. But silicone in general should always been avoided on car bodys.
Just my two pennies. Cheers,
Martin
__________________
E350 - 2014 - 2WD
|
|
|
|
|
07-15-2020, 11:29 PM
|
#48
|
|
Senior Member
Join Date: Jul 2017
Location: Longmont, CO
Posts: 325
|
Quote:
Originally Posted by martinli
One hint regarding working with butyl.
Ensure U use Nitril gloves instead of some other material as Latex or silicone hased gloves. The butyl does not stick on the Nitril gloves.
|
I use nitrile gloves, but that hasn't been my experience at all--and I've replaced or resealed all but 3 windows on my passenger EB. Still better to sacrifice some gloves than have it all over your hands though.
I've found the easiest way to remove old butyl is to ball up the butyl you've already pulled off, then use it to remove the remaining butyl by repeatedly sticking and pulling it away from the buty remaining on the surface. Done at the right speed, it likes to stick to itself and leaves the surface butyl-free. It's like silly putty in that slow speeds will stretch the butyl out in strings but quick movements will "break" the threads. I try to remove as much acetone this way before using acetone to wipe away the remaining residue--much cleaner this way than dissolving large amounts of butyl that then get smeared around.
__________________
2011 Ford E350 EB Quigley 4x4 'PUPLGUK' | V10 Gas | Opt Overland Pop Top | GBS LiFeMnPO4 100Ah
|
|
|
|
|
07-16-2020, 12:52 AM
|
#49
|
|
Senior Member
Join Date: Aug 2017
Location: Berlin
Posts: 134
|
To remove the butyl I used a fluffy rag with aceton.
That way going food by food it got removed in about 10 minutes for one window.
__________________
E350 - 2014 - 2WD
|
|
|
|
|
08-09-2023, 07:17 PM
|
#50
|
|
Junior Member
Join Date: Jul 2019
Location: Nevada
Posts: 6
|
Pop Out Window Leak
With excellent guidance from posts by BrianW, JWA, and others; I recently installed pop outs in rear drivers-side door and the 60% side barn door. The rear window is perfect, but the side window leaks between the glass and the rubber seal. The curious thing is it leaks only in a small area above the rearward hinge. But it is too much water to ignore.
I did treat the rubber seal with 303 protectorent prior to install and it seemed to rejuvenate nicely. I do not have interior window trim, just white metal, but I did put a 1/8-3/16 spacer under the window latch, as recommended. I have since tried a thinner spacer, but it did not help.
Does anyone have any ideas on how to fix this leak? Or a source for buying a strip of new rubber seal? Looks like it would slide or press in easily. Searches so far have not turned up any specs on the size or shape of the seal. Any help will be appreciated, thanks.
__________________
2008 E350 SD EB, Quad Van, DIY Build
|
|
|
|
|
|
 Posting Rules
|
You may not post new threads
You may not post replies
You may not post attachments
You may not edit your posts
HTML code is Off
|
|
|
|
 » Recent Threads
 |
|
|
|
|
|
|
|
|
|
|
|
|
|
|
|
|
|
|
|
|
|
|
|
|
|
|
|
|
|
|
|
|
|


 Linear Mode