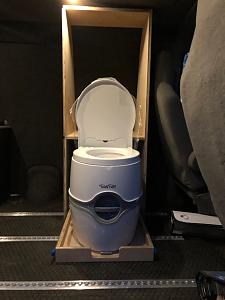
Latest project complete. As Ive used the van Ive discovered that hauling my gear around in plastic totes isnt a great long term solution, plus I recently picked up a Thetford cassette toilet Id like to be able to tuck away. Enter the storage cabinet.
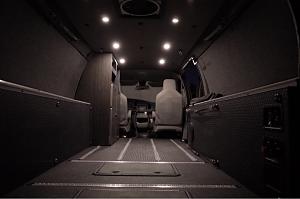
This project has been very much build as I go. I had unused space between my drivers seat and wheel wheel box/bed platform. I decided to use all of it.

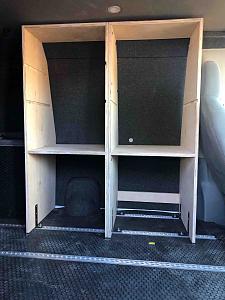
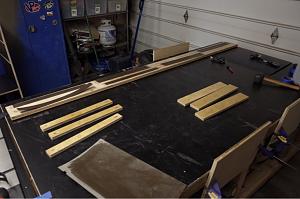
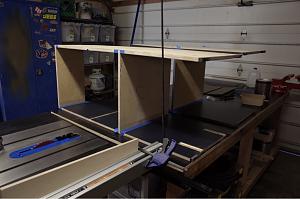
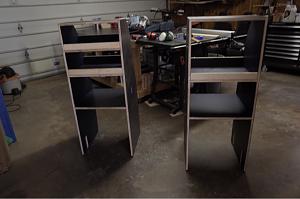
Rough carcass of the cabinet. I was working off some rough sketches I had drawn up, making adjustments to fit the available space as I went.
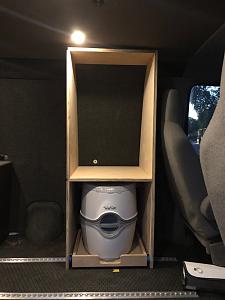
Heres the concept for the hideaway toilet. Both lower sections will have doors. Above that will be drawers and then some cubbies above that.
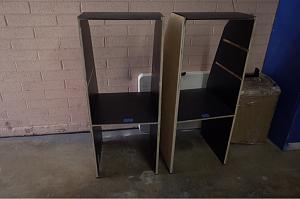
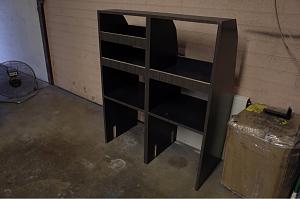
Once I had all the pieces cut and and test fit, I got to applying laminate. This is the first proper cabinet Ive ever built and first time working with laminate. Definitely a learning curve.
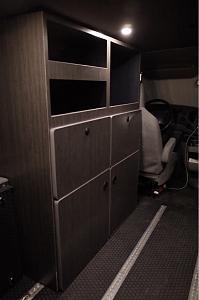
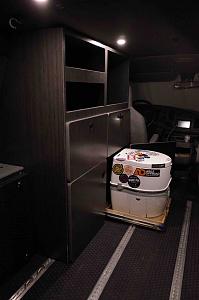
Cabinets installed in the van. They bolt directly to the l-track with some brackets that are mortised into the cabinet sides and secured with t-nuts and machine screws.
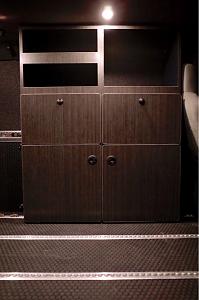
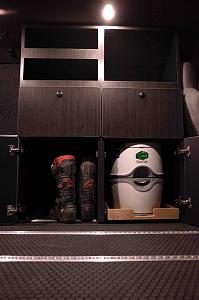
Hidden toilet
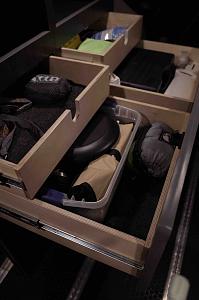
Up close view of the drawers. Drawer face is attached to the bottom drawer with a Southco latch, top drawers are on push to open slides. I lined the drawers with some extra trunk liner I had left over from my door cubbies.
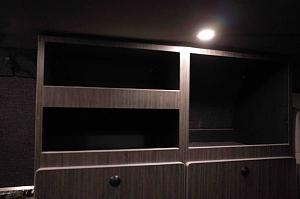
Storage cubbies. These have a 2 lip on the front, and a 3 lip on the rear to keep gear from falling into the abyss. The right side was designed to hold a full face dirtbike helmet, the left side will most likely be used for soft items and packing cubes.
Bottom doors open. Toilet on the right, space for dirtbike boots and shoes on the left. Contemplating a waterproof tray for snowboard boots in the winter.
I built my drawer faces and doors a la Sportsmobile with radius corners and t-slot molding. I have more material on hand for some door mounted tables and a galley box that Ill start on soon.
I also apologize for the dark photos. Im trying to step up my photography game and started using a proper camera as opposed to my iPhone.


 AWOL
AWOL


 Vandit

 2008 GMC 3500 SMB
 Linear Mode