Journey with Confidence RV GPS App RV Trip Planner RV LIFE Campground Reviews RV Maintenance Take a Speed Test Free 7 Day Trial ×


Reply
 
Thread Tools Display Modes
 
Old 05-30-2023, 01:38 PM   #11
Senior Member
 
boywonder's Avatar
 
Join Date: Jul 2013
Location: So Cal
Posts: 4,088
It appears that Sportsmobile has at least 2 iterations/configurations of the design that attaches the crossbars to the roof.

I've worked on at least 15 penthouse roofs (likely all Fresno built) and for those roofs both the fore and aft blocks are bolted through the roof with 4 1/4-20 screws each, as well as some large fender washers, nuts, butyl goo and some plastic beauty covers.

The Fresno roofs have channels on the top fiberglass surface of the roof (ie not "flat") similar to the channels on the stock econoline roof.

Brian W's top appears to be a different design, and he mentions that it's a flat top roof.......maybe SMB north's roof. The way the crossbars are retained is clearly different than the Fresno style.

__________________
2008 E350 RB passenger 4WD SMB penthouse
2013 KTM 350 EXC
2008 KTM 250 XCF-W
2003 Honda Element
boywonder is offline   Reply With Quote
Old 05-30-2023, 02:08 PM   #12
Senior Member
 
Join Date: Jun 2012
Location: Salt Lake City, Utah
Posts: 242
Garage
boywonder, mine is a Texas build. It also has the channels on the fiberglass surface.

Just going out and feeling things again, feels like those four bolts going up through the pad are in the same position as the nuts and stuff you describe on the top of the roof.

Let me try to rephrase this... are those 4 bolts the only thing sandwiching the gray pad, wood and crossbar in there, and are the nuts on the roof attached to the other end of those bolts?

In other words, can the gray panel be removed without having to undo the nuts on the roof?

Scott
Makalu1 is offline   Reply With Quote
Old 05-30-2023, 05:25 PM   #13
Senior Member
 
boywonder's Avatar
 
Join Date: Jul 2013
Location: So Cal
Posts: 4,088
Quote:
Originally Posted by Makalu1 View Post
Let me try to rephrase this... are those 4 bolts the only thing sandwiching the gray pad, wood and crossbar in there, and are the nuts on the roof attached to the other end of those bolts?

yes.....highly likely......

You may be overthinking this......other than needing two people (one to put a wrench on the nut on the roof and one to turn the bolt inside)....just remove the four bolts and pull off the grey pad assembly and re-glue/nail/screw the loose strip of plywood....then re-attach.

Pro-tip..use stainless 1/4-20 hex bolts, fender washers and nuts.....it'll be much easier to remove them in the future, and they won't rust. if the butyl pancakes under the fender washers are in good shape, just leave them there and re-assemble.


Your crossbars didn't get bent?
__________________
2008 E350 RB passenger 4WD SMB penthouse
2013 KTM 350 EXC
2008 KTM 250 XCF-W
2003 Honda Element
boywonder is offline   Reply With Quote
Old 05-30-2023, 07:51 PM   #14
Senior Member
 
BrianW's Avatar
 
Join Date: Apr 2012
Location: Philadelphia, PA
Posts: 4,211
Yes, my 2011 with the flat roof is a SMB North build. Fairly different from my old 1998 North build.
BrianW is offline   Reply With Quote
Old 05-30-2023, 08:03 PM   #15
Senior Member
 
Scalf77's Avatar
 
Join Date: May 2007
Location: Beaverton, OR
Posts: 2,506
So this is from a thread explaining the different tops 
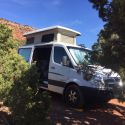
Penthouse Roof Information
"From Nancy at SMB North in Indiana. She has been at SMB North since 1981 and reports they have changed the penthouse tops several times over the years."

“Many years ago, all the penthouse tops had grooves in them. The grooves were designed so rain water would run off either to the front or the back.

Back in 2003 the Dodge Ram van was discontinued. It was the only van low enough to fit into a 7 foot garage with a standard penthouse top on it. When the Dodge Ram van was discontinued, we had to design a top that was a little shorter to go on the Ford E250 so we would still have a garagable penthouse top available. So our president designed the Garagable top and made it bolt from the inside which made it lower and smoother. That is why the garagable top was designed differently. He also designed the garagable top to go all the way to the top of the windshield instead of stopping at the cab where all the other tops did. However, by designing the garagable top this way (longer), we discovered because of the length of the top, the extra outside latches were needed to secure the front of the top so when you were driving it wouldn't come up at the front. The low top was a good idea, but because of the extra latches, people didn't like having to go outside to unlatch them before putting up the top.

--Note from Jeff: Both of the front outside latches can be unlatched and latched from inside by opening the driver and passenger door windows but I guess people hadn’t figured this out.--

SMB West decided they didn't want to install the Garagable top because most of their vans have 4WD and it didn't make any difference whether their vans were garagable or not. That’s why SMB West didn't install garagable tops. They also have their own mold out there so they don’t need to ship their penthouse tops from the fiberglass shop here in Indiana.

SMB West never changed their mold to the smooth top. SMB Texas also installed the garagable tops for a while. However, a lot of garages now being built have either 7 1/2 foot doors or 8 foot doors. We always ask customers if they need the top to fit in a 7 foot garage. If they don’t, we always put the standard penthouse top on.

Since molds only last so many years, when it came time to make a new standard penthouse top mold, the president decided he liked the look of the smooth top instead of the grooved top. So when he designed the next round of standard tops for the Ford RB and EB, he took out the grooves. That’s how that came about. So any top that’s installed by SMB West always has the grooves.

In about 2009-2010, Ford came out with their E150 that has the same GVWR as the E250 vans. Since the E150 is a lower van than the E250 was, the garagable top was no longer necessary to fit in a 7 foot garage. So by just adjusting the standard penthouse top on the E150 van a little, we could install the standard penthouse top and it measured about 83 1/2 inches so we didn't need the longer garagable top anymore. Not having to stock two different tops worked fine for us.
I know this is a long story but that’s the reason why there are so many tops.

All the tops are good tops, it is just a matter of where they were installed and what the need of the customer was.”

-greg
Scalf77 is offline   Reply With Quote
Old 05-31-2023, 08:52 AM   #16
Senior Member
 
BrianW's Avatar
 
Join Date: Apr 2012
Location: Philadelphia, PA
Posts: 4,211
Here's a view of the smooth top on my 2011 North build. One nice thing is that it only has three penetration points, two in the front and one in the rear. (Note this is not my garage; I wish it was! It was where the first owner stored it on his farm. Nice.)
Attached Thumbnails
2011 smooth top.jpg  
BrianW is offline   Reply With Quote
Old 06-01-2023, 06:11 AM   #17
Senior Member
 
boywonder's Avatar
 
Join Date: Jul 2013
Location: So Cal
Posts: 4,088
Quote:
Originally Posted by BrianW View Post
One nice thing is that it only has three penetration points, two in the front and one in the rear.

Two in the front for the front latches and one for the rear latch?
__________________
2008 E350 RB passenger 4WD SMB penthouse
2013 KTM 350 EXC
2008 KTM 250 XCF-W
2003 Honda Element
boywonder is offline   Reply With Quote
Old 06-01-2023, 04:06 PM   #18
Senior Member
 
BrianW's Avatar
 
Join Date: Apr 2012
Location: Philadelphia, PA
Posts: 4,211
Quote:
Originally Posted by boywonder View Post
Two in the front for the front latches and one for the rear latch?

Yup, just those.
BrianW is offline   Reply With Quote
Old 06-04-2023, 10:15 AM   #19
Senior Member
 
Join Date: Dec 2014
Location: Riverside Ca.
Posts: 741
Sorry for your troubles and wish you a speedy repair.
Vanimal is offline   Reply With Quote
Old 07-10-2023, 12:49 PM   #20
Senior Member
 
Join Date: Jun 2012
Location: Salt Lake City, Utah
Posts: 242
Garage
I am happy to say that the advice I got here paid off and I had a pretty good idea of what to expect. I ended up rebuilding the broken wooden bracket that sits in front of the scissor bar and reinforced the area in front of that that had sustained a slight crack. It was probably overkill but only added a slight bit of weight and will prevent further problems. You can see where I added on the new hardware, but I'll find some buttons to hide that soon. Also need to deal with the nuts on top before the next rain! Thanks for all the help here!
Scott
Attached Thumbnails
2023-06-30 10.22.30.jpg   20230710_120843.jpg   20230710_120939.jpg  
Makalu1 is offline   Reply With Quote
Reply


Posting Rules
You may not post new threads
You may not post replies
You may not post attachments
You may not edit your posts

BB code is On
Smilies are On
[IMG] code is On
HTML code is Off
Trackbacks are Off
Pingbacks are Off
Refbacks are Off

» Sportsmobile Registry

Lola

Eddie Haskell

Hooch

Hoooch
Add your Sportsmobile
» Featured Campgrounds

Reviews provided by

Powered by vBadvanced CMPS v3.2.3
Disclaimer:

This website is not affiliated with or endorsed by Sportsmobile SIP or any of its affiliates. This is an independent, unofficial site.


All times are GMT -6. The time now is 01:39 PM.


Powered by vBulletin® Version 3.8.8 Beta 4
Copyright ©2000 - 2024, vBulletin Solutions, Inc.