|
|
 05-01-2009, 04:20 AM
|
#271
|
|
Senior Member
Join Date: Feb 2009
Location: France, Europe
Posts: 617
|
Re: What work did you do on your SMB today?
Today built the sink and fitted the kennel for the dog 
Later going to look at a second hand fiamma F45 awning
Check out:
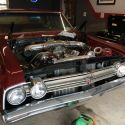
My Chevy Project
__________________
New ride: 2000 Chevy Suburban 1500 4WD
1998 Chevy Express 2500 past project
+ 1990 Mitsubishi Pajero V6 3.0l
+ 2001 Saab 9-5 Aero Hirsch
+ 1972 Saab 96 V4 (not running)
+ fixed house (Argh)
|

|

|
|
05-02-2009, 11:19 AM
|
#272
|
|
Senior Member
Join Date: Jan 2008
Location: Baja Whenever Possible
Posts: 1,012
|
Re: What work did you do on your SMB today?
Well the fridge cabinet project just keeps going and going and going. Here is the back of the fridge cabinet as I found it. No frick'n wonder:

No, seriously, this is the insulation situation in the back of the fridge cabinet as I found it.

After several alternating layers of the reflectix stuff. This is an improvement:

Here I've managed to fit a 3' by 2' piece of dry erase/shower stall board into the gaping hole (although you'll never be able to see this area, I wanted to fit the board so as to help with insulation and to help keep the insulation in place).

You may notice some expanding foam underneath the panel. I used the foam between the board and some of the reflectix in various places to tighten up the new board (with pressure from the expanded foam) against the orig wall boards. I was careful to make sure there was no foam on metal or placed such that it could dam up any moisture. This AM, after the foam expanded all the way, and dried, I trimed it back nicely. The wall is firm and the orig rear wall is firmer than before.
__________________
It takes a village to raise an idiot.
|
|
|
|
|
05-02-2009, 06:03 PM
|
#273
|
|
Senior Member
Join Date: Oct 2007
Location: SoCal
Posts: 1,071
|
Re: What work did you do on your SMB today?
Finally got around to finishing the Aluminess rear bumper hinge screw upgrade. Put in stainless steel non threaded bolts. Also replaced the the plate that goes from the top of the tire carrier and box carrier to the top door hinge. One of mine snapped when we were in Death Valley.
steve 
__________________
'05 Ford V-10 4x4 SMB "50" White
'00 Jeep Cherokee 4x4 Highly Modified
'04 Jeep Grand Cherokee- wife won't let me modify it. :-(
Does anyone really read this stuff other than surfgeek?
|
|
|
|
|
05-03-2009, 08:22 PM
|
#274
|
|
Senior Member
Join Date: Jan 2008
Location: Baja Whenever Possible
Posts: 1,012
|
Re: What work did you do on your SMB today?
Finally wrapped up the cabinet modification and fridge install. The fridge is very quiet. Very happy with this fridge thus far.

__________________
It takes a village to raise an idiot.
|
|
|
|
|
05-03-2009, 10:34 PM
|
#275
|
|
Senior Member
Join Date: Apr 2007
Location: Blairsden, CA (when not on the road)
Posts: 1,109
|
Re: What work did you do on your SMB today?
Looks good deminimis, nice job!!!
Now for the Baja test -
__________________
Scatter
You can be anything you want on the Internet,
it amazes me that so many choose stupid....
2007 RB50, 6.0
K1WGB
|
|
|
|
|
05-03-2009, 10:59 PM
|
#276
|
|
Senior Member
Join Date: Jan 2008
Location: Baja Whenever Possible
Posts: 1,012
|
Re: What work did you do on your SMB today?
Thanks BB. I think its Puertocitos-ready!!
If someone decides to do this swap (Norcold DE4100 (3.6 CF) to the Vitrifrigo (4.2 CF), its not bad, but be prepared to make some easy mods to your cabinet. You'll need to decrease the width of the cabinet opening by 1.25" on each of the sides (by adding molding, whatever -I made some 5/4 piences and glued and nailed strips of the dry erase boards to the face of them). If your former fridge was a Norcold DE0041, you may have to open up the height of the cabinet ( in my case by approx .5") if the cabinet opening is not to the same height as the upper Norcold molding/vent/trim. In my case, the upper front cabinet face dropped behind the Norcold Molding a little bit (approx the amount I needed to remove).The depth of the Vitrifrigo is considerably less than the Norcold, so no issues there. This fridge doesn't stick out as far as the Norcold did, so that's an added plus (since narrower and flush, you can more fully open the fridge door in less room (a biggie for me because the opposing cabinetry keep us from opening the Norcold to 90 degrees). This fridge does not have a drain (has a tray instead), so plug up the drain hole that goes through your floor if you have one. If you have rear AC ducts in the cabinet like I do, you may be able to re-route them along the sides of the fridge. That's what I did, but I had to squish them down to a 1.5" oval. No loss of duct volume, its just oval instead of round. Much better than before as the ducts were pretty pinched-down where the rear of the old Norcold and the curvature of the van wall met up. The seal is magnetic and the latch is positive locking. The trim is all metal which is great for really locking the fridge and cabinet together. God I love cold beer.
__________________
It takes a village to raise an idiot.
|
|
|
|
|
05-05-2009, 11:03 PM
|
#277
|
|
Member
Join Date: Apr 2007
Location: S.F. Bay Area, CA
Posts: 50
|
Re: What work did you do on your SMB today?
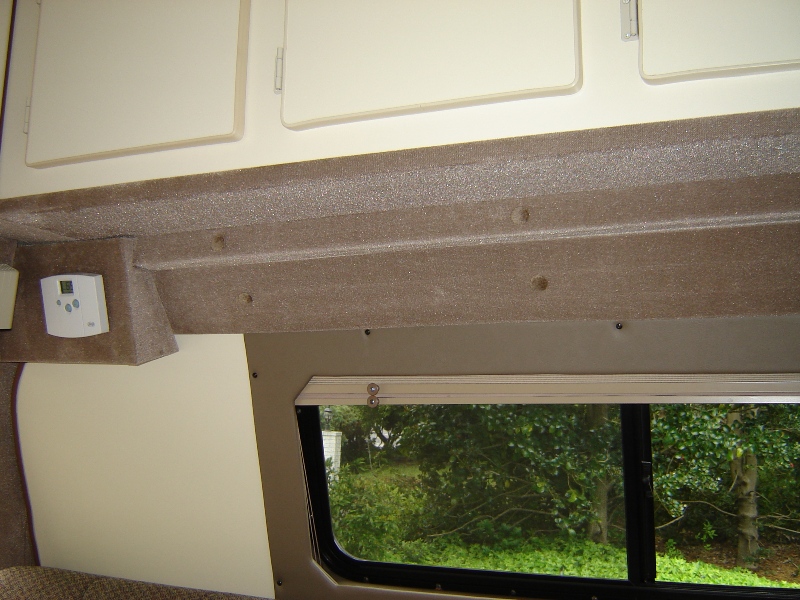
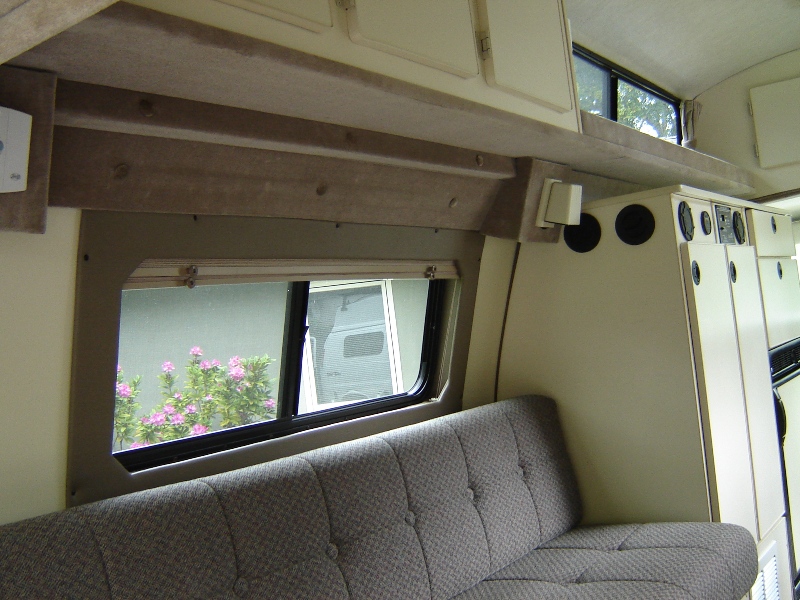
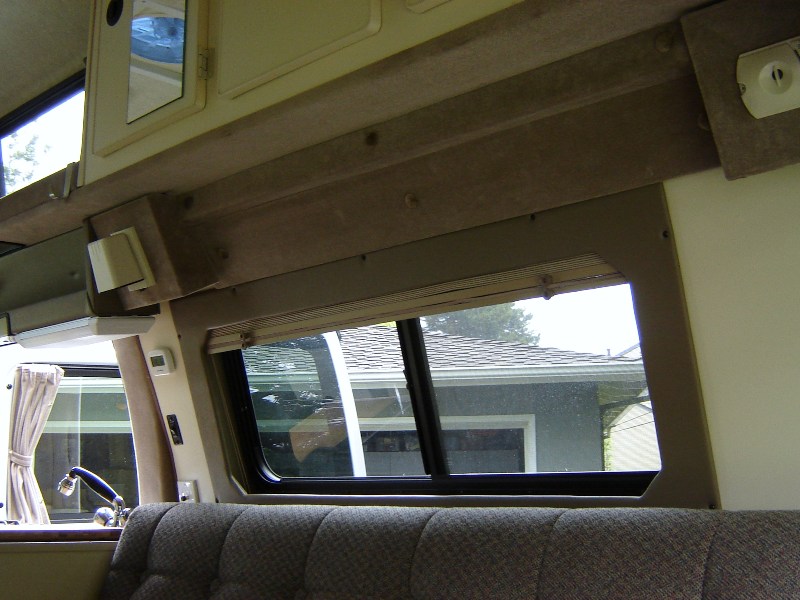
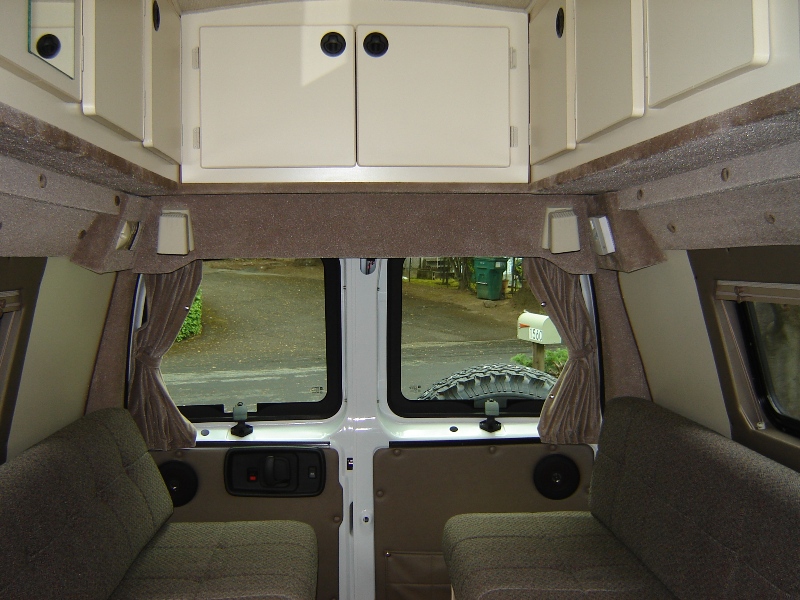
Over rare spare moments the last few weekends, I removed the original headboards over the dinettes (that we bump the backs of our heads on when we sit up without slouching like Mom told me to do). You can see the old head boards in my gallery. A photographer Im not.
Built boxes to mount the lights, as well as the propane alarm, and thermostat that used to be in the middle of the board. Moved the Blue Sky controller from the head board and mounted it in a cabinet.
Covered the lower part of the bare van walls with some 1/8" ply, padded and covered with spare SMB fabric, and used 1-1/2" aluminum angle stock for the upper piece (the roof cutout protrudes out from the wall, necessitating the angle).
Everyone heres real happy with the new headroom. For comparison's sake, the faces of the new light boxes are in the same plane, and are the same height, as the original boards. Im told the headroom is better on the Fords, due to less wall curvature, but if youre bumping your head, you can probably improve matters a lot.
One warning, though: have plenty of adhesive remover on hand. SMB sprayed everything, and I mean everything, behind what you normally see with contact cement, including all of the wiring, and you will get your hands covered in the stuff messing around in the innards of the walls.
These are the after pictures:
__________________
John
|
|
|
|
|
05-05-2009, 11:08 PM
|
#278
|
|
Senior Member
Join Date: May 2007
Posts: 477
|
Re: What work did you do on your SMB today?
Quote:
|
Originally Posted by Roubo
Over rare spare moments the last few weekends, I removed the original headboards over the dinettes (that we bump the backs of our heads on when we sit up without slouching like Mom told me to do). You can see the old head boards in my gallery. A photographer Im not.
Built boxes to mount the lights, as well as the propane alarm, and thermostat that used to be in the middle of the board. Moved the Blue Sky controller from the head board and mounted it in a cabinet.
Covered the lower part of the bare van walls with some 1/8" ply, padded and covered with spare SMB fabric, and used 1-1/2" aluminum angle stock for the upper piece (the roof cutout protrudes out from the wall, necessitating the angle).
Everyone heres real happy with the new headroom. For comparison's sake, the faces of the new light boxes are in the same plane, and are the same height, as the original boards. Im told the headroom is better on the Fords, due to less wall curvature, but if youre bumping your head, you can probably improve matters a lot.
One warning, though: have plenty of adhesive remover on hand. SMB sprayed everything, and I mean everything, behind what you normally see with contact cement, including all of the wiring, and you will get your hands covered in the stuff messing around in the innards of the walls.
These are the after pictures:
|
Awesome MOD!
I have the same layout and I need to do mine. Did you reuse the material or get matching ones?
That's the biggest complaint I get from Mommy and Grandma is those headboards!
I don't know why they made it that way.
__________________
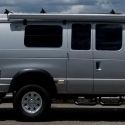
96 RB E-350 460v8 4x4 Custom RestoMod
Warn12kWinch,FFloater,LSlip,Pwtrx Locker 4.10 305x70x16 ToyoMTs,Eagle Alloys,Stove,4CF Ppane Fridge, Air CompTank,Supersprings, Bilstein Shocks,Deavers,CastIron Diff Case, Bullet Proof ReBuilt Transmission, Tubulator DeRale Trans Pan Cover, SSExhaust, KyoceraSolar, Tripplite UPS, 8D AGM, TivoHD, 24in HDLED
95 FJ80 ARB/Kaymar/Emu
2005 AMG CL65 691hp 875tq
|
|
|
|
|
05-05-2009, 11:51 PM
|
#279
|
|
Member
Join Date: Apr 2007
Location: S.F. Bay Area, CA
Posts: 50
|
Re: What work did you do on your SMB today?
I originally was going to reuse the end of the boards for the light boxes, but couldn't remove the fabric cleanly. The boards are covered with a multi-layer fabric, with the brown "velour" you see on the outside. It's glued to some foam, which itself has a fabric underside. By the time SMB glued and stapled everything to the wood, it's on for good.
The box material was scrap plywood laying around (Baltic birch with lots of layers). I could have torn off the material from the originals and used the wood, but I had some scrap Baltic birch plywood laying around and it has a smoother surface. This was just laziness on my part (taking off the fabric, even destroying it in the process, is a lot of work and then there's all the staples to pull).
I used 5/8" ply for the rear boxes, matching the original thickness, since the box fronts need to slide behind the panel flat against the end wall of the van and anything thicker would mean I'd have to do the end panel also. Used 3/4" ply for the front boxes. There's a 2" piece of pine bracing behind the boards, and that's reusable if you want to pull off the fabric, glue, and staples. Me, I hit the scrap pile.
The fabric was NOS, as SMB was kind enough to provide us with a couple of yards extra when we bought the van. I used some thin but dense foam padding that also was lying around - my garage is not a model of neatness - and glued that to the boards before covering with the fabric.
The snaps and fabric buttons were also most graciously provided by SMB.
The electric work was very simple. Most of the wires were long enough to allow me to relocate what I needed to without anything more than replacing the crimp connectors. Did have to extend the propane gauge wiring a foot or so.
All of the original stuff comes off by unscrewing, so you can disassemble everything without penalty. Watch out, though, because underneath each light plate SMB drove a long drywall screws through the board and into the van. You'll need to unscrew each light to get at these.
Most of the time was spent in fitting the covering pieces you see in the pictures. Neither side is identical, and I had to add angled mounting blocks behind the covering pieces to keep everything in the right plane. Probaby could do it in one-third the time now.
Before I started really going to town, though, I pulled off one headbaord and held a piece of cardboard along the wall to mimic the new headroom. I'm over 6' tall and I fit just fine, so your Mom and Grandma should do just fine. If I was a few inches taller, though, the top of my head would hit the underside of the cabinets, rendering the project a waste of time. No problem for the folks without the high tops and cabinets, though.
__________________
John
|
|
|
|
|
05-06-2009, 04:06 PM
|
#280
|
|
Senior Member
Join Date: Feb 2009
Location: France, Europe
Posts: 617
|
Re: What work did you do on your SMB today?
Fitted Fiamma awning! Yes at last some real stuff!
Check out:
My Chevy Project
Other wise tested the Galley Matt at the pump :


__________________
New ride: 2000 Chevy Suburban 1500 4WD
1998 Chevy Express 2500 past project
+ 1990 Mitsubishi Pajero V6 3.0l
+ 2001 Saab 9-5 Aero Hirsch
+ 1972 Saab 96 V4 (not running)
+ fixed house (Argh)
|
|
|
|
|
|
 Posting Rules
|
You may not post new threads
You may not post replies
You may not post attachments
You may not edit your posts
HTML code is Off
|
|
|
|
 » Recent Threads
 |
|
|
|
|
|
|
|
|
|
|
|
|
|
|
|
|
|
|
|
|
|
|
|
|
|
|
|
|
|
|
|
|
|


 Linear Mode