|
|
 08-15-2019, 06:49 AM
|
#101
|
|
Senior Member
Join Date: Nov 2012
Location: Brentwood, CA
Posts: 1,051
|
Quote:
Originally Posted by bambucha

hello excellent idea for the intercooler but how do I do for the air filter
|
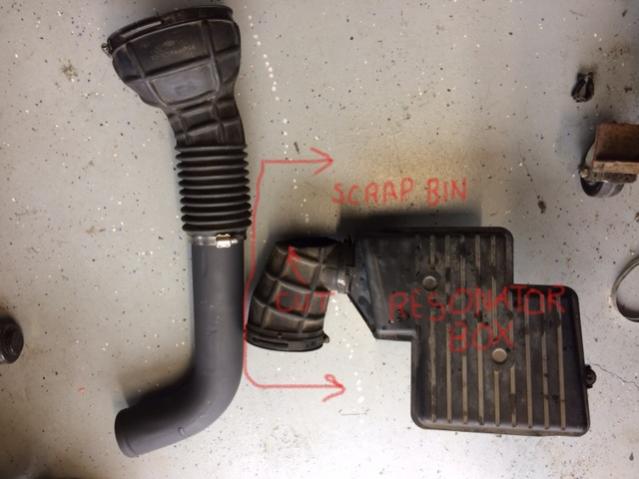
I threw away the stock resonator box, bracket, the draft tube housing, and orange silicone 90 elbow. I was able to re-use the stock air cleaner box and snorkel, but had to make a 3" tube and use a couple silicone 90's to get past the new spider

__________________
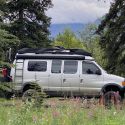
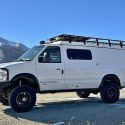
1995 E350 7.3 Diesel, 4x4 high roof camper, UJOR 4" lift
|

|

|
|
08-21-2019, 07:14 AM
|
#102
|
|
Senior Member
Join Date: Nov 2012
Location: Brentwood, CA
Posts: 1,051
|
The Beast is getting Autometer gauges
The later model vans with modern Engine Control Modals all put out tons of data accessable through the OBDII port. My Friend Brian showed me a cool $30 wireless transmitter that captures the Ford information, and displays it through a note pad interface, that you supply and mount. It's really a virtual gauge set that is completely customizable, and eliminates the need for any traditional 'gauges'. He's got more information than the space shuttle for under hundred-fifty bucks! But, unfortunately it doesn't work with the older Ford 'Data Link', so it's old school Autometer gauges for me.
My experience with Autometer is you pay a little more (than say GlowShift) but their stuff is pretty good quality, durable, and kits complete. I bought an A pillar overlay panel, boost gauge, EGT gauge, and transmission temperature.
After doing a little research on where to mount the sensors, I drilled and tapped the driver's side exhaust manifold, from under the van. I used an 1/8-NPT tap, driving the square end with a splined socket on an extension, with a ratchet handle. I greased both the drill and the tap, to capture the chips, and keep them from running through the turbo (A method I've used many time with success).
view from the driver's side, doghouse cover removed

My 1995 7.3 has a factory boost port tapped into the passenger side valve cover, so I tee'd into it, for the boost gauge's tiny plastic tube. One more fitting and I'll have the boost gauge finished.

Transmission: With the new monster-size transmission cooler plumbed and in place, I had been wrestling with the idea of where to 'take it's temperature'. According to a former transmission engineer on the Ford Enthusiast Forum, the best place to sense transmission temperature is at the Ford test port location, on the driver's side of the E4OD. The Autometer sensor supplied with the kit screwed right into the already tapped hole. That was easy!


I set up the gauge pod on the workbench, consolidating common wires where I could, soldering and heat shrink tube where it made sense. Fed the trunk of wires and plastic boost tube behind the dash, through a gap at the base of the A pillar. Of course, the dash had to come apart to gain access to the connections. I probed the back of the headlight switch, until I located the dash lights wire, that had the dimming feature. Then located a switched and fused 12v source for gauge power. It's all the 20% little stuff that consumes 80% of the time.

I had to use my die grinder to gouge at the factory panel in several places, so that after overlay panel was in place, the two mated flush.

__________________
1995 E350 7.3 Diesel, 4x4 high roof camper, UJOR 4" lift
|
|
|
|
|
08-21-2019, 11:36 AM
|
#103
|
|
Senior Member
Join Date: Mar 2015
Location: Maryland
Posts: 3,382
|
Will be a little sad when this thread comes to a close. You're living proof of "where there's a will, there's a way".
__________________
TwoXentrix
"AWOL"
|
|
|
|
|
08-21-2019, 03:52 PM
|
#104
|
|
Senior Member
Join Date: Jun 2017
Location: Riverside, CA
Posts: 385
|
Quite the project. That intercooler was ambitious. Love to see the ways you overcame obstacles. On my 4R75E I used the test port also for the Trans Temp Gauge. I liked how clean it was to install.
__________________
Tim Potts
2012 Chevrolet Express 3500 6.0
|
|
|
|
|
08-29-2019, 07:24 AM
|
#105
|
|
Senior Member
Join Date: Nov 2012
Location: Brentwood, CA
Posts: 1,051
|
I fired it up last week, but the gauge was showing no boost, ever after reving it up. I removed the 1/16th plastic tube, blew thru it, no air would move. I upgraded to 1/4", bench tested the new gauge, but still no boost in the driveway. More than a little disappointing.
It took a few more full work days to finish the gauge pod install, put the dash back together (repair some of the brittle plastic pins I broke) , seats in, finish trimming the grill, repairing the cracked headlight support, and 32 other little things, so I could finally road test it yesterday afternoon.
Yep, it's got boost. As much as 15psi at higher rpms. That's a relief.
Funny thing is, I was helping a friend shake down his new turbocharged drag car 6yrs ago, and we had the same thing... no boost in the shop, didn't even move the gauge, until we put a load on it, about the time I put it in 3rd gear on it's maiden 1/4 mile pass, 25psi. I feel like such a dope, I should have remembered that.
I was surprised at the fast response time of the Autometer EGT gauge (it's the newer stepper motor type, probe in the exhaust manifold) When I romp on it, the new gauge climbs fast, from 400f to 1100f in maybe 60 seconds. I left the dog house cover off (van) so I could check for valley leaks, and almost burned my shin from the blistering radiant heat off the manifold. That mechanical clutched fan moves some air, too!
A brake caliper is hung up, and started smoking, ending my short test after just 5 miles. It had been intermittently do this last year, sitting 8 months didn't help. I'll get that repaired and take it out again, but going racing this weekend, so there's that.
I still want to shoot hot and cold side boost tubes with my IR temp gun, and see the effects of the intercooler addition, see if 'the juice was worth the squeeze' so to speak...
Thanks all for the encouragement 
__________________
1995 E350 7.3 Diesel, 4x4 high roof camper, UJOR 4" lift
|
|
|
|
|
08-29-2019, 07:58 AM
|
#106
|
|
Senior Member
Join Date: Mar 2019
Location: Croydon, PA
Posts: 308
|
Well done. Still not entirely sure it's worth the effort, but cool to see you made it work. Did you do any "before" dyno runs?
|

|
|
|
08-29-2019, 11:47 AM
|
#107
|
|
Member
Join Date: Jan 2018
Location: Northern California
Posts: 54
|
Great to see the project results rolling along and everything working as planned
All gonna be well worth it
See you this weekend 
__________________
2001 Ford E150 HighTop Conversion
Based out of the Sacramento Valley
Northern California
|
|
|
|
|
08-29-2019, 01:48 PM
|
#108
|
|
Senior Member
Join Date: Mar 2013
Posts: 4,244
|
Another frozen brake caliper, too bad you cant' buy new ones because I think the rebuild quality is suspect. Nice to hear it's running though.
__________________
Arctic Traveller
KC6TNI
2001 GTRV
Advanced 4wd
Agile Ride improvement package
|
|
|
|
|
08-29-2019, 02:23 PM
|
#109
|
|
Senior Member
Join Date: Nov 2012
Location: Brentwood, CA
Posts: 1,051
|
Quote:
Originally Posted by IanF
Well done. Still not entirely sure it's worth the effort, but cool to see you made it work. Did you do any "before" dyno runs?
|
Thanks. Yep, lots of effort, not sure I would have taken on such a big project, had I known how many hours it would take.
I have zero intention of ever doing another, or offering a kit for sale. No need in my life for that kind or aggravation 
On the other hand, I will say it;s been an interesting project; If I don't push myself well beyond my comfortable limit, I'm not living life... I'm just existing.
On the subject of 'worth the effort', after a short 5 mile test with a brake issue, the jury is still out.
I don't have before IC Rear Wheel Dyno numbers. Have you dyno'd yours, or know anyone who has?
__________________
1995 E350 7.3 Diesel, 4x4 high roof camper, UJOR 4" lift
|
|
|
|
|
08-29-2019, 02:41 PM
|
#110
|
|
Senior Member
Join Date: Nov 2012
Location: Brentwood, CA
Posts: 1,051
|
Quote:
Originally Posted by OutlawImages
Great to see the project results rolling along and everything working as planned
All gonna be well worth it
See you this weekend |
Thanks Brian. Looking forward to seeing you, as always, my friend.
We found the culprit, and made chassis changes to Chuck's car that should keep you photogs from 'diving for cover' like at Memorial Day race. Shooting race pics seems like a semi-dangerous gig, I don't know who wet themselves first, Chuck, Kyle, you, or me . Got that pic handy?
__________________
1995 E350 7.3 Diesel, 4x4 high roof camper, UJOR 4" lift
|
|
|
|
|
|
 Posting Rules
|
You may not post new threads
You may not post replies
You may not post attachments
You may not edit your posts
HTML code is Off
|
|
|
|
 » Recent Threads
 |
|
|
|
|
|
|
|
|
|
|
|
|
|
|
|
|
|
|
|
|
|
|
|
|
|
|
|
|
|
|
|
|
|


 AWOL
AWOL Linear Mode