|
|
 01-13-2019, 11:46 AM
|
#91
|
|
Senior Member
Join Date: May 2017
Posts: 201
|
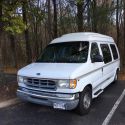
2012 E-350 EB V10, 4x4, CCV Top
Sofa Bed Rebuild
Our original plan for the floor plan was a 50 style layout with the sofa bed across the van above the rear axle. After our few camping trips last summer we decided to change our plan and design a layout with the sofa bed along wall of the van, right behind the driver's seat.
This leaves a center isle to the rear of the van. We thought that gave us better access to the storage in the rear half of the van, without having to climb over the sofa, or open the rear doors. My wife also preferred the porti potti towards the rear of the van, rather than towards the front of the van.
It wont be the best seating for passengers, but we think it will be the most comfortable for us. It will be nice to sit with the side doors open and have a nice breeze.
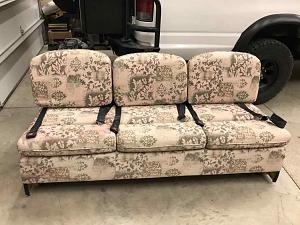
So now we finalized our layout, the first step was our sofa bed. We searched for the right sofa, but could not find anything local. There are some online options, but when you add the cost of shipping, it just seemed too much to spend. So we looked on the classified adds and found someone selling a jackknife sofa bed for $75. It was from a motorhome and included 3 seatbelts. We picked it up, and the first thing was to remove the old cover and cushions.
We went from this:
To this:

The sofa was it was about 18" too long for our application, the next step was to this:
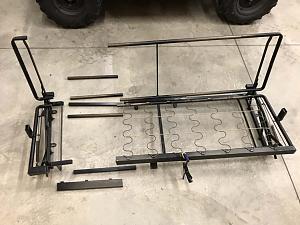
And finally to this.
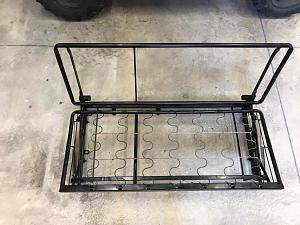
I cut out 18" from the 6 cross members and welded it back together. I am not a welder, but a guy with a welding machine. I sleeved each cross member for added strength and to help with my welding. Between the sleeves and a disc grinder, everything ended up looking pretty good.
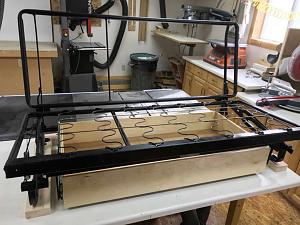
Since the positions of the seat belts changed, I added an additional brace onto the lower rear cross member where the seat belts are attached. I spray painted the frame and it was finished. I was pretty happy how it turned out.
To get the right height, I created a 2x4 sub-base that the sofa will sit upon. There are six, 1/2" bolt holes that are used to attach the sofa in the van. The bolts will pass through the sofa frame, the 2x4 sub-base, the plywood floor and then through the metal van floor. I will use steel backing plates below the van floor to strengthen the attachment.
The bed is not quite long enough for most people to sleep (about 52 long), but I can swivel the front seats around and extend our feet onto the seats. It wont be the most comfortable, but should work when needed. We wanted to go with the shorter sofa to leave more room for wall cabinets.
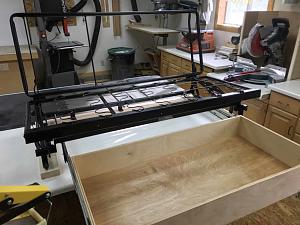
The sofa originally had a storage drawer underneath. I had to build a shorter and higher drawer to fit in the modified sofa frame. This was done with some 1/2" Baltic birch plywood that I finished with a few coats of polyurethane.
|

|

|
|
01-13-2019, 11:50 AM
|
#92
|
|
Senior Member
Join Date: May 2017
Posts: 201
|
2012 E-350 EB V10, 4x4, CCV Top
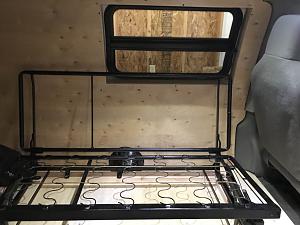
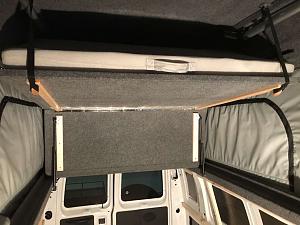
I made another change to how I lift the bed on the CCV top. I had previously connected three of the panels together and added a hinge in the rear, to allow the bed to be easily raised. This plan works well with a 50 style layout, but since we changed our layout plan, I wanted to change how the bed was raised to give us more headroom.
Previously;

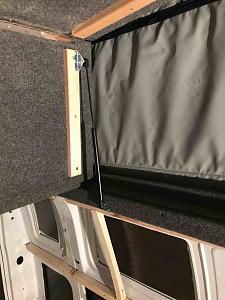
I changed the panels so only two of the panels were connected, and added a second piano hinge to connect it all together. This creates a "Z" bed folding action that gives me 7' of headroom for all, but the rear 3 feet of the van.
I also added a couple of gas shocks to assist in raising and lowering the bed. Due to the geometry, it takes a little push at the hinge, but then the shock lift the bed and all I have to do is attach the front of the bed to the two straps to hold it up. When I lower the bed, the shocks slow the descent of the bed.
|
|
|
|
|
01-20-2019, 10:32 AM
|
#93
|
|
Senior Member
Join Date: May 2017
Posts: 201
|
Porch Light
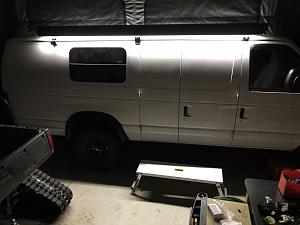
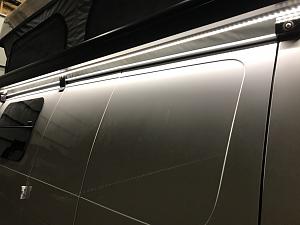
Last Saturday I had some time to add an LED strip porch light to the bottom of the awning.
I had some aluminum extrusions with plastic covers that I attached to the bottom of the awning with some flathead machine screws. The waterproof LED strip had an adhesive back that fit into the extrusion. I ran the wire underneath the pop top. I still need to install the electrical system, but I did give it temporary power to test it out.
The system is dimmable, and comes with a remote. I got the LED system and the extrusions from SuperBrightLED.com.
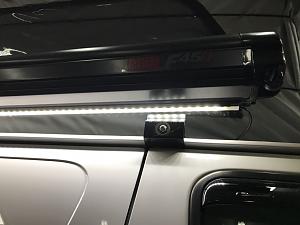
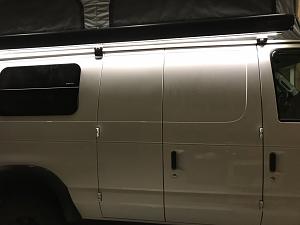
At full brightness it lights up the shop floor pretty good.
|
|
|
|
|
01-20-2019, 02:45 PM
|
#94
|
|
Senior Member
Join Date: Oct 2009
Location: Portland, OR
Posts: 1,257
|
That is really cool and clean. Nice work.
__________________
2001 Ford RB 7.3 Quadvan (sold)
2006 Sportsmobile EB Transformer 6.0
|
|
|
|
|
03-10-2019, 10:53 AM
|
#95
|
|
Senior Member
Join Date: May 2017
Posts: 201
|
After a few weeks of doing nothing on the van, I was able to get some time to work on the van.
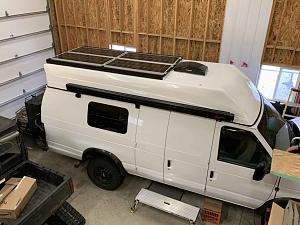
Roof Rack (Solar panel holder)
I call this the solar panel holder, rather than the roof rack, because after putting on 4-100 watt panels, there is no room for anything else. I also decide since the roof was so high, I would probably not store or carry anything on top of the van anyway.
I debated between a aluminum rack and a steel rack from thin wall square tubing. The aluminum would be lighter weight and look better, but it was expensive. The steel would be less than half the cost, but would require me to weld up the frame. It would also be 10-15 lbs heavier. In the end I decided to go with the aluminum extrusion rack.
The deciding factor for me was, no matter how well I prepped and painted the steel rack, water would get inside, rust the rack and then I would have rusty water continually dripping down side of the van. With the aluminum rack, I would not have that issue. And the extrusions look better, is easy to build, is adjustable and is lighter weight.
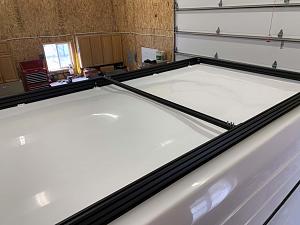
I had ordered the black anodized extrusions and hardware from 8020. Everything was pre-cut, so all I needed to do was assemble it. I used Loctite or nylock nuts to hold everything together. I assembled the rack on the shop floor and fitted the solar panels to the rack.

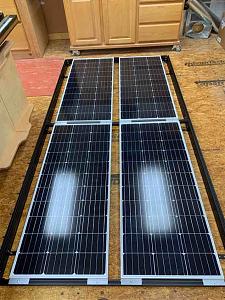
Rather than use the Renology brackets, I built some brackets from "Z" profile aluminum extrusions. This allowed them to sit inside the rack rather than on top of the rack.
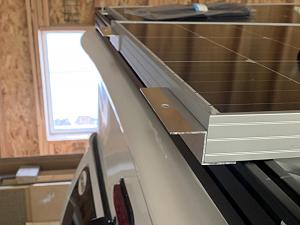
To mount the rack on the CCV top, I first aligned the rack on the top. I used some right angle brackets to bolt the rack down. Once everything was aligned, I drill through the fiberglass and wood in the pop top.
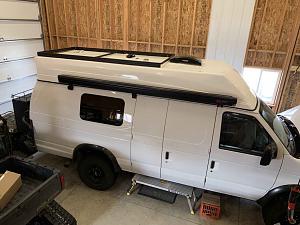
I then used 5/16 SS bolts to hold it all down. Once I had the holes drilled, I unbolted the rack and then mounted the angle brackets with RV roof sealant on the bolt and under the bracket. I then reattached the rack, using Loctite on all the SS bolts. I also added plenty of sealant on top of the brackets, after everything was bolted down.
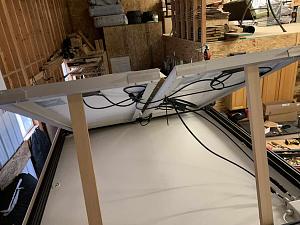
Now the rack was attached I placed all the solar panels. I have debated between wiring the panels is parallel and series. I know there are pros and cons to both. I finally decided to do both. I wired the front and rear two panels in series and then the front and back in parallel. My theory is if half the van is shaded, the other half can still make power, verses having all four panels in parallel. Of course in real life, it may not matter much. I used wire ties to hold the extra wire off the roof.
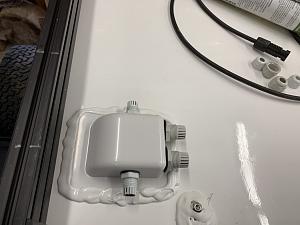
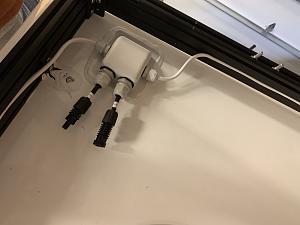
After wiring the panels, I drilled a 1-1/4 hole through the roof to run the wires into the van. I used a PVC fitting as a bushing.
Since I also added a few extra wires for some roof lights, I added a couple of water-tight fittings to the roof gland. I used VHB tape to attach the gland to the roof and then sealed the entire unit.
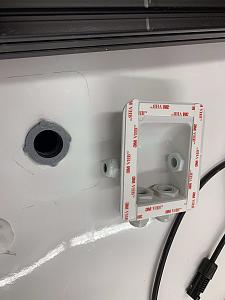
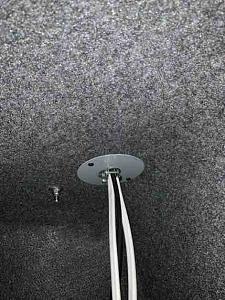
On the inside of the top, I made a mounting plate with a cable clamp to clean up the wire entry and hold the wires tight. I still need to run the wires from the top down to the rear passenger side of the van, where my solar controller and batteries will be mounted.
Next is to build the cabinets.
|
|
|
|
|
03-17-2019, 10:56 AM
|
#96
|
|
Senior Member
Join Date: May 2017
Posts: 201
|
2012 E-350 EB V10, 4x4, CCV Top
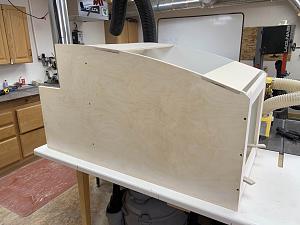
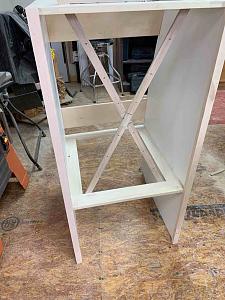
Fridge Cabinet and Road Trip
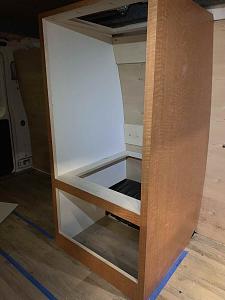
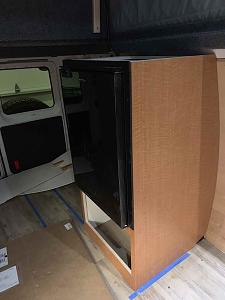
The next project was too build the refrigerator cabinet. I have the TF130 TruckFridge. We wanted a nice size fridge, but after seeing the TF130, I am sure it will be plenty big. The cabinet was made of 3/4" Baltic Birch plywood, covered with white laminate on the inside and a wood grain on the outside. I used a template to get the wall profile. Rather than solid plywood shelves, I build just a frame to hold the fridge and at the top of the cabinet. This allows for ventilation and maybe cut a few pounds. I installed the cabinet and the fridge.
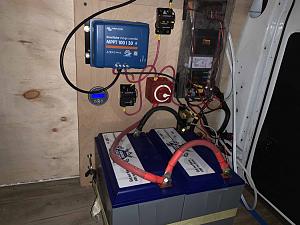
I also built a temporary electrical panel so we could power the fridge and use the solar on a trip later in the week.
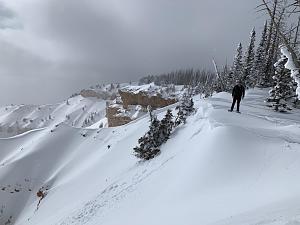
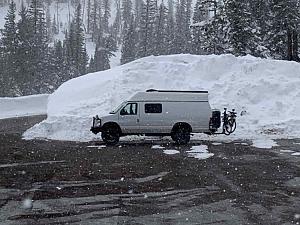
Since this week was my son's spring break, he wanted to go on an adventure. We left Thursday morning and drove the van to Brian Head Utah. There was about 6-7 feet of snow as we got near the top of the mountain. We parked at the end of the road and snoeshowed about 2 miles to Cedar Breaks National Monument. We went out on one of the overlooks, but we were standing 6 feet above the lookout deck. Unfortunately we were in the clouds by the time we got there, so we didnt get great pictures. On the way back the wind really picked up and the wind chill dropped to about 0 F. We made it back to the van and drove down the mountain, out of the snow.
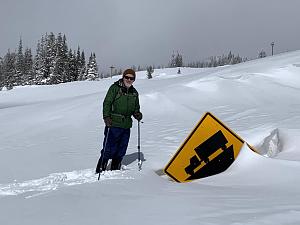
No the snow wasnt 20 ft deep, but this was the pile of snow from clearing the parking area.
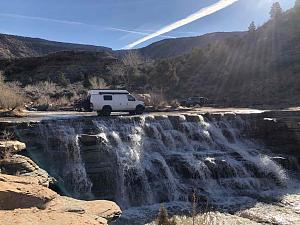
We then drove to Toquerville Falls. It was only 11 miles of dirt road, but it took almost an hour to get there. There were a lot of bumps, and a few rough spots. We got out there after the sun set, but were able to find a spot right next to the falls. We were the only ones out there. It was a pretty spot, but the falls were loud all night long and made it difficult to sleep.
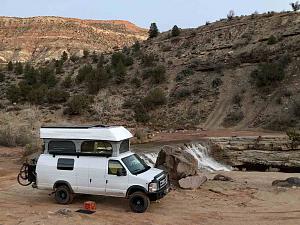
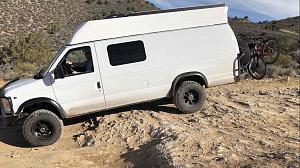
Yes we rubbed the bike rack coming off that rock.
Continued on next post.
|
|
|
|
|
03-17-2019, 11:01 AM
|
#97
|
|
Senior Member
Join Date: May 2017
Posts: 201
|
Continued from previous post.
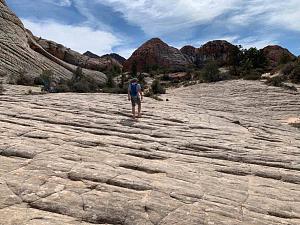
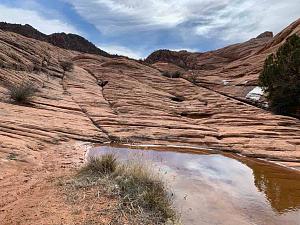
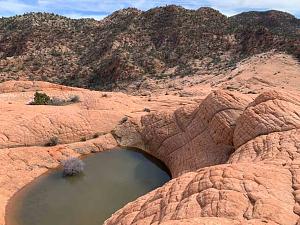
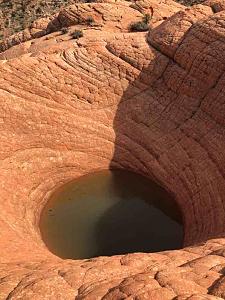
From Toquerville we drove down through St George and then back north past Gunlock Reservoir and up on the bench above Gunlock. I think this area is call Sand Flats. We did a 3 mile hike call the Vortex. It was in the redrock and near the top of the peak there were a couple of deep potholes full of water. It was a nice hike and I enjoyed it.
After the hike we drove further up on the Sand Flats bench. We first stopped at upper Sandflats Reservoir and cooked fahitas for dinner. The area was all private property so we could not camp at the reservoir, so we drove further down the road to a spot that was on BLM land and set up camp. It was a nice spot, but it was cold and windy all night long.
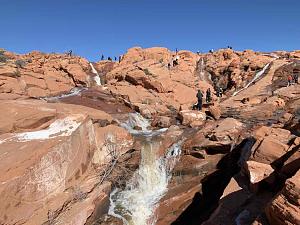
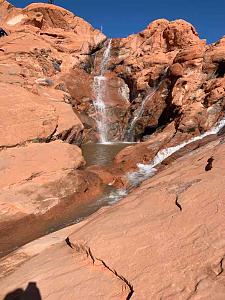
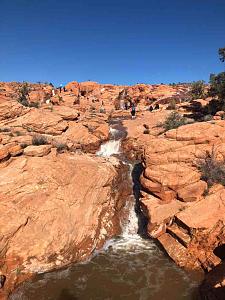
The next morning we had planned to kayak at the Sandflats Reservoir, but we thought it might be warmer and less windy down in the valley. We stopped at Gunlock Reservoir on the way back to Ivans and looked at the waterfalls at Gunlock Reservoir. This only happens on the good water years. The falls have not flowed for about 3 years, but the recent storms have created the falls this year. It was pretty cool to see, but there were way too many people around.
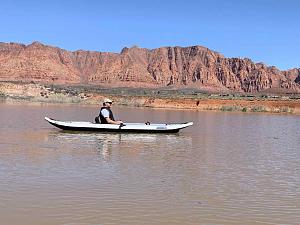
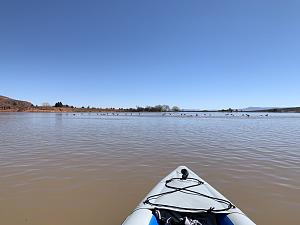
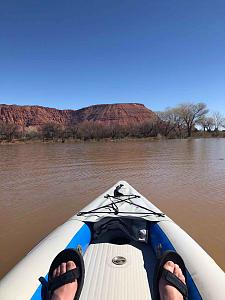
Next we drove down to the Ivan's reservoir and did some kayaking. We bought 2 inflatable kayaks this winter off the classified adds. This was the first time we had a chance to use them. They are Sea Eagles 385FT. The water was pretty nice and flat. We paddled around the lake and was able to watch the wildlife and birds. I really like the kayaks. There are easy to paddle and very stable. We are looking forward to using them more in the future.
After paddling for a couple of hours we ate lunch and then headed for home.
Overall, the van worked great. The ground clearance was nice on the rougher roads. The solar worked great. Of course with only running the fridge and lights at night, we never dropped below 95% SOC of the battery. I have the Victron Solar Controller and BMS. They both have Bluetooth connections, so it was nice to monitor the system.
|
|
|
|
|
03-17-2019, 08:18 PM
|
#98
|
|
Senior Member
Join Date: Jul 2011
Location: TN
Posts: 10,254
|
Very nice! The van is coming together nicely as well.
Thanks for sharing.

|
|
|
|
|
03-18-2019, 05:24 AM
|
#99
|
|
Senior Member
Join Date: Nov 2016
Location: FL and VA
Posts: 1,953
|
Yeah, what he said. Very nice. Nice trip and photos as well. Thanks for posting.
__________________
Chris
2008 GMC 3500 Quigley Weldtec 4x4 Savana SMB
|
|
|
|
|
05-19-2019, 11:39 AM
|
#100
|
|
Senior Member
Join Date: May 2017
Posts: 201
|
|
|
|
|
|
|
 Posting Rules
|
You may not post new threads
You may not post replies
You may not post attachments
You may not edit your posts
HTML code is Off
|
|
|
|
 » Recent Threads
 |
|
|
|
|
|
|
|
|
|
|
|
|
|
|
|
|
|
|
|
|
|
|
|
|
|
|
|
|
|
|
|
|
|


 Vandiesel II
 2008 GMC 3500 SMB
 Linear Mode