|
|
 11-09-2013, 08:10 AM
|
#71
|
|
Senior Member
Join Date: Jun 2013
Posts: 197
|
Re: 2013 E350 New Build
Quote:
|
Originally Posted by JWA
Quote:
|
Originally Posted by shadzima
WOW, you moving fast, looking good.
|
Boy, Howdy that's for sure---almost too fast! 
Skinny not to rain on your progress here but I'd strongly suggest re-thinking using that radiant barrier material on your floor as your photos show. Since its mostly cotton similar to the OEM floor mats it will easily absorb humidity and/or condensation. For some odd reason once it gets damp it seems to never dry out and will eventually cause your floor to rust without your knowledge. I have a few photos of this very thing happening if interested.
Were it me I'd simply use 3/4" plywood on the floor and leave some way for humidity to freely move in and out of the spaces left by spanning the floor ribs. Since I run a cargo-only van I didn't close those spaces off, left them open at the rear doors.
I've seen two many otherwise nice vans suffer significant floor rot both in the rear cargo area as well as under the front OEM floor mats too. My solution up front was complete removal of the OEM mat, apply radiant barrier insulation foil/PVC sandwich, foil side 3M'd to the floor then re-using the OEM mat.
Another possible solution would be to pre-emptively treating the entire floor front-to-back with something like POR-15 silver. Remove the front seats and mat, lightly scuff the entire floor and apply POR-15 per directions. This step would give you superior rust inhibiting protection you don't really have at the moment. The later years of E-Series seem far less able to resist rust which suggests they've reduced some of their finishing processes (ie; gone all cheap on us!). Best to do something now before the rust starts.
Anyway sorry to be a downer-----great progress for certain! |
You can rain on my progress any time. I'll take all the advice I can get. This is my first conversion, so I have a lot to learn. Hopefully, before it's too late.
I'm cool with leaving the barrier off of the floor. I do want to at least put some rigid foam board down though. That shouldn't cause any rust problems, will it?
I'm planing on gluing the radiant barrier onto the back side of my wall plywood before I install it too. Thoughts on that?
Thanks for your advice.
|

|

|
|
11-09-2013, 11:41 AM
|
#72
|
|
Senior Member
Join Date: Jan 2011
Location: Reynoldsburg, Ohio
Posts: 3,775
|
Re: 2013 E350 New Build
Gluing your radiant barrier to the wood walls wouldn't be a problem assuming it won't be in contact with the floor, roof or side wall metal. If the glue side of your radiant barrier is something impervious to moisture direct contact with metal would also be fine. My only concern is anything that would hold absorbed moisture against any metal surface would be in constant contact with metal.
Nothing against the foam under your plywood floor but it probably doesn't enhance temperature or sound insulation control. I'd not discourage using the foam but I would use an exterior grade in order to not replicate the same moisture absorption of the OEM padding. I'd still recommend leaving the spaces under the floor ribs open as mentioned above.
You're doing good work Skinny----hoping only to help you get a long lasting trouble free conversion. I applaud your being so industrious----pretty amazing!
J W
|
|
|
|
|
11-10-2013, 05:45 PM
|
#73
|
|
Senior Member
Join Date: Jun 2013
Posts: 197
|
Re: 2013 E350 New Build
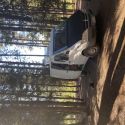
So I pulled up the little bit of radiant barrier I had put on the floor, as suggested by JW, and started to install a 1/2" foil backed foam board and 5/8" plywood.
A little Gorilla tape on the edge of the foam board just to keep little white pieces from falling off after the trim.
|
|
|
|
|
11-10-2013, 05:47 PM
|
#74
|
|
Senior Member
Join Date: Jun 2013
Posts: 197
|
Re: 2013 E350 New Build
|
|
|
|
|
11-10-2013, 07:58 PM
|
#75
|
|
Senior Member
Join Date: Jan 2011
Location: Reynoldsburg, Ohio
Posts: 3,775
|
Re: 2013 E350 New Build
Great taste in tool selection----mostly Milwaukee much like my own! 
Nice job fitting your flooring around the wheel wells and gas filler bump----where'd you get that great timber framing compass? I used something called Perfect Butt mostly found in woodworking and home remodeling trades.
|
|
|
|
|
11-10-2013, 08:28 PM
|
#76
|
|
Senior Member
Join Date: Jun 2013
Posts: 197
|
Re: 2013 E350 New Build
Quote:
|
Originally Posted by JWA
Great taste in tool selection----mostly Milwaukee much like my own!
Nice job fitting your flooring around the wheel wells and gas filler bump----where'd you get that great timber framing compass? I used something called Perfect Butt mostly found in woodworking and home remodeling trades. |
Thanks JW. Probably 75% of my hand tools are Milwaukee. The routers and belt sanders are Porter Cable. They're hard to beat. I've had That Veritas log scribe for years. Probably came from Woodworkers Supply. ??
I'm going to start scribing the wall panels tomorrow. ;-)
|
|
|
|
|
11-10-2013, 08:42 PM
|
#77
|
|
Senior Member
Join Date: Jul 2011
Location: TN
Posts: 10,271
|
Re: 2013 E350 New Build
Quote:
|
Originally Posted by skinny
New tires and wheels installed. I like a lot.....  |
Me too. A WHOLE lot! Can you give us the wheel and tire names and sizes? All I can make out is Toyo Open Country on the tires, an excellent choice BTW.
Thanks, looking good

|
|
|
|
|
11-10-2013, 08:49 PM
|
#78
|
|
Senior Member
Join Date: Jun 2013
Posts: 197
|
Re: 2013 E350 New Build
Quote:
|
Originally Posted by 86Scotty
Quote:
|
Originally Posted by skinny
New tires and wheels installed. I like a lot..... |
Me too. A WHOLE lot! Can you give us the wheel and tire names and sizes? All I can make out is Toyo Open Country on the tires, an excellent choice BTW.
Thanks, looking good
|
Thanks.
The Wheels are Mickey Thompson Baja Classics. They just came out with them about 3 weeks ago. Tires are AT/II's 285/70/17
|
|
|
|
|
11-10-2013, 08:54 PM
|
#79
|
|
Senior Member
Join Date: Jul 2011
Location: TN
Posts: 10,271
|
Re: 2013 E350 New Build
Thanks, I was just reading back over your thread and had pretty much put it together, but thanks. Are they quiet on the road?
|
|
|
|
|
11-10-2013, 08:59 PM
|
#80
|
|
Senior Member
Join Date: Jun 2013
Posts: 197
|
Re: 2013 E350 New Build
Quote:
|
Originally Posted by 86Scotty
Thanks, I was just reading back over your thread and had pretty much put it together, but thanks. Are they quiet on the road?
|
I have no idea. ;-) The reviews I had read seemed to indicate they are. All I've done was drove it around the block and back into the shop after I had them installed. I was sitting on a 5 gallon bucket because the seats are pulled out. 
|
|
|
|
|
|
 Posting Rules
|
You may not post new threads
You may not post replies
You may not post attachments
You may not edit your posts
HTML code is Off
|
|
|
|
 » Recent Threads
 |
|
|
|
|
|
|
|
|
|
|
|
|
|
|
|
|
|
|
|
|
|
|
|
|
|
|
|
|
|
|
|
|
|


 Linear Mode