Journey with Confidence RV GPS App RV Trip Planner RV LIFE Campground Reviews RV Maintenance Take a Speed Test Free 7 Day Trial ×


Reply
 
Thread Tools Display Modes
 
Old 09-16-2021, 09:30 PM   #91
Senior Member
 
Scalf77's Avatar
 
Join Date: May 2007
Location: Beaverton, OR
Posts: 2,506
Bathroom-shower

Well, I chose to solve my dilemma with the wide bathroom/shower by moving away from the cassette toilet and shower pan. This will result in smaller inside dimension of the bath/shower, but I will gain some room in the aisle way. This move also made me move to a Thetford Curve Porta-potty. While it would be nice to have the room inside, this will most likely meet my needs better. One benefit of moving to this solution was the new pan provides me the ability to provide an air vent for the heater to the front of the van. All in all, I will consider it a win, and try to recover the cost of the cassette toilet and shower pan. Now we can move to the installation of the new shower.

I started the shower by laying a piece of 3mm plywood against the wall of the van. I had been in limbo on how I was going to handle the “Ford” wire bundle going to the back of the van. The existing hole in the C pillar is to small to get the wire bundle connectors through. This makes pulling it out and rerouting behind the panel difficult task. So given that I did not want splice all the wires in the bundle and chose to split the larger bundle into smaller bundles and lay it flat. I then used the gap between the wall panels and my shower wall. It is a tight fit but works.


I built the walls out of marine plywood, 18mm on the right side, 12mm on the left side, I also pit 3mm piece on the floor. I used some left over ShowerSeal® from KBRS that I had used for a home bathroom project.


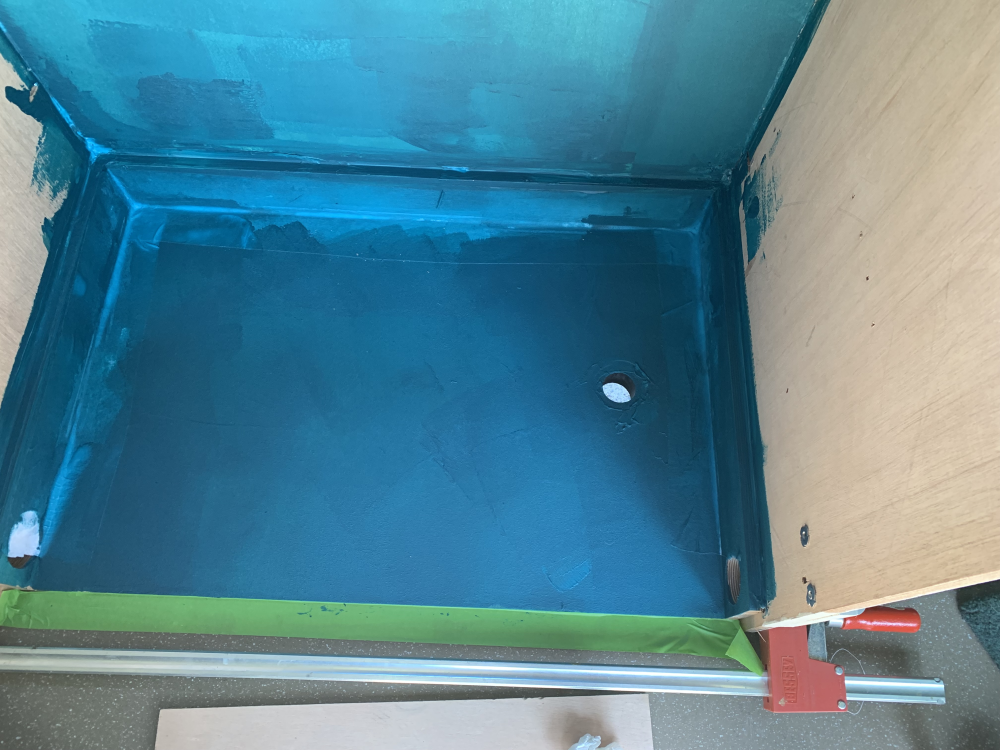
I ordered a 36" x 24" x 5" Right Drain in White RV shower pan from RecPro. The new shower pan has some access on the front that will allow my heater vent to the front of the van. After installing the pan, I added 3mm pieces of marine ply to even out the side ridge of the pan. Again, this was coated with ShowerSeal ®


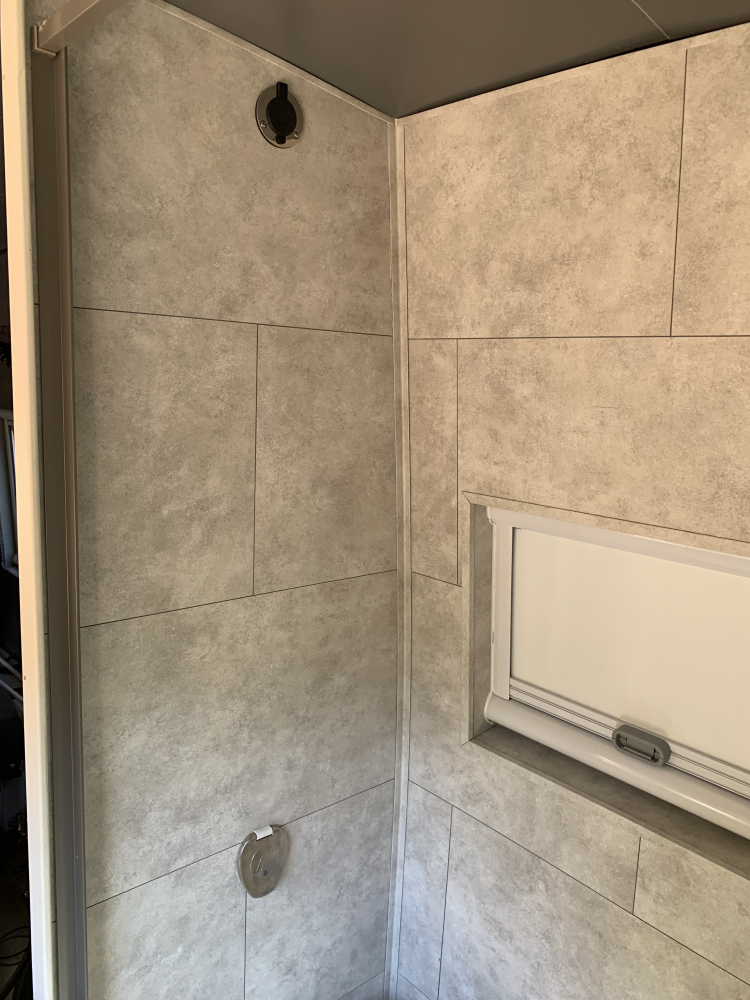
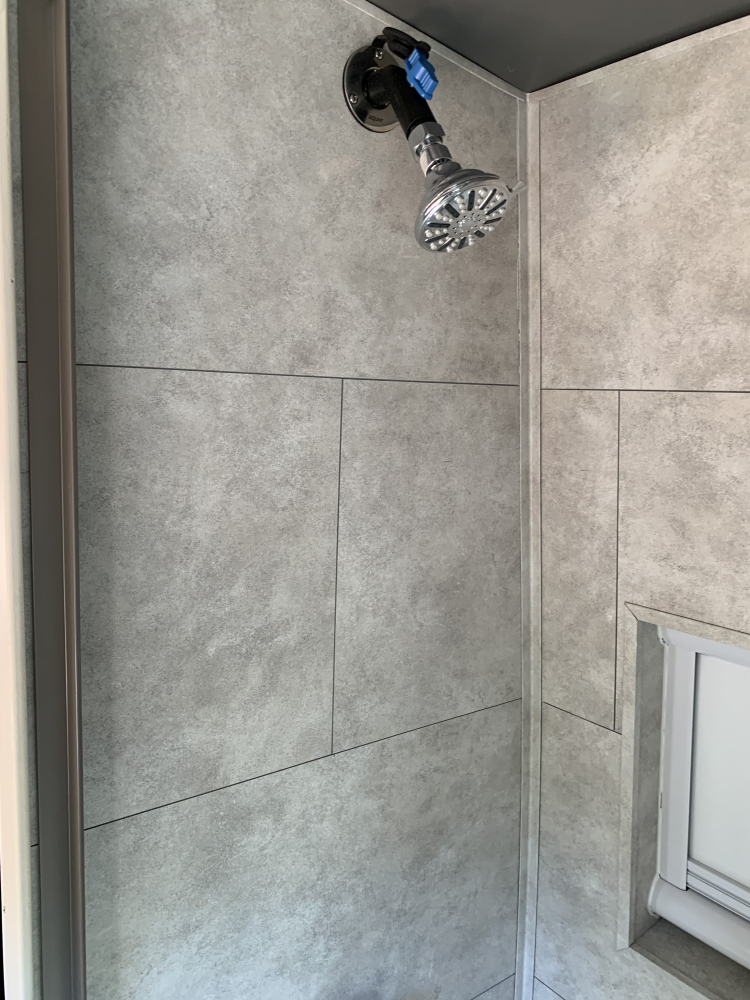
Then I covered the walls with Dumawall waterproof wall tiles, these are made from PVC are interlocking and need no grout. For the inside of a van these seemed perfect. Installation is easy, the biggest problem being the cuts that were specific to the van. The product is glued to the walls with Loctite Power Grip Ultimate, to complete the waterproof function they recommend Dap Kwik Seal Ultra siliconized sealant. Dumawall also provides some various corner, J and L trims. The hardest part was the window, but all in all I am happy with the outcome.


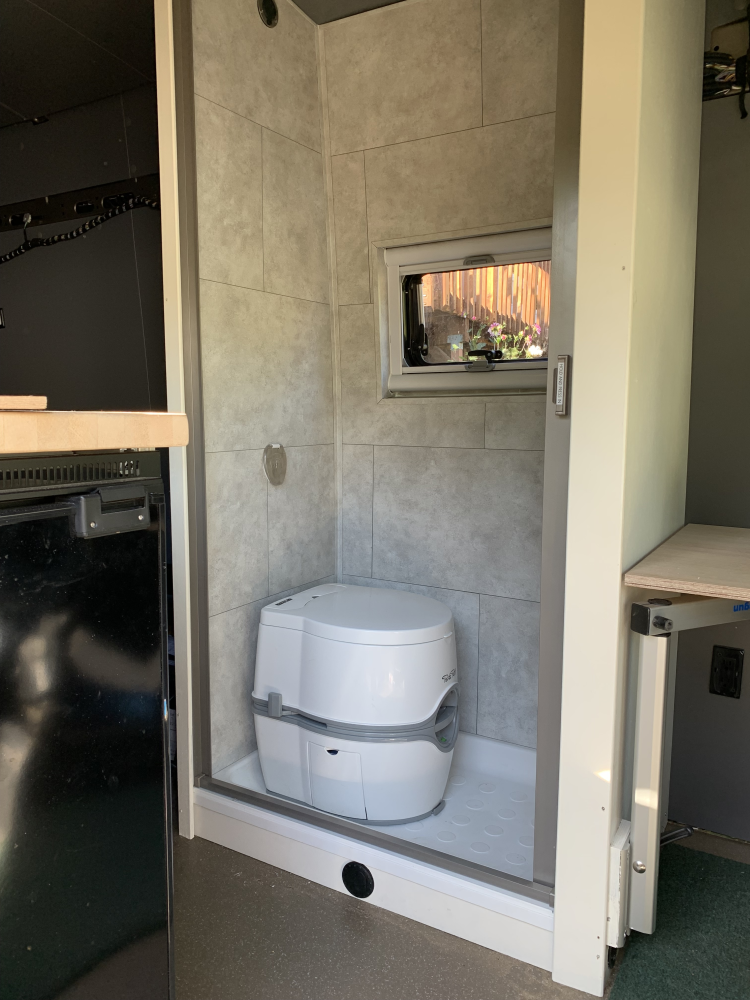
I decided to go with door/curtain combination and went with a NAUTILUS Retractable Shower Door for RV’s from Stoett Industries. This is a fully retractable door that comes with a patented self-cleaning integrated squeegee that removes water and soap and drains it off into the shower floor. During delivery I found the package was slightly damaged, upon later inspection I found one small endcap missing. A quick email to Stoett on a Saturday, and they had the part in shipping on Monday morning.
My only complaint would be the “Brushed Nickel” finish, I should have just gone with white.


Note: The heater vent on the bottom front of the shower, there is also another one to the front under the Lagun Table mount.

Although this is a shower, the smaller size made me think about the fixtures for the shower. I chose to go with a recessed shut off/mixing valve by Scandvik. For the shower head attachment, I went with RV city inlet by Aquor. (I got the idea from Vandit – 2013 E250 Ground Build Up by member aarcaris.)


I am attaching a showerhead to removable faucet hose connector. We will also have a removeable closet pole, to hang the wet gear we acquire here on PNW.


Now it is time to install the water tank, Truma-Combi hot water heater/heater, and gray water tank.

-greg

Scalf77 is online now   Reply With Quote
Old 09-16-2021, 11:22 PM   #92
Senior Member
 
bigriver's Avatar
 
Join Date: Feb 2014
Location: Columbia River Gorge
Posts: 651
You continue to blow my mind on that build. Good work son.
__________________
Joe
2003 EB50 7.3L PSD Q4X4
2000 Chevy Express 3500 High Top EB37 - Sold
2003 EB30 - Sold
bigriver is offline   Reply With Quote
Old 09-17-2021, 06:01 AM   #93
Senior Member
 
86Scotty's Avatar
 
Join Date: Jul 2011
Location: TN
Posts: 10,250
That shower came out great!
86Scotty is online now   Reply With Quote
Old 09-17-2021, 11:07 AM   #94
Site Team
 
BroncoHauler's Avatar
 
Join Date: May 2007
Location: Southern New Mexico
Posts: 10,179
Quote:
Originally Posted by Scalf77 View Post

Now that's a room with a view. Sharp looking set-up.


Herb
__________________
SMB-less as of 02/04/2012. Our savings account is richer, but our adventures are poorer.
BroncoHauler is offline   Reply With Quote
Old 09-19-2021, 04:32 PM   #95
Senior Member
 
Otter's Avatar
 
Join Date: Apr 2016
Location: Oregon
Posts: 1,186
Garage
Boy, that’s a great looking addition, Greg! You’re adventurous, for sure. Nice job!
.
__________________
"PhoTo" - 2014 Ford E350 5.4L RB - Agile 4x4 - CCV Poptop
Otter is offline   Reply With Quote
Old 09-19-2021, 05:17 PM   #96
Senior Member
 
vandiesel's Avatar
 
Join Date: Oct 2009
Location: Portland, OR
Posts: 1,257
Garage
Way to set the bar for pretty much every builder out there. Such a clean solution Greg. Nice work.
__________________
2001 Ford RB 7.3 Quadvan (sold)
2006 Sportsmobile EB Transformer 6.0
vandiesel is offline   Reply With Quote
Old 09-19-2021, 09:13 PM   #97
Senior Member
 
Scalf77's Avatar
 
Join Date: May 2007
Location: Beaverton, OR
Posts: 2,506
Thanks for the compliments, I am pretty happy with how it is turning out. The bath/shower is a big part of the build, and it set me back a bit going another direction from the original plan. The extra inches this solution provides me will be worth it. The Dumawall tiles are pretty nice, and appear to be a good solution for an RV.

The Nautilus shower door is working out great. I thought it would make a lot of noise while driving, but it appears I will be keeping it open while driving.

-greg
Scalf77 is online now   Reply With Quote
Old 09-19-2021, 09:16 PM   #98
Senior Member
 
Scalf77's Avatar
 
Join Date: May 2007
Location: Beaverton, OR
Posts: 2,506
Xantrex Freedom XC Pro 3000 review-update

In a previous post I did a quick review on my Xantrex Freedom XC 3000 charger/inverter. One of my only complaints other than fan noise (that I expected) was the inability to turn off the charger. So, if I plugged in at a campground or at my house, the charger was always on. This may be a personal nit, but I disliked it enough I was looking to change the unit because of it. Luckily, I found a setting that will turn the charger off, and still allow bypass mode when plugged in.

There is a setting that is called Charger Ignition Control, setting number 26. Its default vale is “OFF” and you can change it to “At0” or Auto-ON”. While auto-on may seem opposite of what you would to turn off the charger, what it does turn the charger control over to an ACC input. This leaves the charger off until the ACC input sees 12 volts on it. Generally, this could be an ignition-controlled circuit, but nothing would keep you from using a switched 12 to control the charger.


Luckily with the Bluetooth remote it is easy to change the setting. So, I may just use the phone app because the default will be for it to be off.


-greg
Scalf77 is online now   Reply With Quote
Old 09-20-2021, 03:30 AM   #99
Senior Member
 
marret's Avatar
 
Join Date: Nov 2016
Location: FL and VA
Posts: 1,953
Garage
Excellent, thanks Greg. Fine work all around, thanks for posting.
__________________
Chris
2008 GMC 3500 Quigley Weldtec 4x4 Savana SMB
marret is offline   Reply With Quote
Old 09-20-2021, 10:26 AM   #100
Senior Member
 
Scalf77's Avatar
 
Join Date: May 2007
Location: Beaverton, OR
Posts: 2,506
Start Battery Charger Options

Part of the reason for wanting to disable the charger while in AC-bypass mode was for one of my starting battery charging options. I say options because I have two additional methods to charge starting batteries other than the alternator.


The first is solar, I designed the solar system to be able to divert one 100-watt panel away from the house battery controller to a smaller controller for the start battery.


Because I live in the PNW and know that solar is limited during the winter months, I also have a small plug-in charger that I can turn on. This can be run of Inverter in Inverter mode(no shore power) or in bypass mode(shore power).


Both chargers are attached to the start battery with the CCP1 connection on my 2020 Transit. The CCP1 connection has an always on 60-amp fused connection. The CCP2 connection is controlled and has a 175-amp fuse.


Note: The black wire is a communication wire, not a ground wire. The grounding is performed via the frame connection.

-greg
Scalf77 is online now   Reply With Quote
Reply


Posting Rules
You may not post new threads
You may not post replies
You may not post attachments
You may not edit your posts

BB code is On
Smilies are On
[IMG] code is On
HTML code is Off
Trackbacks are Off
Pingbacks are Off
Refbacks are Off

» Sportsmobile Registry

Biggie

Berta

Esme

Amy V
Add your Sportsmobile
» Featured Campgrounds

Reviews provided by

Powered by vBadvanced CMPS v3.2.3
Disclaimer:

This website is not affiliated with or endorsed by Sportsmobile SIP or any of its affiliates. This is an independent, unofficial site.


All times are GMT -6. The time now is 06:29 AM.


Powered by vBulletin® Version 3.8.8 Beta 4
Copyright ©2000 - 2024, vBulletin Solutions, Inc.