|
|
 10-20-2021, 12:22 PM
|
#121
|
|
Senior Member
Join Date: Feb 2020
Location: Bend, OR
Posts: 312
|
Quote:
Originally Posted by BroncoHauler

Gorgeous interior, and I REALLY like how clean your plumbing install is. Straight lines, secured lines, very nicely done.
Herb
|
Thanks, Herb! I really tried to keep everything nice and orderly even though I hope to not have to be looking at the plumbing much.
__________________
Vandit - 2013 E250 Ground Up Build- Full Custom DIY Interior Build
- DIY U-Joint Off Road 6" 4x4 Conversion
|

|

|
|
02-15-2022, 04:51 PM
|
#122
|
|
Junior Member
Join Date: Apr 2021
Posts: 22
|
This build is so inspiring and well documented. Thank you for this resource. Have you been enjoying it?
A quick question: I really like your use of nutserts to secure the subfloor and wall panels. Can you share your technique for accurately mapping the holes to be drilled on the panel that align with the nutserts behind them?
|
|
|
|
|
02-15-2022, 05:48 PM
|
#123
|
|
Senior Member
Join Date: Aug 2019
Location: Elk Grove, CA
Posts: 391
|
Quote:
Originally Posted by NeedsWork
This build is so inspiring and well documented. Thank you for this resource. Have you been enjoying it?
A quick question: I really like your use of nutserts to secure the subfloor and wall panels. Can you share your technique for accurately mapping the holes to be drilled on the panel that align with the nutserts behind them?
|
I don't know what the "official" answer will be, but I'd drill the panel and use those holes as pilot holes for nutserts. Let's see if I'm right.
__________________
Bob
2005 E350 Super Duty Ext Wheelchair Van
2002 Itasca 35U Motorhome
|
|
|
|
|
02-15-2022, 05:58 PM
|
#124
|
|
Senior Member
Join Date: Apr 2021
Posts: 407
|
Quote:
Originally Posted by BCam
I don't know what the "official" answer will be, but I'd drill the panel and use those holes as pilot holes for nutserts. Let's see if I'm right.
|
Another technique is to sharpen a bolt to a point, install said bolt into the nutsert with the pointy side facing out, then press your panel up against the pointy bolt(s). Your hole pattern will be transferred perfectly.
|
|
|
|
|
02-15-2022, 06:24 PM
|
#125
|
|
Senior Member
Join Date: Feb 2020
Location: Bend, OR
Posts: 312
|
Needswork: Thanks for the kind words! We have been enjoying it, but have been on a little bit of hold for bigger trips through winter since it's still 2wd. That should be changing this year!
For the aligning of the Nutserts BCam is right, but only for some of them. I did debate doing the method that motovan_mn described, but after some additional research and test it didn't seem like a good idea. This was because there is so much curve in the van body any kind of stand-off from your final resting location of your panel will result in your hole being in the wrong location. I tried a few pieces of cardboard like this and it resulted in holes being very off. It does work great on flat surfaces though! I used a few different methods depending on where they were located and how much I cared about their final spacing and whatnot. I tried to remember exactly how I did it, but it might not be exact as my memory is a little foggy.
Floor: I was more worried about drilling through in the wrong spot and hitting something below the van than the way they looked for the floor so I did all of the floor bolts the most complicated way. Measuring out all the locations from the top and bottom of the van, Pilot hole drilling, then final drilling, then installing the nutserts, and lastly transferring all those measurements to the wood. This wasn't the best result, but since it was all covered I didn't care as much.
Walls: Since on the walls I cared a little more about the layout I did a different method. Since I had a furring strip as my attachment point I was able to use standard screws as my initial holding point. I knew where my furring strip was supposed to be, so I did a rough layout on the panel pushed it into place, and then secured it with wood screws. Once it was secured and fully conformed to the wall I went back and did a final layout by drilling through the face of the panel at the temporary screw locations.
Ceiling: For this I did a combo of the two methods, but without furring strips, it was a little harder. I started by installing nutserts on the centerline of the van at each rib. These measurements were transferred to the wood panel which allowed me to install it. Then I measured out exactly how I wanted my remainder bolts to layout and drilled through the panel to the metal rib with a pilot hole to get center. then went back and installed the rest after removing the ceiling panel.
__________________
Vandit - 2013 E250 Ground Up Build- Full Custom DIY Interior Build
- DIY U-Joint Off Road 6" 4x4 Conversion
|
|
|
|
|
02-23-2022, 12:54 PM
|
#126
|
|
Junior Member
Join Date: Apr 2021
Posts: 22
|
Thanks for the input, BCam & motovan_mn!
aarcaris: Thanks for the detailed explanation of the techniques for the ceiling and walls, I will definitely keep your post in mind when I'm doing mine.
If you had to do it over again, would you still do 1/4" BB w/ kerf cuts for the walls and ceiling, or would you just go 1/8"?
|
|
|
|
|
02-24-2022, 11:39 AM
|
#127
|
|
Senior Member
Join Date: Feb 2020
Location: Bend, OR
Posts: 312
|
Needswork: If I were to do it again I would still do 1/4" BB w/ Kerf Cuts for the walls and do the same for the ceiling. As much of a pain as it was to get the walls to conform to the van, I think in the end it was worth it to have a little extra material thickness on the walls. Our german shepherd isn't the most aware of his size and on numerous occasions, he has thrown himself into the wall next to the bed as he lays down. So far 1/4" BB seems to be holding up well. Also having a little thicker material eliminates the possibility to have any waviness in the panels. I cant say for sure that 1/8" BB would but I can say that the 1/4" BB created a nice clean consistent curve on all the panels.
__________________
Vandit - 2013 E250 Ground Up Build- Full Custom DIY Interior Build
- DIY U-Joint Off Road 6" 4x4 Conversion
|
|
|
|
|
02-25-2022, 12:01 PM
|
#128
|
|
Senior Member
Join Date: Feb 2020
Location: Bend, OR
Posts: 312
|
Small Update :
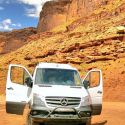
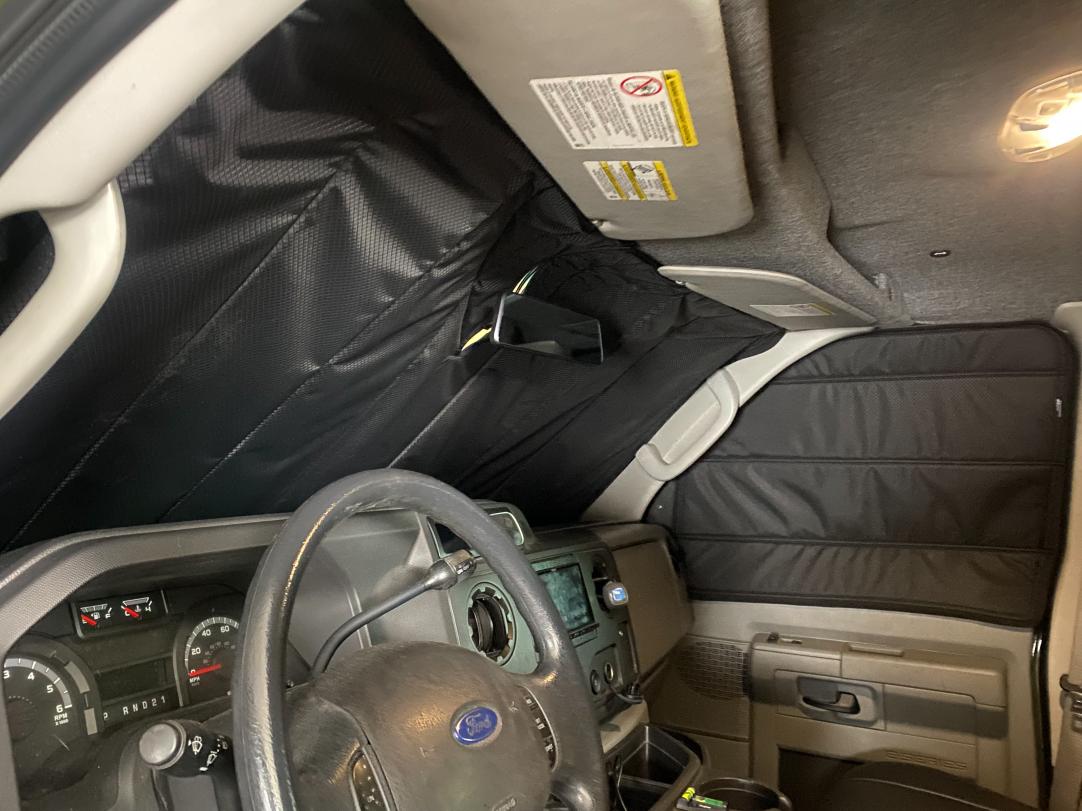
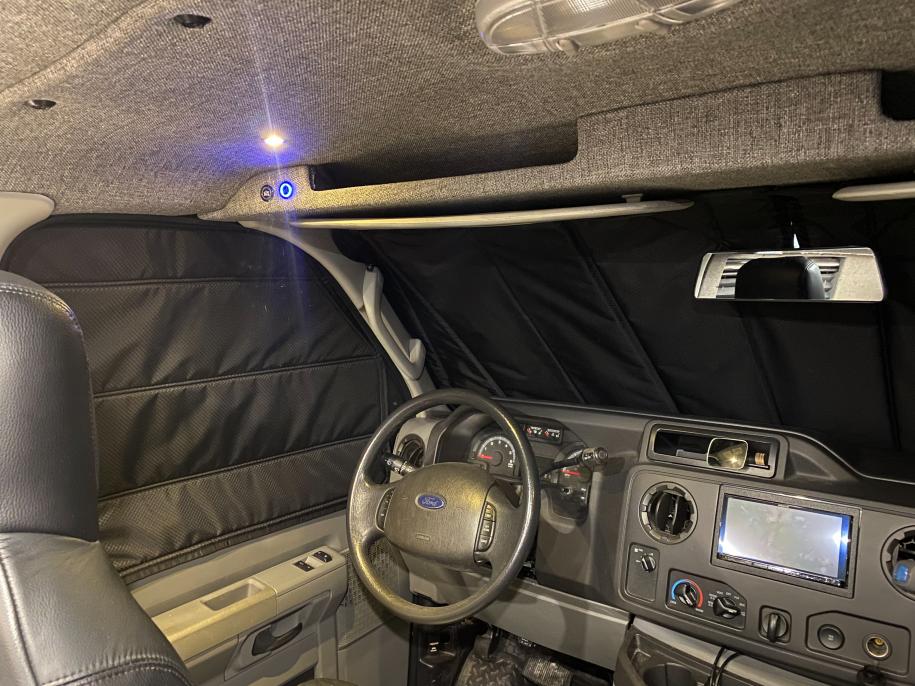
-About a month ago we placed an order for window covers through Van Made Gear We decided to go with Van Made Gear. after seeing their products in person at the Adventure van Expo in Redmond Oregon in the fall of 2021. They use a nice high-quality fabric on both sides of the cover with a thin semi-rigid insulation layer sandwiched between the fabric. They are mounted using sewn-in magnets that allow for quick and easy setup with no additional mounting hardware needed. Plus they fold up nicely for easy storage. Unfortunately, they only offer cab window covers (windshield, driver & passenger doors) unless you have the cargo doors with no window surround. After failing to convince them to make some custom cover for our side and rear doors we decided to buy the matching material we needed for those doors and place our order for the cab windows covers. After about 4 weeks they showed up in the mail and they look great! The fit and finish are very nice and high quality. I have a local upholster lined up to make our other 4 window covers and hope that if I can make good templates they will be able to knock out the other 4 quickly. I will post the results of the custom ones once done.
4X4 Update: For those that posted on my other thread with suggestions for what to include in our 4x4 conversion thank you! I have still haven't placed my order, but would like to get it in for all the initial bits by mid-March, just have to finish up a few house projects before I can mentally take on signing up for all the expenses that are to come! For anyone that is curious, below are the basics specs that we have landed on.
Here's the Plan As of Right now:
4x4 Kit: U-Joint 6 lift kit Front End:Front Axle: Dana 60 Stage 2 w/ Hub Conversion and Brake Upgrade
Front locker: Eaton E-locker
Front Gears: 4:88 (Just in case we decide to go with 37s)
Front Shocks: Fox Reservoir Shocks Rear End:Rear Axle: Sterling 10.5 out of 2011 and ↑ F250/F350
Rear Locker: OX locker Cable Driven
Rear Gears: 4:88 (Just in case we decide to go with 37s)
Rear Shocks: Fox Reservoir Shocks Transfer Case: NV271 w/ 2 Pc Shifter Upgrade Wheels and Tires:Wheels: Method 701 Matte Black
Tires: Nitto Ridge Grappler 35/12.5r17 or Nitto Ridge Grappler 37/12.5r17 Additional items that will be needed to finish the conversion:Transmission: Complete remanufactured 4R75 to be 4x4
Exhaust: Rework exhaust to accommodate for transfer case
Driveshafts: Custom Driveshafts from Tom Woods
Tuner: 5 Star Tuner
__________________
Vandit - 2013 E250 Ground Up Build- Full Custom DIY Interior Build
- DIY U-Joint Off Road 6" 4x4 Conversion
|
|
|
|
|
02-27-2022, 01:09 PM
|
#129
|
|
Junior Member
Join Date: Apr 2021
Posts: 22
|
Those window shades look incredibly nice... excited to see how your custom upholstered ones turn out.
Your UJOR build looks good. I think the 4.88 gears will raise the RPMs a few hundred over stock but shouldn't push you outside your power curve on the 5.4.
Why the e-locker on the front instead of dual ox lockers? Too many shifters on the floor? 
Also curious about your desire for 37s. Is that a primarily aesthetic or practical decision? In one man's opinion, true 37s on an RB begins to look a little heavy handed, but that's of course subjective. I do like Justin's setup at UJOR CO, though, with the undersized 37" BFGs. I'm sure you've talked to him about it.
I had a pair of Ridge Grapplers but replaced them with Falken Wildpeak AT3Ws. I think either is a solid choice, but I didn't have great snow/ice performance with the Grapplers. I don't know if that's a consideration for you, but in NW Montana it's a primary factor. The Grapplers do a have a more aggressive look and seemed to be a tad wider.
|
|
|
|
|
02-28-2022, 08:54 AM
|
#130
|
|
Senior Member
Join Date: Feb 2020
Location: Bend, OR
Posts: 312
|
NeedsWork: Yeah the window covers are super nice! I am hoping that the custom ones will come out as nice, but we will see.
I know ow 4.88 might be a little over geared, but it came from the suggestion of Justin at UJOR CO. He said that is what he has in his van and it runs well on both 35s and his undersized 37s.
I tried to get Chris to put an OX locker with an air actuator in the front diff, which would eliminate one lever, but He said that they will only do Tru Trac or E-lockers in the front diff. Since I am planning on just ordering the axle fully built from them I am a little stuck with their options. Wouldnt have been my first pick, but I think it will still do the job.
I am debating 37s mainly just for aesthetics. The fender to wheel gap on 35s in my opinion sometimes looks a little big. This might be because a lot of the ones I have seen are freshly converted with new leafs, which I know will settle some lessening that gap. I am now leaning more toward 35s, but I haven't completely ruled 37s out yet. I agree that no matter what it will need to be an undersized 37.
Thanks for the input on the Ridge Grapplers! I have a set of the Falkens on my Tacoma and have been happy with them. Snow and Ice isn't something I am planning on seeking out a whole lot in the van, but being in Central Oregon and having plans to do a lot more winter exploring next winter I might need to rethink the Ridge Grapplers.
__________________
Vandit - 2013 E250 Ground Up Build- Full Custom DIY Interior Build
- DIY U-Joint Off Road 6" 4x4 Conversion
|
|
|
|
|
|
 Posting Rules
|
You may not post new threads
You may not post replies
You may not post attachments
You may not edit your posts
HTML code is Off
|
|
|
|
 » Recent Threads
 |
|
|
|
|
|
|
|
|
|
|
|
|
|
|
|
|
|
|
|
|
|
|
|
|
|
|
|
|
|
|
|
|
|


 Vandit


 Linear Mode